Have you ever wanted your own URL shortener?
YOURLS (Your Own URL Shortener) puts you in control of your short links. No more depending on services like bitly that might vanish overnight!
I’m going to walk you through installing YOURLS from start to finish. Even if you’re not tech-savvy, don’t worry – I’ve broken everything into simple steps anyone can follow.
The first time I tried installing YOURLS, I thought it would be complicated. But once I figured out the process, it was actually pretty straightforward. With this guide, you’ll have your own URL shortener running in no time.
You’ll discover:
- How to get your server ready with all the necessary requirements
- Three different ways to install YOURLS based on your comfort level
- Tips for configuring YOURLS securely
- Solutions to common problems you might run into
The best part? You don’t need coding skills to follow along. Let’s get started and set up your very own URL shortener!
Why You Should Run YOURLS?
YOURLS stands for “Your Own URL Shortener.”
It’s a free, open-source tool that lets you create and manage short links yourself. I think it’s super useful for anyone who shares links regularly online.
When you run your own URL shortener, you get some real advantages. Your links won’t disappear if some company goes out of business.
Also, you can create branded short links that match your style. And you can see exactly how people interact with your links through detailed stats.
YOURLS is super flexible too.
You can use it just for yourself, for your business marketing, or even set up a public service for others to use. It’s totally up to you!
I’ve watched people use YOURLS in all kinds of creative ways – from tracking marketing campaigns to making memorable links for business cards.
What You’ll Need Before Starting
Before jumping into the installation, let’s make sure you have everything needed. Think of this as gathering your ingredients before cooking.
Server Stuff You’ll Need
For YOURLS to work properly, your server needs:
- Web server: Either Apache 2.4 or newer (with
mod_rewriteturned on) or Nginx. - PHP: You need PHP 7.4 or newer. If you want to use the API features, make sure cURL is enabled.
- Database: You’ll need MySQL 5.0+ or MariaDB 10.0+ to store your links.
- HTTPS: Not absolutely required, but I really recommend it for security.
- Domain name: You need a domain pointing to your server.
Most modern web hosting plans include all this stuff already. If you’re not sure, just ask your hosting company if they support YOURLS – they’ll know what you need.
Basic Skills That Help
Of course, you don’t need to be a computer genius to install YOURLS.
But knowing a few basics will help:
- How to upload files to your web server
- How to create a simple database
- How to edit text files
Don’t worry if some of these are new to you! I’ll explain everything step by step as we go.
Method 1: Manual Installation of YOURLS
The manual installation gives you the most control.
Let me break it down into bite-sized steps.
Downloading and Prepping Files
First, let’s get the YOURLS software on your computer:
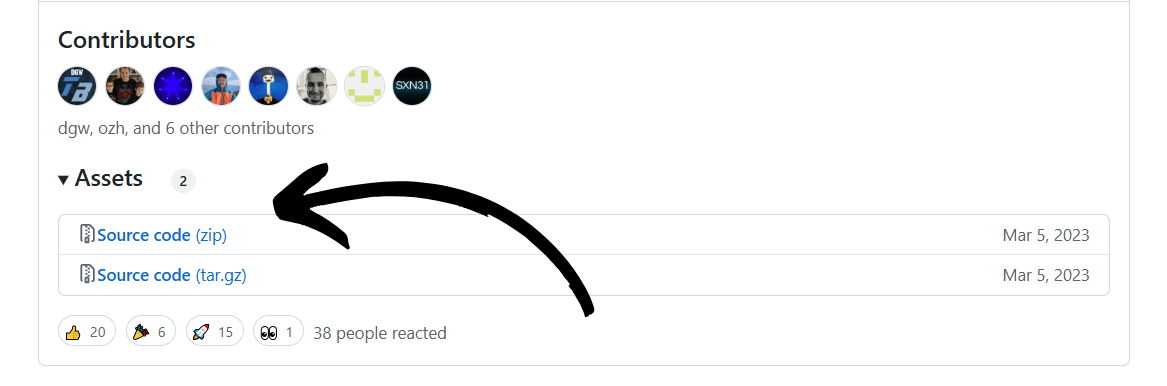
- Visit the YOURLS GitHub releases page
- Download the latest version (it comes as a zip file)
- Unzip it on your computer
- Find the file called user/config-sample.php
- Make a copy and rename it to
user/config.php
Setting Things Up
This is where most people get stuck, but I’ll make it simple. Open that user/config.php file with any text editor (even Notepad works) and change these settings:
1. Database stuff
Find and update these lines with your database information:
define('YOURLS_DB_USER', 'your_database_username');
define('YOURLS_DB_PASS', 'your_database_password');
define('YOURLS_DB_NAME', 'yourls_database_name');
define('YOURLS_DB_HOST', 'localhost');
define('YOURLS_DB_PREFIX', 'yourls_');
2. Site settings
Look for and update these:
define('YOURLS_SITE', 'https://your-domain.com');
define('YOURLS_PRIVATE', true);
define('YOURLS_UNIQUE_URLS', true);
define('YOURLS_COOKIEKEY', 'random_string_here');
For the COOKIEKEY, grab a random string from yourls.org/cookie.
3. Admin account details
Set up your login details:
$yourls_user_passwords = [ 'your_username' => 'your_password', ];
Use a strong password here! I once used a simple password and regretted it later.
4. URL style
Choose between 36 characters (lowercase) or 62 (mixed case):
define('YOURLS_URL_CONVERT', 36);
Uploading to Your Server
Now that you’ve configured everything:
- Connect to your web server using FTP or your hosting control panel
- Upload all the YOURLS files to your web directory (like
public_html) - Double-check that everything transferred correctly
Finishing the Installation
Let’s complete the setup:
- Open your web browser and go to
https://your-domain.com/admin/ - You should see the YOURLS installation page
- Click the “Install YOURLS” button
- If everything’s set correctly, YOURLS will create your database tables
- You’ll then see the admin login page
- Log in with the username and password you set earlier
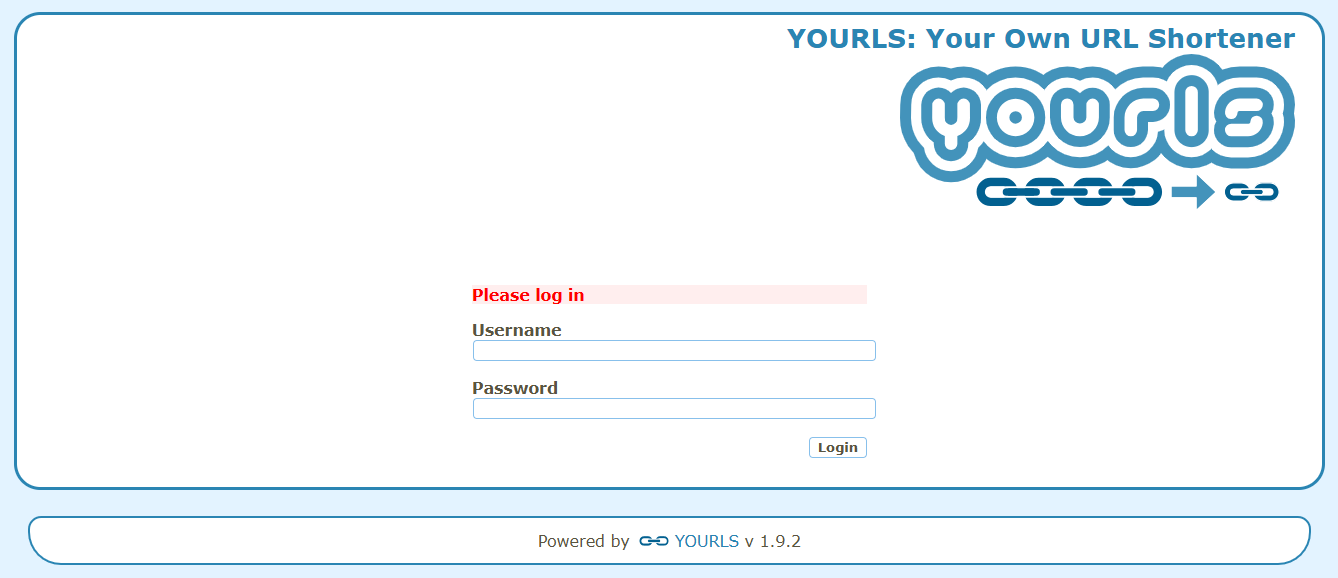
The first time I did this, I felt a little rush of excitement when the login page appeared!
It looks something like this:
Checking Server Configuration
Depending on your server, you might need one more step:
For Apache servers:
Make sure the .htaccess file was created. If not, you’ll need to create one yourself with the proper rewrite rules.
For Nginx servers:
You’ll need to set up your yourls.conf file with the right settings.
Apache tends to be easier for beginners, but both work great once set up properly.
Method 2: Installing YOURLS with Softaculous
If your hosting has cPanel with Softaculous, you’re in luck!
Installing Yourls this way is by far the easiest way to install for a beginner.
Finding Softaculous in cPanel
- Log into your cPanel account
- Look for the “Softaculous Apps Installer” icon
- Click it to open Softaculous
Locating YOURLS
- Use the search box to find “YOURLS”
- Click on the YOURLS icon when it appears
- Hit the “Install” button
Setting Up Your Installation
You’ll see a form to fill out:
- Choose Protocol: Pick HTTPS (much safer)
- Choose Domain: Select your domain name
- Directory: Leave blank for root or enter a name for a subdirectory
- Site Name: Name your YOURLS installation
- Admin Username: Create your admin username
- Admin Password: Make a strong password
- Admin Email: Enter your email address
- Database Name: The default is usually fine
- Table Prefix: The default “yourls_” works great
Completing Setup
- Double-check all your settings
- Click the “Install” button
- Softaculous will do all the technical work for you
- When finished, you’ll get a success message with links
Accessing Your New System
- Click the admin panel link from Softaculous
- Log in with your username and password
- You’re all set to start creating short links!
I remember being surprised at how fast this method was – literally took me less than 5 minutes from start to finish.
Method 3: Installing YOURLS with Docker
Docker lets you install YOURLS in a container, which is great for advanced users or if you want to easily move your setup between servers.
Getting Docker Ready
First, install Docker and Docker Compose on your server. Check out the official Docker docs for instructions specific to your system.
Creating Your Docker Setup File
Create a file called docker-compose.yml with these contents:
version: '3'
services:
  db:
    image: mysql:5.7
    volumes:
      - db_data:/var/lib/mysql
    restart: always
    environment:
      MYSQL_ROOT_PASSWORD: root_password_here
      MYSQL_DATABASE: YOURLS
      MYSQL_USER: yourls_user
      MYSQL_PASSWORD: db_password_here

  yourls:
    depends_on:
      - db
    image: yourls
    ports:
      - "8183:80"
    restart: always
    environment:
      YOURLS_SITE: https://your-domain.com
      YOURLS_USER: admin
      YOURLS_PASS: admin_password_here
      YOURLS_DB_HOST: db
      YOURLS_DB_USER: yourls_user
      YOURLS_DB_PASS: db_password_here
      YOURLS_DB_NAME: YOURLS
    networks:
      - default
      - nginx-proxy-manager_default

networks:
  nginx-proxy-manager_default:
    external: true

volumes:
  db_data:
Remember to replace the placeholder passwords and domain with your actual information!
Starting Your Docker Containers
Run this command from the folder with your docker-compose.yml file:
docker-compose up -d
Docker will download everything needed and start the containers for you.
Accessing Your Docker YOURLS
Once the containers are running:
- Go to
http://your_server_ip:8183/admin/ - Follow the on-screen steps to finish setting up
- Log in with the credentials you specified
Adding Nginx Proxy Manager (Optional)
For better security, I recommend setting up Nginx Proxy Manager to:
- Add SSL with Let’s Encrypt
- Access YOURLS on the standard HTTPS port
- Manage access more easily
Keeping Your Installation Secure
Security matters! Here’s how to keep your YOURLS installation safe.
Update Your Login Details
Even if you set custom login details during installation:
- Edit your
user/config.phpfile to update the$yourls_user_passwordsarray - Use a password that’s different from your other accounts
When I first installed YOURLS, I used the same password as my email – big mistake! Now I use unique passwords for everything.
Lock Down Your Config File
The config.php file has sensitive info like database passwords:
- Change its permissions to prevent anyone from changing it:
chmod 644 user/config.phpOr even more secure:chmod 400 user/config.php - Make sure it can’t be accessed through a web browser
Stay Updated
Keep YOURLS up to date to fix security issues:
- Follow the YOURLS GitHub repository for new releases
- Back up your database before updating
- Follow the update instructions for each new version
Back Up Regularly
Set up regular backups of your YOURLS database.
Most hosting companies offer backup tools, or you can find plugins for this.
I learned the importance of backups the hard way when I lost a week’s worth of link data after a server crash. I now use Hostinger which offers automatic backup.
Right now, they are offering up to 70% discount. You can grab the latest deal here.
Making YOURLS Your Own
Once YOURLS is up and running, you might want to personalize it.
Public or Private – Your Choice
By default, YOURLS is private (only you can create links).
Change this in your config.php:
define('YOURLS_PRIVATE', false); // false = public access
If you go public, add some anti-spam measures like captcha.
Custom Front Page
YOURLS comes with a sample public page you can customize:
- Find the file
sample-public-front-page.txt - Rename it to
index.php(after backing up the original) - Edit it to match your style
Add Cool Plugins
YOURLS gets even better with plugins:
- Check out the plugin directory
- Download plugins you like and put them in the
user/pluginsfolder - Activate them in the admin panel
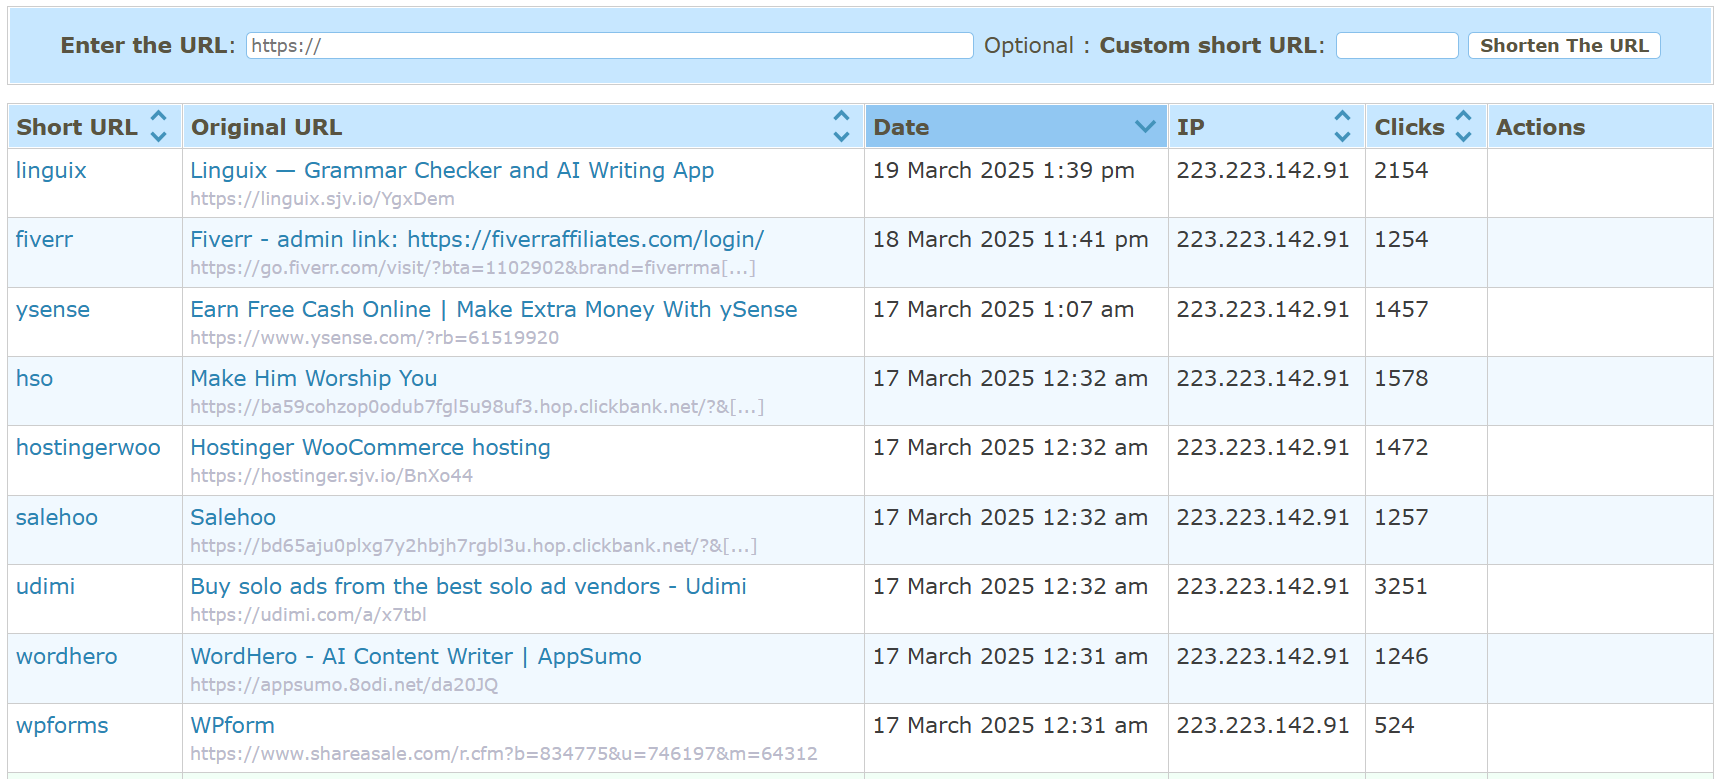
I added a QR code plugin to my YOURLS, and now every short link automatically generates a QR code too – super handy for print materials!
I also added two more plugins —
- Timezones – Tell YOURLS what timezone you are in
- IP click detail – Shows click level IP address detail and User Agent, Referrer
Fixing Common Problems
Even with a careful installation, things can go wrong. Let me show you how to fix some of the most common issues with installing YOURLS.
Short Links Return 404 Errors
If you get “Page Not Found” when clicking short links:
For Apache:
- Check if the
.htaccessfile exists - Make sure mod_rewrite is enabled
- Check that your server allows .htaccess overrides
For Nginx:
- Check your rewrite rules in the config
- Make sure the config is loaded
- Restart Nginx after changes
Spinning Icon When Adding Links
If you see an endless spinning icon when adding links:
- Check your browser’s console for errors
- Make sure your server allows Ajax requests
- Try temporarily disabling security plugins
This happened to me once – turned out my overzealous security plugin was blocking the Ajax requests.
Database Connection Problems
If you see database errors:
- Double-check your database settings in config.php
- Make sure MySQL is running
- Check if your database user has the right permissions
Turn On Debugging
If you’re still stuck, enable debugging mode:
- Open config.php
- Add this line:
define('YOURLS_DEBUG', true); - Check the error messages for clues
Just remember to turn debugging off once you’ve fixed the problem!
Install Your Own URL Shortener Today
You now have everything you need to set up your own URL shortener with YOURLS. Whether you went with the manual approach, Softaculous, or Docker, I am sure you can now do everything from start to finish.
If you are still having issues, you can contact me from the contact page.
Having your own URL shortener opens up so many possibilities. Create branded links for marketing, track click stats, or even offer shortening as a service.
Start with a private setup while you get comfortable with YOURLS. Then explore all the cool features and customizations as you gain confidence.
If you need more help, check out the official YOURLS docs and the active community forums where other users share tips and tricks.