Starting an online store is one of the best ways to make money in today’s digital world. Not only does it give you the opportunity to sell products and services online, but it also allows you to reach a global market.
So, if you want to start an online store, this beginner-friendly tutorial will show you how. Follow these steps and you’ll be up and running in no time!
A few decades ago, it wasn’t easy to start an online store.
It required a lot of technical knowledge and you had to be able to build your own website from scratch. Also, as an online store owner, you had to handle every aspect of running your online business by yourself.
Thankfully, we’re living in a different time now.
There are plenty of online tools and platforms that make it easy for anyone to start an online store – even if you don’t have any technical skills!
So, what are the steps to starting an online store in this day and age?
That’s what you’ll learn in this tutorial.
I’ll cover everything from choosing the right eCommerce platform to setting up your online store. By the end of this step-by-step guide, you’ll be ready to start selling your products and services online!
So, without further ado, let’s get started!
How to Start an Online Store?
Before we dive into the steps of starting an online store, let’s quickly define what an online store is and how it works.
What is an online store?
An online store, also known as an eCommerce website, is a website that allows you to sell products and services online. It’s similar to a brick-and-mortar store, but it’s entirely online. Customers can browse your product catalog, select the items they’re interested in, and add them to their shopping cart. They can then pay for their purchases directly on your website.
With the right tools and platforms, you can quickly build an online store that lets you sell your products and services to a global audience.
There are many different eCommerce platforms that you can use to start your own online stores, such as Shopify, WooCommerce, and more.
What do you need to start an online store?
To start an online store, you’ll need a few basic things.
- A domain name, which functions as your website’s address.
- A web hosting account, where all of the files for your website will be stored and it makes your website accessible via the internet.
- An eCommerce platform, which is a software application that enables you to build and run your online store.
Yes, it’s really that simple!
If you want to start an online store, you don’t need to be a tech expert or hire someone with expensive technical skills.
With today’s technology, anyone can create a professional-looking online store in just a few hours – without spending a lot of money.
So, what are you waiting for?
Follow these steps and start selling online today!
- Pick an eCommerce Platform
- Research products to sell
- Create your online store
- Set up a payment processor
- Stock your store with products
- Promote your online store
- Analyze, optimize and grow
Let’s dive in…
1. Pick the Right eCommerce Platform

First, you need to choose the right eCommerce platform.
This part is crucial because the platform you choose will determine how easy (or difficult) it is to run your online store.
What is an eCommerce platform?
An eCommerce platform is a software solution that gives you the ability to create an online store. It provides you with the necessary tools and features to run your business, such as product management, payment processing, marketing tools, business tools, SEO tools, and many more.
There are many different eCommerce platforms to choose from, each with its own set of pros and cons. Some of the most popular eCommerce platforms include Shopify, BigCommerce, WooCommerce, and Magento.
How to Choose The Right eCommerce Platform?
When it comes to picking the right eCommerce platform, your main priority should be to find a solution that meets your specific needs.
For example, if you plan on selling digital products, you’ll need to find an eCommerce platform that can handle digital product delivery. Similarly, if you would to sell physical products and ship them to customers, you’ll need an eCommerce platform that supports inventory management and shipping tools.
Once you know what type of products you plan on selling, you’ll be able to find the right eCommerce platform that fits your needs.
Here are a few things to keep in mind when choosing a platform:
- Ease of Use: The platform should be easy to use
- Scalability: You’ll need a platform that can scale with you
- Features: The platform has all the features and functionality
- Cost: How much does the platform cost and can you afford it?
To start an online store, you need to do some initial research to choose the right eCommerce platform, identify its key features, and compare different options. This will help you make an informed decision.
Shopify vs Woocommerce
Shopify is a powerful and easy-to-use eCommerce platform.
It’s perfect for entrepreneurs who want to create a professional online store without any technical skills. But, it can be expensive at $29/month.
Woocommerce is another good option if you’re on a budget.
It’s packed with features and it’s free to use. You don’t need any technical skills to set up and run your store using Woocommerce.
To start a Woocommerce store, you need:
- A web hosting account
- A domain name
Yearly cost for your online store: $33 only
Not a bad deal, right?
Best eCommerce Platform
Woocommerce is a great option if you have a limited budget and you want to start an online store quickly. Shopify is a good option if you have a bit more money ($29 per month) to spend and you want an all-in-one solution.
2. Research Products to Sell
Now that you’ve decided on your platform, it’s time to find products to sell. The first step is to come up with a list of ideas for products to sell.
You can start by brainstorming a list of potential products.
You can either sell digital products, such as eBooks, videos, music, or software. Or you can sell physical products that need to be shipped to customers.
I personally recommended selling digital products.
Benefits of Selling Digital Products
- Low start-up costs
- No inventory or shipping costs
- Instant delivery of digital products
- Worldwide market
- Easy to scale your business
- Easy to manage
- High profit margins
Physical or Digital Products to Sell Online?
No matter, what type of products you plan on selling, digital or physical, there are a few things to keep in mind:
- Make sure that there is demand for your product
- Consider buying less and selling more
- Identify your target audience and craft your marketing message
- Focus on quality over quantity
- Make sure that your product is priced correctly
Well, you get the idea.
Now that you know what type of product you want to sell, it’s time to do some market research to see if there’s a demand for your product.
To do this, you can use Google Keyword Planner to find out how many people are searching for your product. This will give you an idea of the market size and potential demand for your product.
To get started with Google Keyword Planner, create a free account and then enter your product into the “Your product or service” field.
You can also use advanced keyword research tools like Ahrefs, SEMrush’s Keyword Magic Tool, or KWFinder to find potential keywords for your product. You can also get an estimate of the monthly search volume for those keywords.
3. Create Your Online Store
To create your online store or website where you’ll be selling your products, you need a domain name and web hosting.
What is a domain name?
A domain name is your website’s address on the internet. It’s what people will type into their browser to find your site.
For example, my domain name is thisss.com
What is web hosting?
Web hosting is the service that stores all of your website’s data (images, videos, text content, etc.) on a web server. Essentially, it’s the home for your website that makes it accessible to everyone via the internet.
A good web hosting provider will also include a website builder. So you don’t need any technical skills to create your website.
You can get started with Bluehost for only $2.75 per month.
They offer a free domain name when you purchase hosting and they have a simple website builder that you can use to create your website.
Follow these steps to successfully set up your store:
Step 1: Visit Bluehost

Bluehost is one of the most popular web hosting providers in the world. Founded in 2003, Bluehost has been a popular name in the web hosting industry. With over 2 million domains hosted, they are a trusted and reliable company.
The interesting part?
You’ll get a free domain name when you purchase hosting.
To get started, visit Bluehost.com and you’ll land on the homepage. Click on the “Get Started Now” button to begin.
Step 2: Choose your hosting plan
On the next screen, you’ll be asked to choose your hosting plan.
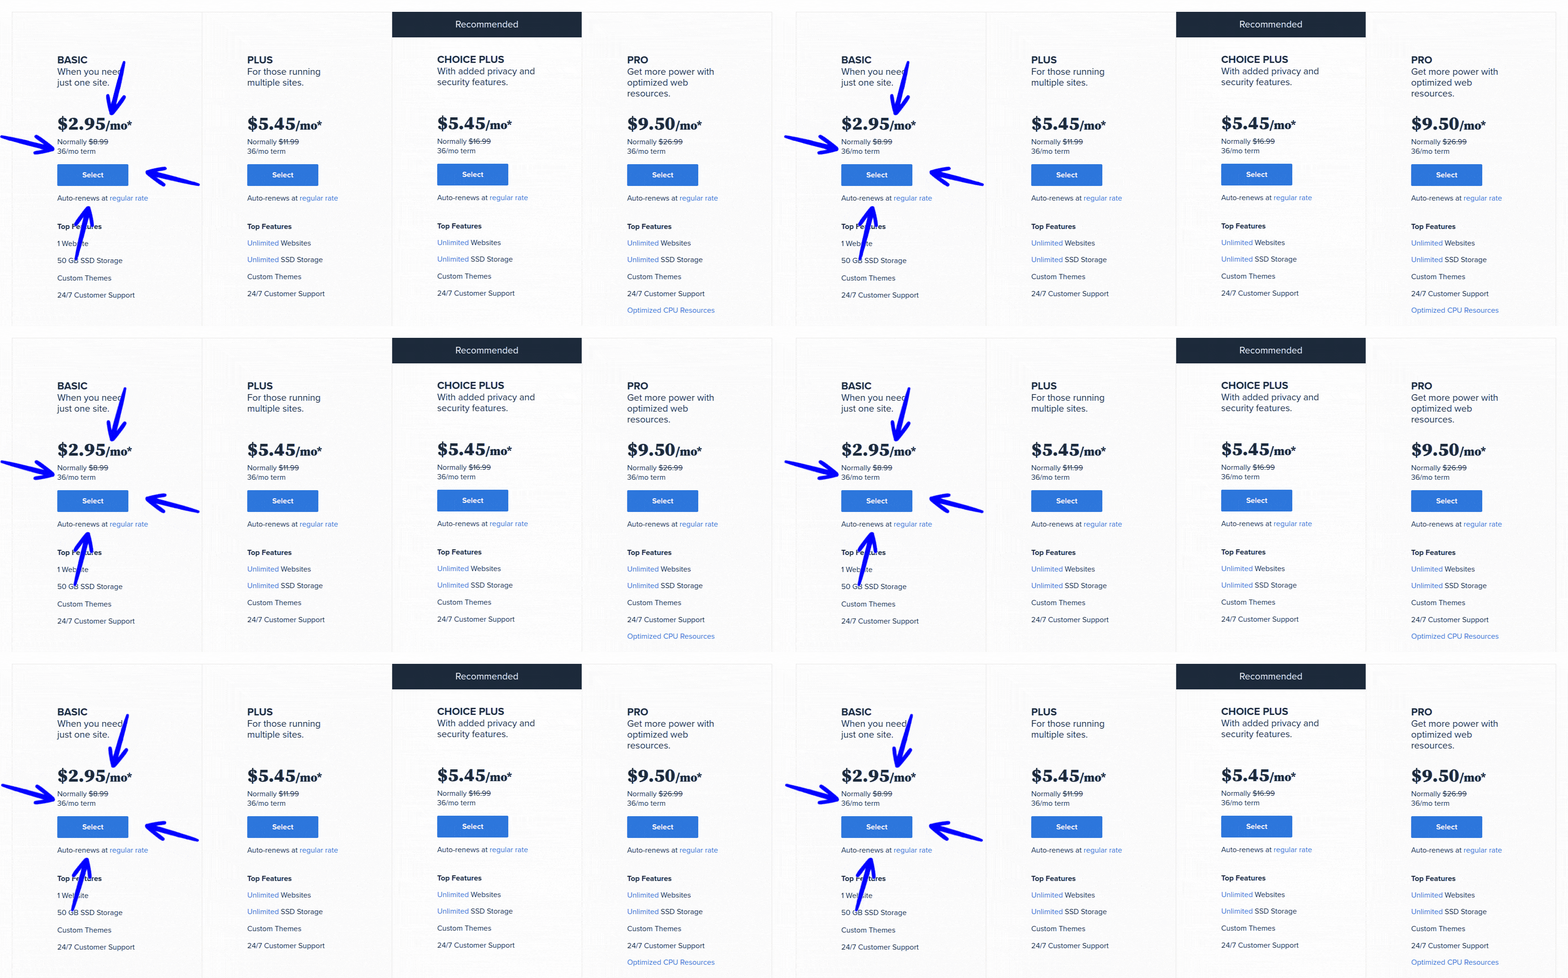
For most people, the “Basic” plan is more than enough to get started. It’s the most affordable plan and it comes with everything you need to get started.
If you think you’ll need more resources in the future, you can always upgrade your hosting plan to a higher tier at any time. Once you’ve selected your hosting plan, click on the “Select” button to continue.
Step 3: Enter your domain name
Next, you’ll need to choose your domain name.
If you don’t have a domain name already, don’t worry. You can easily get one from Bluehost. And, the domain will be free for the first year.
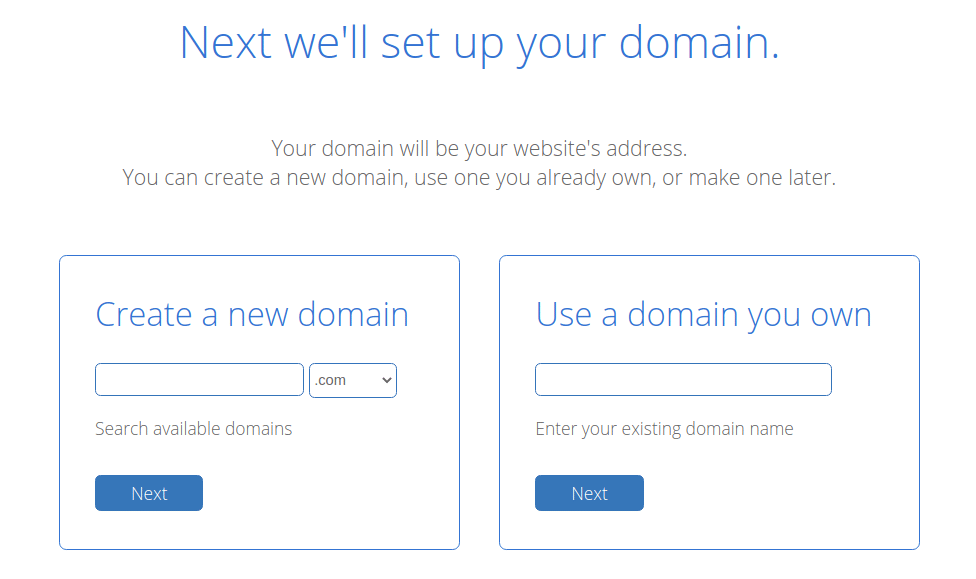
Enter the domain name you want in the “new domain” field and then click on the “Next” button. If the domain name you want is available, you’ll see a green message that says it’s available. If it’s not available, you’ll see a list of similar domains that are available. You can also use Bluehost’s Domain Name Search tool.
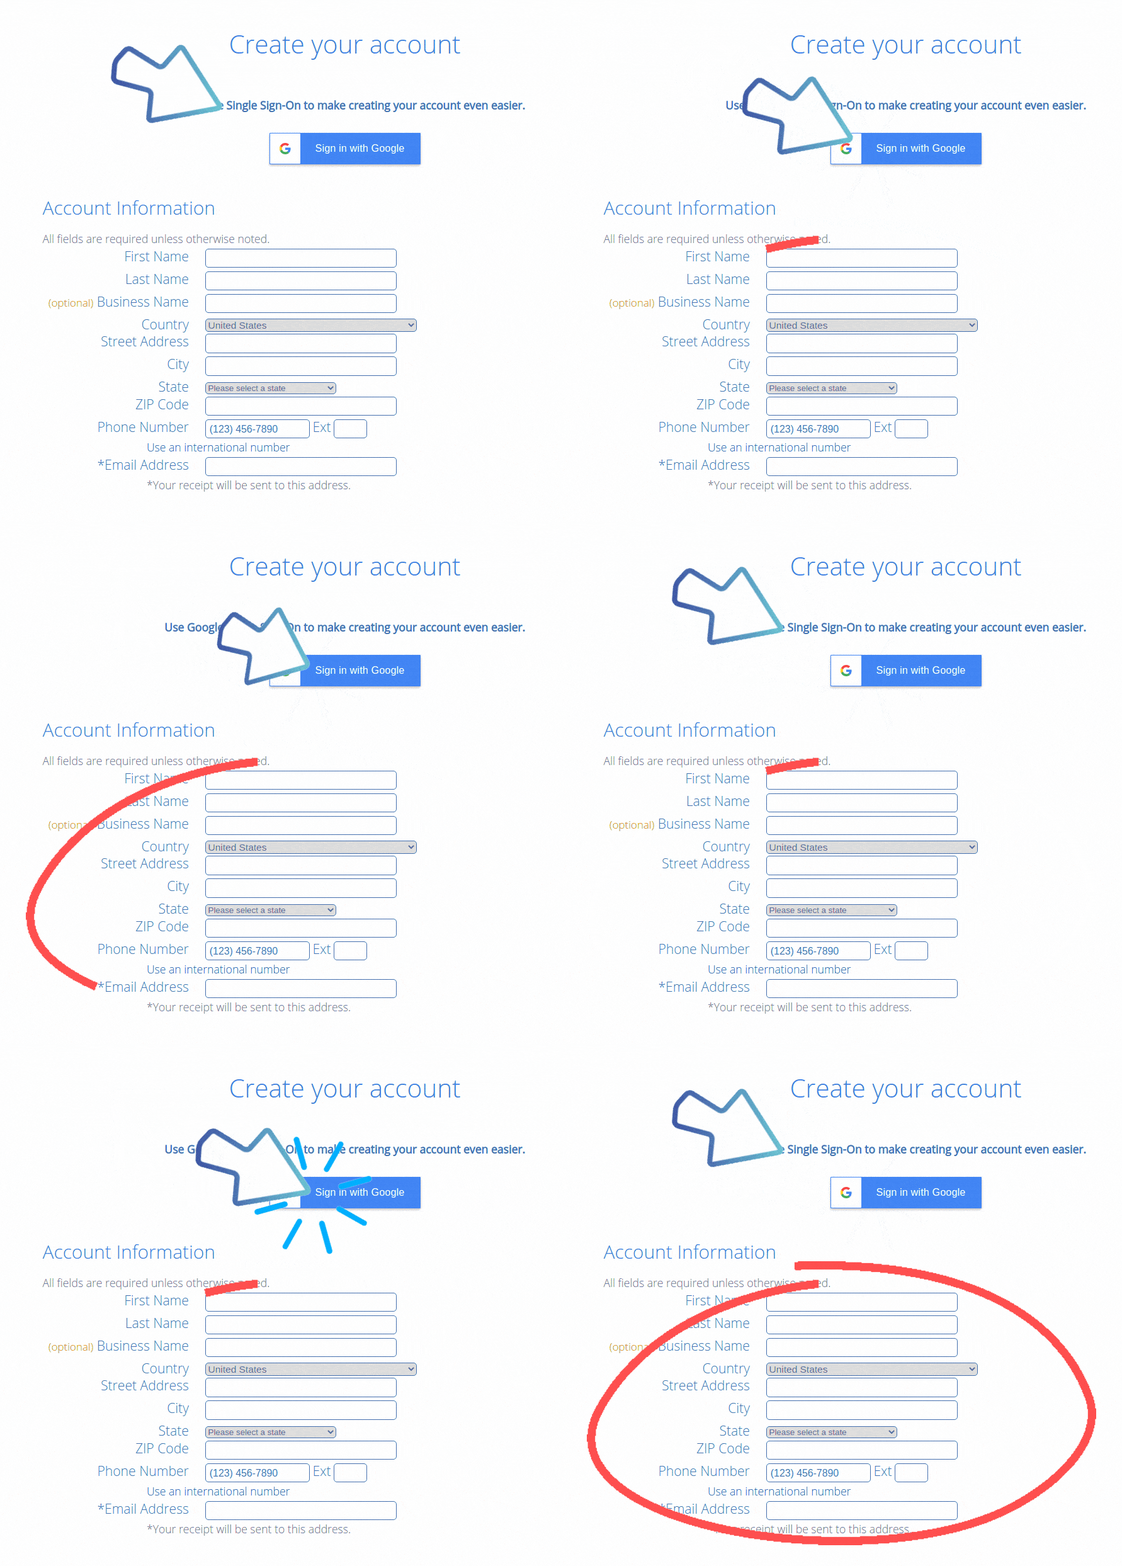
Step 4: Enter your account information
On the next screen, you’ll need to enter your account information. This includes your name, address, and contact information.
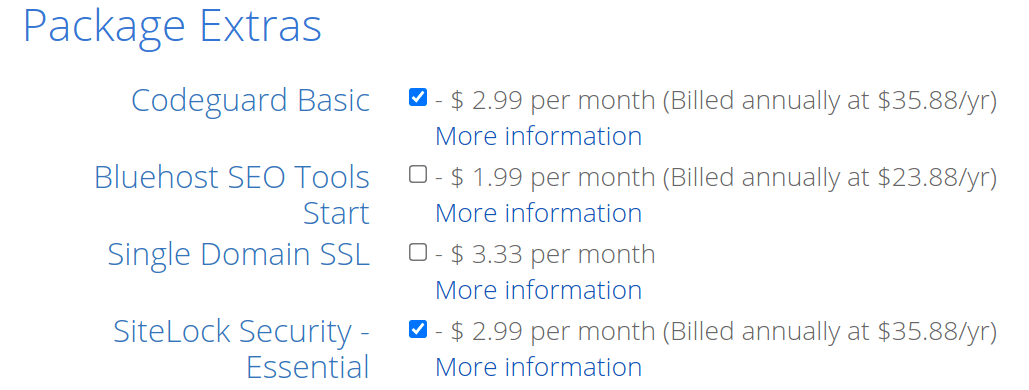
Next, choose any add-on services you want to add to your hosting plan. These services are optional and not required to set up your store.
Finally, you’ll need to enter your billing information. Bluehost will charge you for your hosting plan and any add-on services you select.
They offer a 30-day money-back guarantee.
So, you can always cancel your account if you’re not happy with their service. I don’t think you’ll need to do that though.
Step 5: Complete the purchase process
Once you’ve entered all of your account information and billing information, click on the “Submit” button. This will take you to the purchase page.
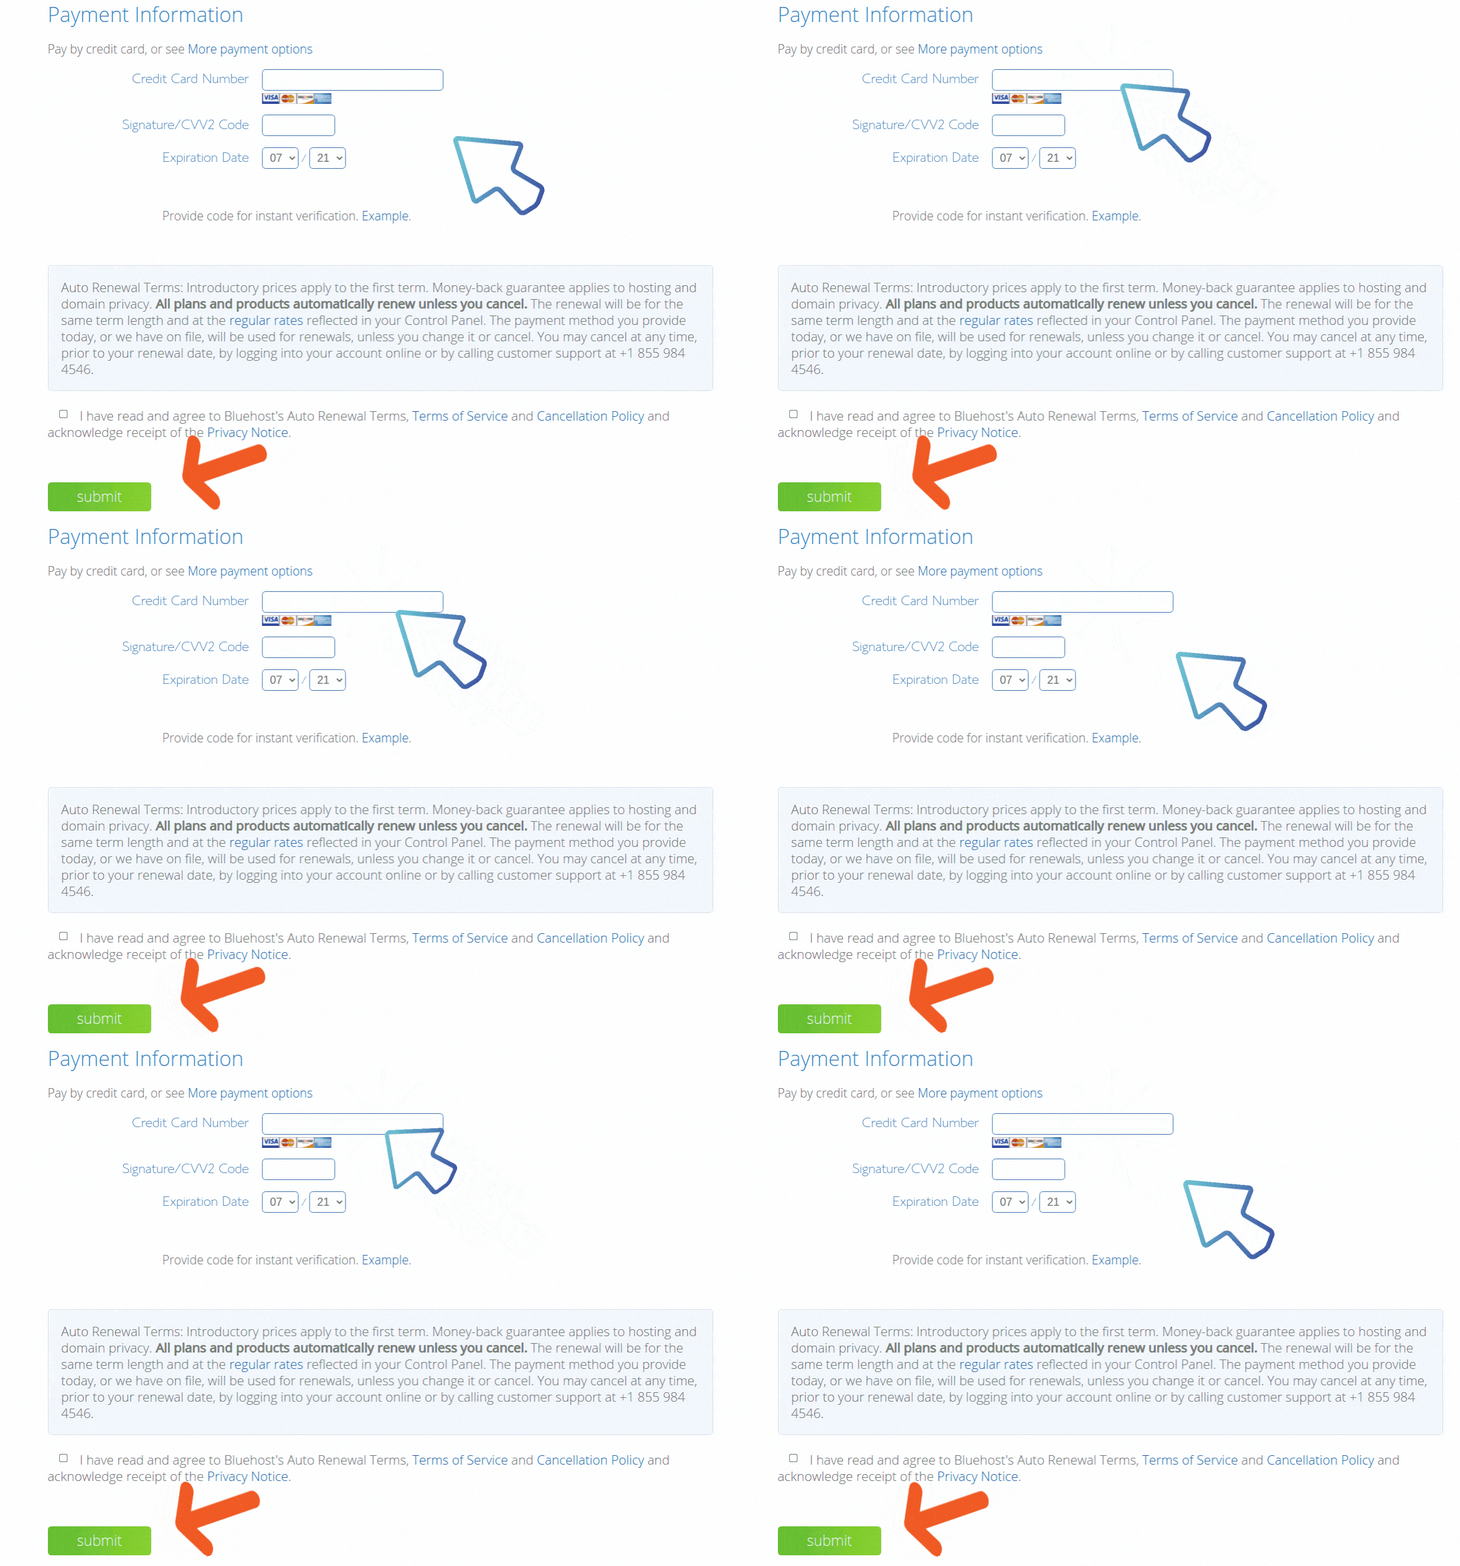
Review your order and make sure everything is correct.
If everything looks good, click on the “Complete Purchase” button to finish signing up with Bluehost.
Step 6: Log into your account
Once you’ve completed the purchase process, you can set a password.
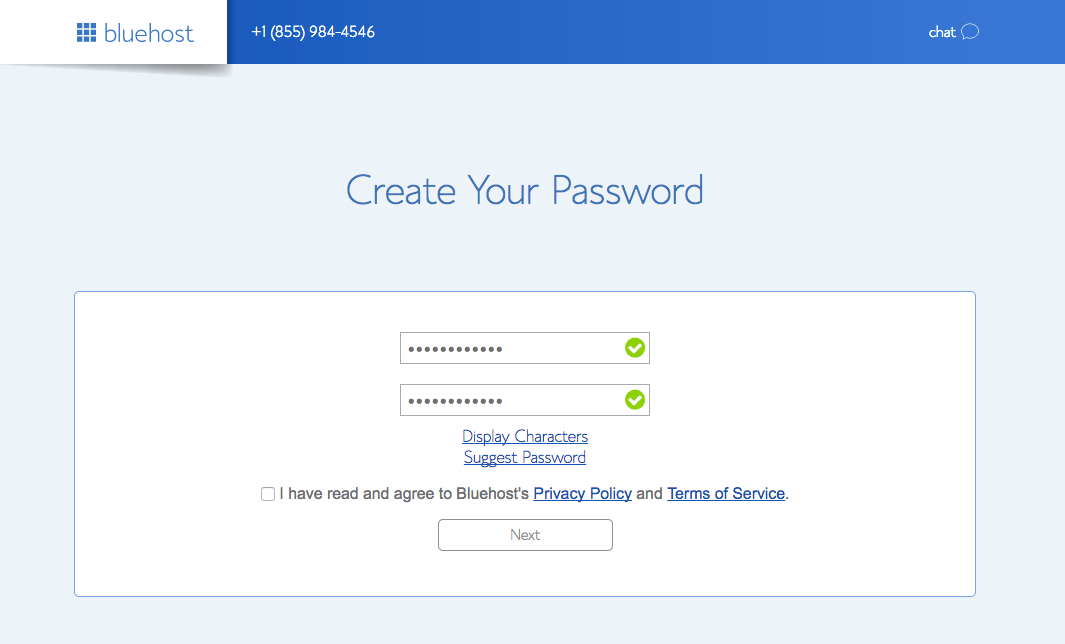
Just choose a password, confirm it, accept the terms, and hit Next. You can use this password and your email address to log into your Bluehost account.
There are plenty of website builders out there.
But, WordPress is the most widely used content management system and the most popular way to build and manage your website.
WordPress is free and open-source.

You can use WordPress to build your online store. WordPress is so popular that over 40% of all websites worldwide are powered by WordPress.
Some of the key benefits of WordPress include:
- WordPress is free and easy to use
- WordPress is open source, so
- You can customize it however you want
- Thousands of free WordPress themes and plugins are available
- WordPress is SEO-friendly
- A huge community of experts and resources
- Over 40% of online sites are powered by WordPress
So, what do you think?
It’s pretty clear that WordPress is the way to go.
The best part?
Bluehost automatically installs WordPress in the background when you set up your hosting account. So, when you log into Bluehost, WordPress will already be installed. That means you don’t have to worry about installing it yourself.
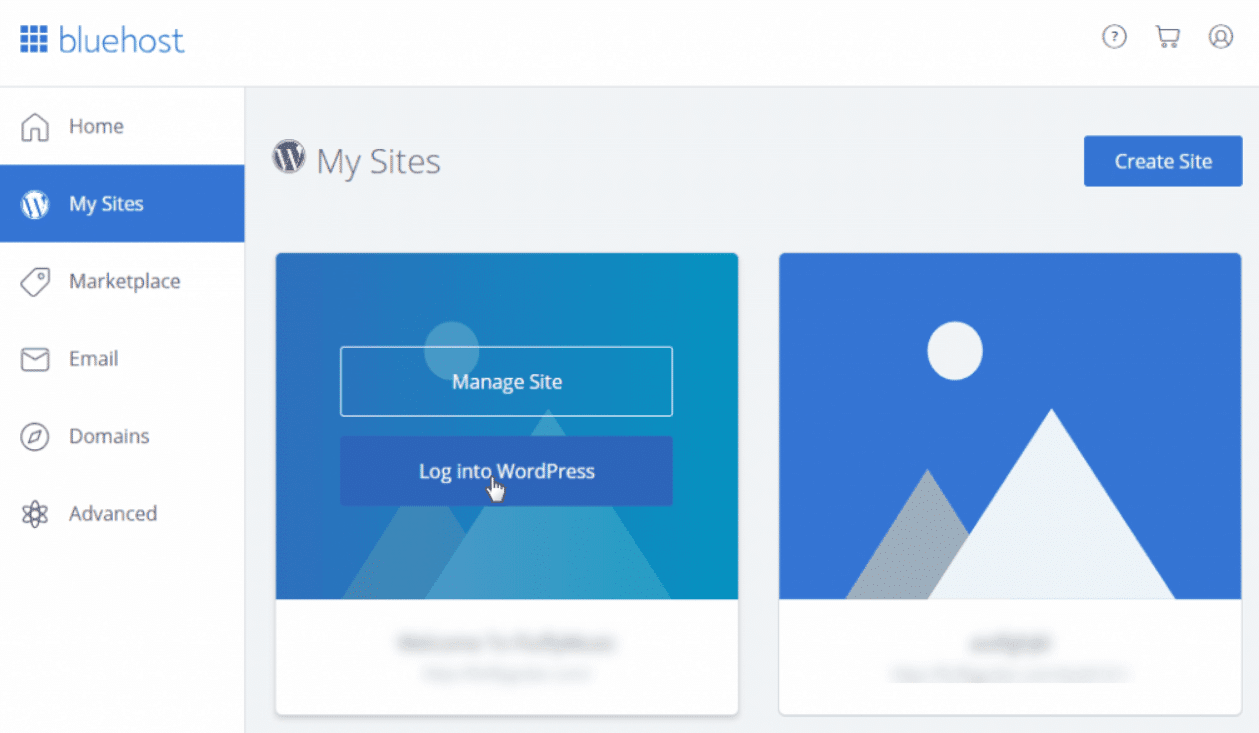
From your Bluehost account, click on the “My Sites” tab at the top and then click on the “Log Into WordPress” button to get to WordPress admin.
In the next step, you’ll learn how to set up your online store with WordPress
Step 7: Set Up Your Store
Once you’ve logged into WordPress admin, it’s time to set up your store.
Before you get started, make sure that your domain is pointing to Bluehost and without it, your store will not be accessible to the public.
If you’re not sure how to do that, don’t worry.
Bluehost has a tutorial that walks you through the process.
A: Install WordPress Plugin
When your domain is pointed, it’s time to set up your WordPress site and build your online store using WordPress. Basically, you’ll need to install the Woocommerce plugin and customize the settings to get your store up and running.
What is a WordPress plugin?
A WordPress plugin is a small piece of software that adds extra functions and features to your WordPress website.
What is the best eCommerce plugin for WordPress?
Woocommerce is the most popular eCommerce plugin for WordPress. It is a free plugin that lets you build and manage an online store.
It’s also one of the best plugins for building an online store.
To install the plugin, just visit your WordPress admin dashboard and go to Plugins -> Add New. From there, you can search for the plugin and install it.
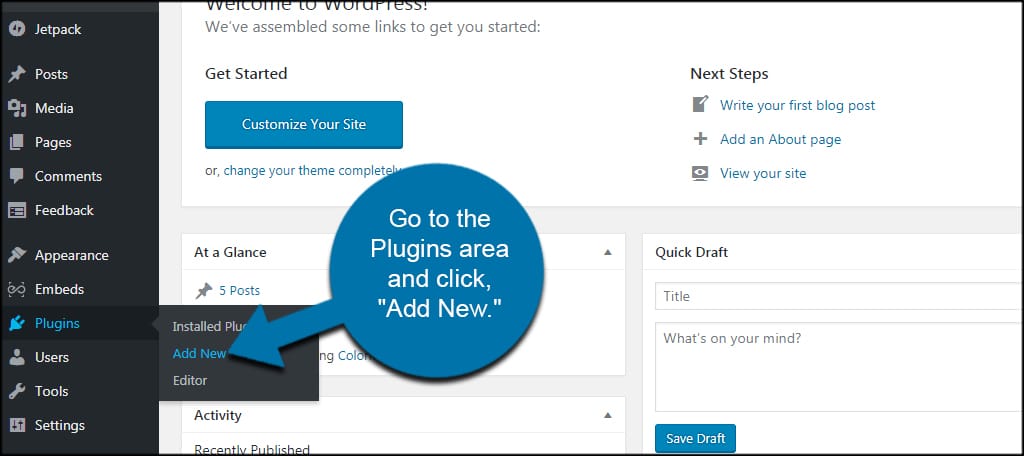
Once you’ve activated the plugin, you can set up some basic settings.
First, you’ll need to visit the WooCommerce menu in WordPress admin. Here, you can configure your store settings, choose a payment processor, set up shipping options and email notifications, and more.
It’s also a good idea to set up some essential plugins to give your WordPress store more powerful features and capabilities.
Some of the best plugins for Woocommerce stores include:
- WPForms: lets you add forms to your store
- YITH WooCommerce Wishlist: allows customers to add items to a wishlist
- WooCommerce Product Add-ons
- WooCommerce Subscriptions: allows customers to subscribe to products
- WP Rocket: speeds up your website
While it’s optional, adding these plugins will give your Woocommerce store a competitive edge and help you grow your business.
Here’s a detailed tutorial from Woocommerce on how to set up your store.
B: Install a WordPress Theme
You need a professional theme to make your WordPress store look great. WordPress has thousands of themes to choose from, both free and premium.
When choosing a theme for your store, make sure it is:
- Responsive
- eCommerce-friendly
- Easy to customize
One of the best themes for building an online store is Divi.
It is a powerful theme that lets you create unique and professional-looking stores using the drag and drop page builder. Plus, it’s optimized for search engines and comes with a suite of powerful features and capabilities.
You can also use StudioPress themes. These are some of the best themes for WordPress and are perfect for building an online store. If you are looking for a free option, the Storefront theme from Woocommece is a good choice.
Once you’ve chosen a theme, install it on your WordPress site.
To install the theme, just go to Appearance -> Themes and click on “Add New“. Then you can search for a theme and install it.
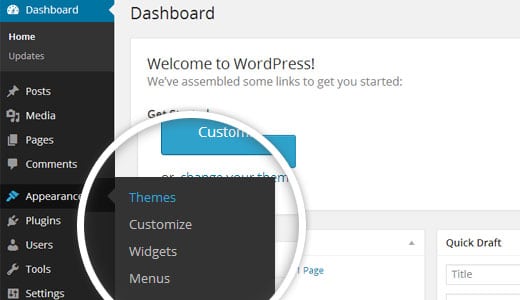
Why install a theme?
The right theme will give your online store a professional look and feel. The right theme will also help improve your store’s performance and speed.
C: Configure Your Store Settings
Now that you have installed the WordPress plugin and theme, it’s time to configure your store settings.
To do this, go to the WooCommerce menu in the WordPress admin and click on “Setting”. There, you can configure your general, product, tax, shipping, payment, and all other necessary settings for your store.
4. Set Up a Payment Processor
Once you’ve set up your WordPress store with Woocommerce, you’ll need to choose a payment processor. A payment processor will help you accept payments from customers and deposit them into your bank account.
What is a payment processor?
A payment processor is a company that processes payments for your business. It will accept payments from customers, process them securely and quickly, and transfer the funds to your bank account.
Examples of Payment processors:
There are many different payment processors to choose from.
Some of the popular ones include:
- PayPal
- Stripe
- Square
- Amazon pay
- Braintree
- 2Checkout
- Authorize.Net
First, you’ll need to decide which payment processor is right for you. Factors to consider include transaction fees, processing speed and level of security, customer support, ease of use, and more.
Once you’ve chosen a payment processor, you’ll need to set up an account and integrate it with your WordPress store.
Here’s a great guide from WooCommerce on payment processors.
So, what’s the most recommended option?
I strongly recommend using PayPal. It is the most popular payment processor and is used by millions of businesses around the world.
You can also use Stripe.
Stripe is popular with online merchants because it offers fast and convenient payments, flexible monthly billing options, and low transaction fees.
It is a popular alternative to PayPal and is used by many online stores.
Woocommerce makes it easy to set up both PayPal and Stripe.
To set up PayPal with Woocommerce, go to WooCommerce -> Settings -> Payments and click on the PayPal Checkout tab.
To set up Stripe with Woocommerce, install this plugin.
Read – Showit vs WordPress: Best Option for Online Stores?
5. Stock Your Store with Products
After you’ve set up a payment processor and configured it to accept payment, you’ll need to add products to your store.
If you’re selling physical goods, you’ll need to source them from suppliers and have them shipped to your customers. If you’re selling digital products, you can simply upload them to your online store.
Some tips for stock management include:
- Use a spreadsheet to keep track of quantities and costs.
- Have regular check-ins with your suppliers to ensure that you’re getting the best prices and quality. It’s also important to have a good relationship with your suppliers so that you can negotiate better prices.
- Keep track of sales in your online store so that you can order more stock when needed. Many new sellers make the mistake of not tracking sales.
- Don’t overstock your products. While it’s important to have enough stock to meet customer demand, you don’t want to have too much stock that it becomes a burden. You don’t want to have products sitting around.
To add products to your store, go to WooCommerce -> Products -> Add New.
Using the Product Data box, you can add a title, description, and product image. You can also specify other details such as price, stock levels, weight, and shipping class. It’s also important to set up shipping and tax rules.
While it’s easier to sell digital products online, selling physical products requires a bit more work. You’ll need to find suppliers for your products.
You can use the dropshipping model, where you source products from a supplier and have them ship directly to your customers. This is a great way to get started because it doesn’t require you to carry any inventory.
You can find suppliers for your products by doing a Google search or using a dropshipping directory like Oberlo or Salehoo.
If you want to carry your own inventory, you can find suppliers on Alibaba.com or you can choose any supplier that you prefer.
Once your products are added, you’ll be ready to start selling!
6. Promote Your Online Store
Finally, you need to promote your store and drive traffic to it.
Launching a new online store is no small feat. It’s important to take the time to market your store and bring in customers.
There are many ways to promote your store.
Some popular methods include:
- Search engine optimization (SEO)
- Social media marketing
- Content marketing
- Email marketing
- Paid advertising
One of the best ways to drive organic traffic is to start a blog and publish regular content that targets your target market.
This will help you build credibility and visibility for your store.
Another important part of promoting your store is to build an email list. You can do this by offering something for free in exchange for an email address (such as a free shipping coupon or ebook). With an email list, you can send regular updates to your customers and keep them engaged with your store.
No matter which method you use, you’ll need to experiment and find the marketing channels that work best for you. It’s important to test different channels and see what brings in the most sales.
Always focus on providing great customer service. This will help ensure that your customers keep coming back and making repeat purchases.
7. Analyze, Optimize, and Grow
It’s important to regularly analyze your data so that you can see what’s working and what’s not. This will help you optimize your store for greater sales.
Some common metrics to monitor include:
- Number of new customers
- Returning customer rate
- New and repeat purchase rates
- Revenue and profit
In addition, you should also regularly optimize your store for conversions.
This may involve A/B testing different website designs, themes, sales copies, or product prices to see what leads to the best sales.
By following these steps, you can start an online store that delivers great results and drives long-term growth. Remember to focus on your customers and always strive to provide the best possible experience for them.
Take Action Now… or, it’ll be too late!
If you’re interested in starting an online store, now is the time.
With the right tools and strategies, you can build a successful online business that delivers amazing results. These days, having an online store is essential for any business, big or small. Don’t wait any longer!
Once you’ve followed these steps, you’ll have a fully functioning online store that is ready to take orders and sell products.
So, what do you think?
Are you ready to set up your online store with WordPress?
If so, Bluehost makes it easy. With a few simple steps, you’ll have your very own online store up and running in no time!
Overall, WordPress is the best choice for building an online store. It is free, easy to use, customizable, SEO-friendly, and comes with a huge community of experts and resources. And with Bluehost’s help, setting up your WordPress eCommerce store is a breeze. And, it’s going to cost only $33 per year for hosting.
So, if you have little to no money to start your online store, WordPress and Bluehost are the way to go! There’s no need to overspend on costly eCommerce platforms when you can get started with WordPress for free.
And, with that, I will end this post.
I hope you enjoyed reading it and found it helpful.
Please do me a favor by sharing this post online. It doesn’t only help me, but it also helps more people learn about building online stores.

