Are you in search of the ultimate WordPress cache plugin to supercharge your website’s speed? Look no further than WP Rocket – a top-notch caching solution that leaves its competitors in the dust.
Whether you’re a content creator, blogger, or a proud owner of a WordPress website, WP Rocket is the go-to choice for maximizing your site’s performance. With its intuitive interface and powerful features, the WP Rocket plugin stands head and shoulders above all other cache plugins available today.
Why do we rave about WP Rocket?
Simple – it offers the most comprehensive set of features, from page cache to heartbeat settings, making it an invaluable asset for anyone serious about optimizing their website’s speed and performance.
In this blog post, we’ll take a deep dive into why the WP Rocket plugin has earned its place as the best cache plugin for WordPress websites. We’ll explore the aspects that set it apart from its competitors and answer the most frequently asked questions regarding its setup and maintenance.
While it’s essential to have good WordPress hosting and proper configuration for the best results in terms of page loading speed, WP Rocket plays a crucial role in taking control of your WordPress performance. Its capabilities are bound to enhance your website’s speed and overall user experience significantly.
If you’re curious about whether WP Rocket is the right fit for your needs, fear not! This WP Rocket review post will provide in-depth knowledge that will help you make an informed decision.
So, let’s dive in and discover the power of WP Rocket to elevate your website’s performance!
WP Rocket Review Overview
WP Rocket is a premium WordPress cache plugin designed to help you easily optimize and speed up your website. It has been around since 2013, and it has been gaining more and more popularity in recent years. With over a million active installations, WP Rocket is the most popular premium caching plugin for WordPress.
The plugin works by caching various aspects of your website such as images, HTML pages, CSS, and JavaScript files. This helps reduce the amount of server resources used by your website and significantly improve page loading time.
The cost of WP Rocket is only $49 per year (single site license), making it one of the most affordable caching solutions available. Plus, they offer a 14-day money-back guarantee in case you’re not satisfied with their plugin.
Yes, there are free options available. But, most of them don’t come close to the features and flexibility that WP Rocket offers.
Overall, WP Rocket is an excellent caching plugin for WordPress websites. It offers a ton of features to help you optimize your website and improve its loading speed. And, the cost is very reasonable.
- Page level caching
- Browser caching
- Database optimization
- GZIP compression
- Minification of HTML, CSS, and JavaScript files
- Lazy loading images
- Defer JavaScript loading
- CDN integration
$49/year
Save now / all plans
My Experience with WP Rocket
I have personally been using WP Rocket for more than 3 years now.
During this time, I tested the plugin extensively and tried out its different features.
I was pleasantly surprised with how easy it is to set up and use the plugin. It has a simple yet intuitive user interface that makes it easy to get started. All you have to do is purchase a license, download and install it, and activate the plugin, then proceed to its settings page where you can choose the features you want to enable.
The caching process with WP Rocket is incredibly efficient.
I’ve seen my website load faster than ever before after activating the plugin.
My first question:
Did you notice how fast the pages are loading on this site?
I’m sure you did.
That’s the magic of WP Rocket and BunnyCDN. Pretty amazing. Right?
So if you’re looking for the best WordPress cache plugin, look no further. Because in this in-depth WP Rocket review I’ll help you make a strong decision.
Pretty bold statement. Right?
But here’s the thing:
WP Rocket is, in my opinion, one of the best WordPress caching plugins for boosting the loading speed of your website. And, BunnyCDN is unquestionably the cheapest (around $1/month), yet extremely powerful and reliable CDN.
And, I know, it won’t be difficult to prove it with this review.
Here’s the fact:
Both of these tools simultaneously help me achieve super-fast loading speed. I’ve been able to achieve over 95% score on GTmetrix for all my pages, with the help of these powerful tools.
However, this review will mostly focus on WP Rocket.
That’s okay. Right?
You’ve probably landed on this page looking for someone to hold your hand and help you figure out if WP Rocket is the right choice or not.
The short answer is YES.
If you are obsessed with the loading speed, you should know how someone like me with no technical knowledge is getting amazing page loading performance.
My Result with WP Rocket
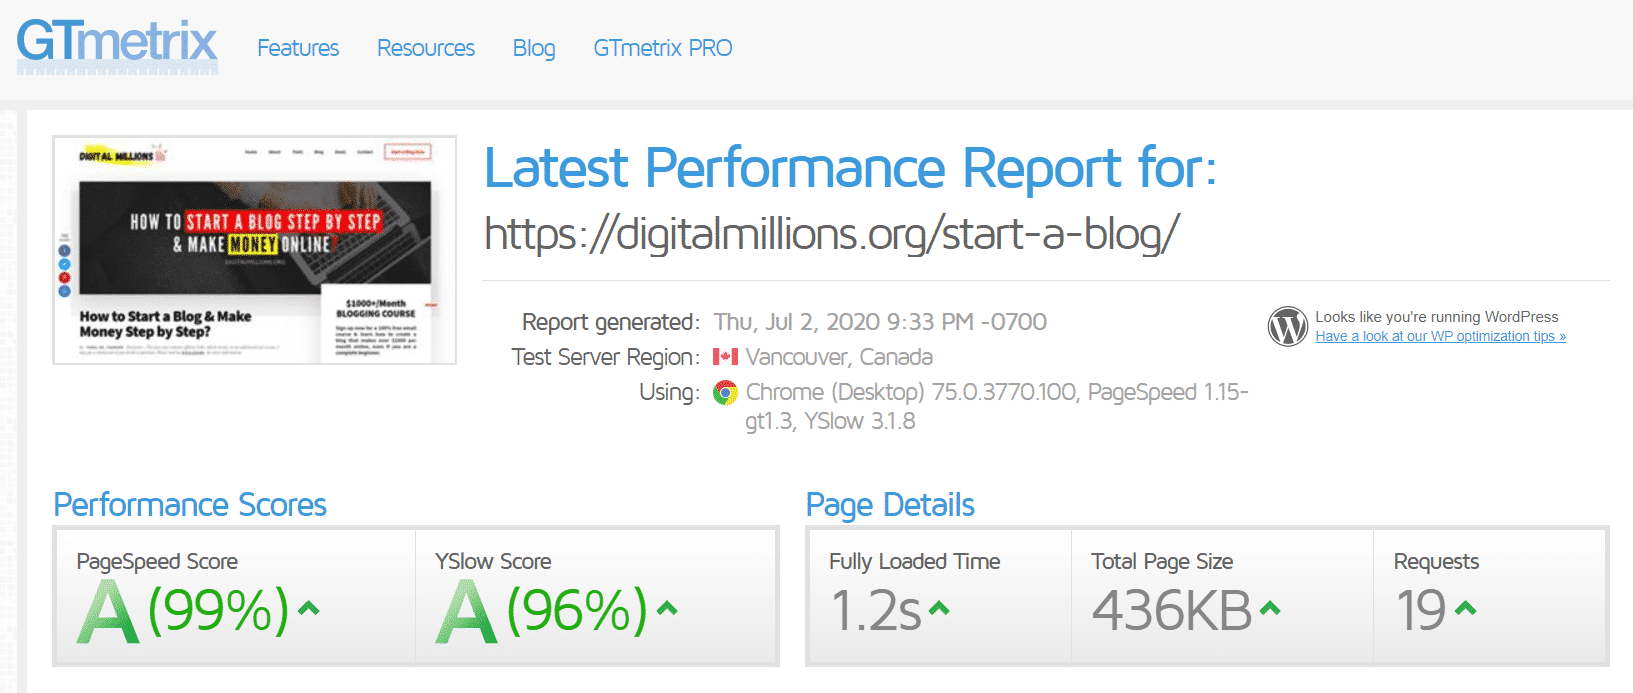
Take a look at my results below.
Did you notice?
One of my most image-heavy blog posts loads within just 2 seconds.
I know… I know you are smart. You need more proof. You can’t trust my words. Then take a look at my loading time without WP Rocket.
My Result without WP Rocket
It’s the same page with ?nowprocket parameter.
This parameter (?nowprocket) is used to bypass the WP Rocket cache and check your page loading time without using the power of the cache created by WP Rocket.
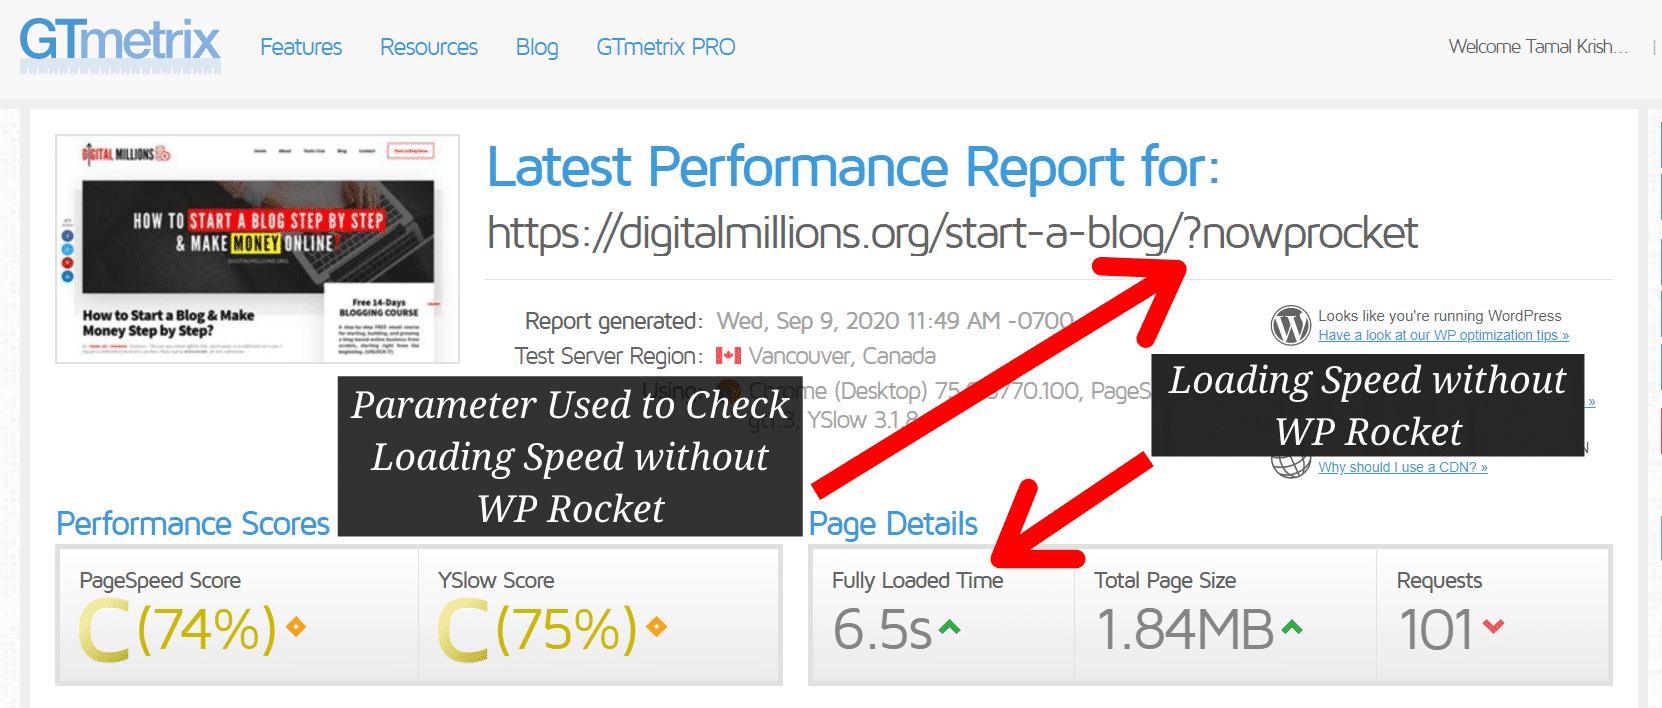
So did you notice the difference?
Surprised, Right?
And that’s exactly why I strongly recommend you to buy WP Rocket as it’s the highest-rated caching plugin that delivers excellent page-loading performance.
WP Rocket Real User Reviews
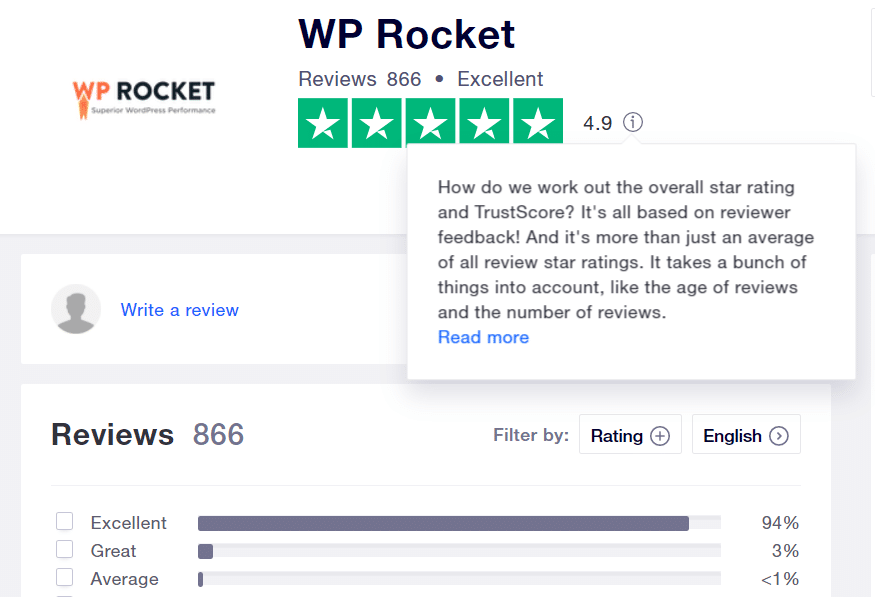
A careful look at its Trustpilot profile reveals the true ratings:
Even though it’s branded as a caching plugin, it’s so much more than that.
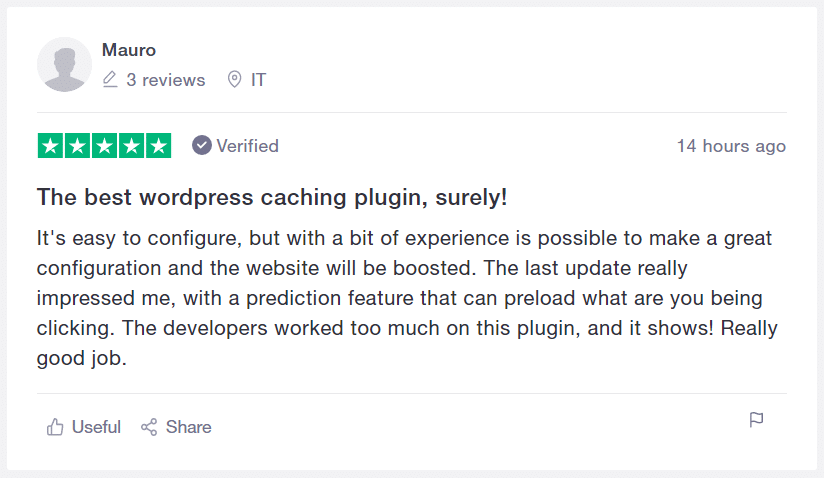
Truly speaking, I’m not asking you to trust me. But, take a look at WP Rocket reviews on TrustPilot to see what people are saying about WP Rocket. See how people reviewed it in their own words:
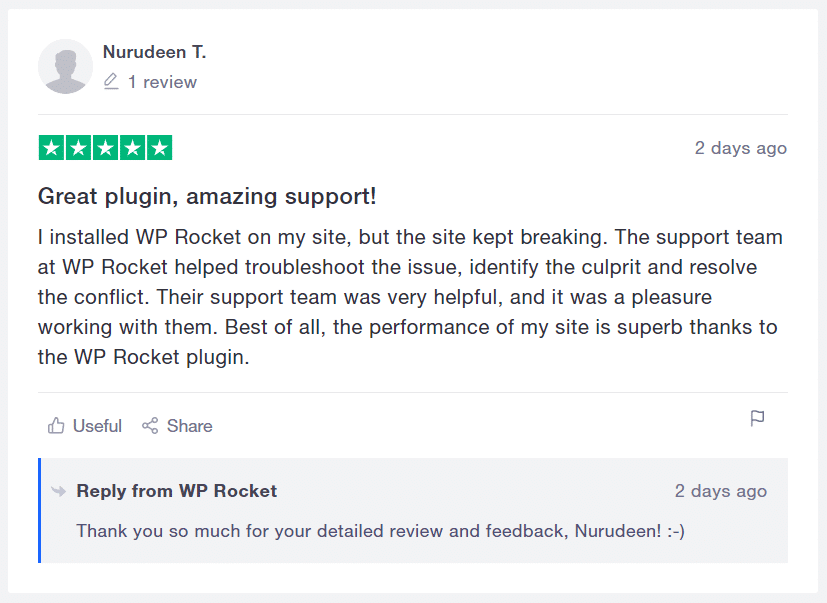
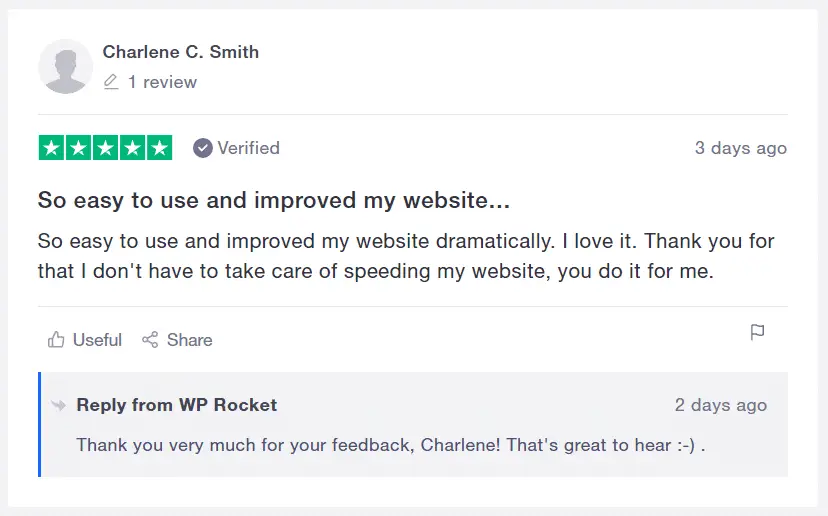
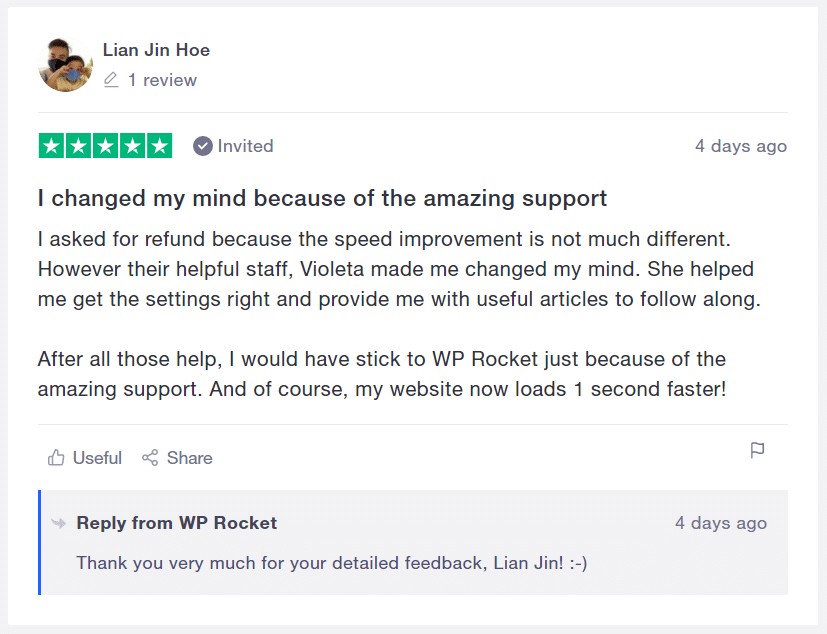
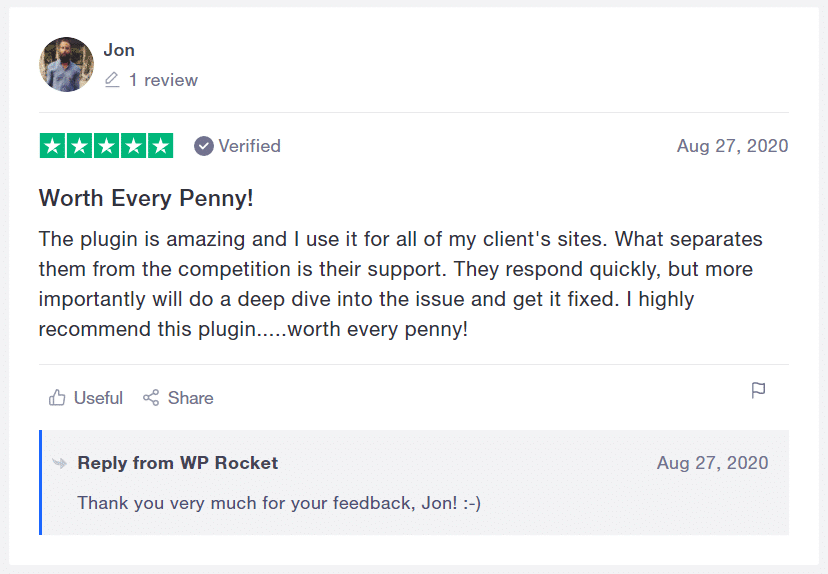
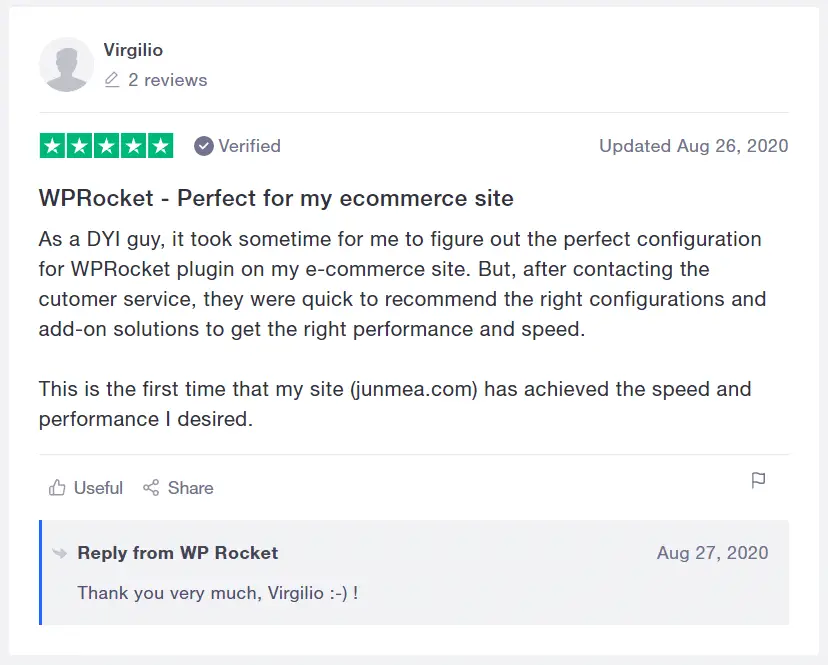
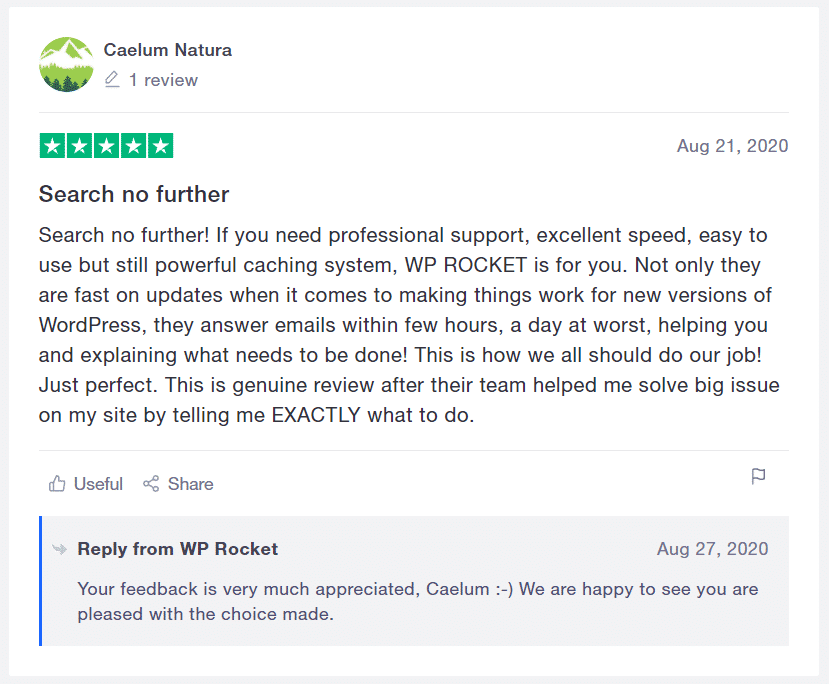
Ok, that’s enough. Let’s stop it for now. 🙂
No, really that’s enough. Right?
Interested to experience it yourself? Click the special link below to grab it today. You’ll be happy to know that it costs only $49 for 1 year of support and updates.
Any good news?
Of course, you’ll get a 14-day money guarantee.
Yes, that’s right. I don’t think you’ll ever need one. But still, if you are not satisfied with how it performs for your site, you can get a full refund within 14 days.
Keep in mind that their support is very responsive. And, they can easily solve any problems you may have with your site.
Really, it can’t be better than this.

In this WP Rocket review, I will be going through the best features that WP Rocket has got to offer you. I will also help you decide if it’s the right choice in case you have already decided to purchase it, but have some confusion.
Unfortunately, WP Rocket is a premium plugin. So unless you decide to pay for a premium price you can’t take advantage of this plugin.
So it’s natural to look for reviews online.
Because you want to make a confident decision towards buying it. And, that’s what I’m going to help you with through this review.
So, let’s start from the basics…
What is WP Rocket?
WP Rocket is a premium caching plugin for WordPress sites.
It can dramatically speed up your website in no time.
The plugin works by creating cached versions of your web pages, which can be served up to your visitors much more quickly than the original version. This results in an overall faster website, for better user experience and SEO.
It also includes other useful features to help you optimize your websites, such as the minification of HTML, CSS, and JavaScript files, GZIP compression, database optimization, CDN integration, Google fonts optimization, and more.

The plugin basically takes advantage of caching technology to make your website load faster, and the results can be quite impressive.
Have you ever wanted to visit a site and waited so long that you decided to hit the back button? Isn’t it frustrating to wait more than 3 seconds?
Research says that more than 50% of visitors will leave your site if it takes more than 3 seconds to load. That’s why it’s critical to have a fast-loading website.
The good news is that there are plenty of ways to improve a website’s load time. And, if your website is built with WordPress, caching is something you should try.
But if you are a beginner and never heard of the term Cache, let me tell you what cache is and how it helps your website load fast.
What is Cache & How Does it Help?
The cache is a separate copy of all the pages on your website. It’s generated when a page is loaded for the first time. For all subsequent users, the cached version of your webpage is served, without going through the entire page generation process.
As a result, the pages load fast when served from the cache.
With the help of WordPress cache plugins, you can create a cache easily. I personally like WP Rocket for its excellent features and performance.
One of my most image-heavy blog posts loads in just 1.2 seconds.

A fast-loading website doesn’t only help with user experience, but it helps with SEO too. Google already announced in July 2018 that it’s going to make loading time a part of its algorithm. There’s no doubt that it helps with better ranking.
With hundreds of positive customer reviews, WP Rocket is an intelligent choice for your WordPress site, if you are serious about improving the load time.

As I’m writing this article, WP Rocket has received over 700 customer reviews on Trustpilot with an excellent 4.8 rating. That proves why people obsessed with performance love this WordPress plugin so much. I’ve personally tested and used it, and I can confirm that the plugin deserves every bit of its excellent reputation.
Well, I don’t want to keep you waiting long and bore you. Let’s dive right into the best features of WP Rocket! (Spoiler alert: it’s awesome!)
Best WP Rocket Features
Whenever someone talks about WP Rocket Plugin, the most commonly talked about feature is, undoubtedly, the speed it provides.
As I’m writing this, there are over 700,000 WordPress sites using WP Rocket.
Yes… you heard that right…
And, the reason why it is loved by thousands of people is not only it’s powerful cache features, but plenty of additional performance tweaks that it makes.
Now you’re probably thinking, “It will be feaking hard to set it up”.
Then, here’s the good news for you:
It takes just a few clicks without any complicated settings. By default, WP Rocket activates the most important features as you install and activate it.
The result?
Excellent page performance.
It boosts your website’s page loading speed mainly by:
- Creating basic page cache
- Compressing HTML, JavaScript, and CSS files
- Loading your images only when the user needs to it
- Optimizing your database
But wait… wait… that’s not all.
Let’s take a quick look at all the features WP Rocket offers. It includes:
- Quick setup
- Page caching
- Cache preloading
- GZIP compression
- Browser caching
- Database Optimization
- Google Fonts Optimization
- Remove Query Strings from Static Resources
- Lazyload – load images as your visitors scrolls down.
- Minification / Concatenation
- Defer JS Loading – helps with loading speed.
- CloudFlare Compatibility
- CDN – content delivery network support
- DNS Prefetching
- Mobile Detection
- Multisite Compatibility
- eCommerce Friendly – supports ecommerce sites
- Multilingual Compatibility
- Import/Export
- Developer Friendly
Look, let me be totally honest here.
There are tons of free WordPress cache plugins out there.
But you’ll have to download and activate at least 4-5 different plugins to achieve the results that WP Rocket can deliver on its own.
Is there anything wrong with downloading lots of plugins?
No, there’s nothing wrong. But, it can quickly become a mess. And, managing lots of plugins for a single purpose can quickly become highly complicated.
A single mistake can break your site or get your site down for hours.
For beginners, it will be frightening.
Anything worse?
You have nobody to ask for help. Yes, that’s right. 😥
Fortunately, it doesn’t happen with WP Rocket. The support team is unimaginably responsive and it quickly responds to your queries.
The best part?
They have the most extensive documentation I’ve ever found available for a cache plugin. So obviously, there’s a reason why thousands of people love WP Rocket.
In short, no other cache plugin can give better results than WP Rocket.
Need to compare it with other popular free plugins?
Here’s a quick comparison:
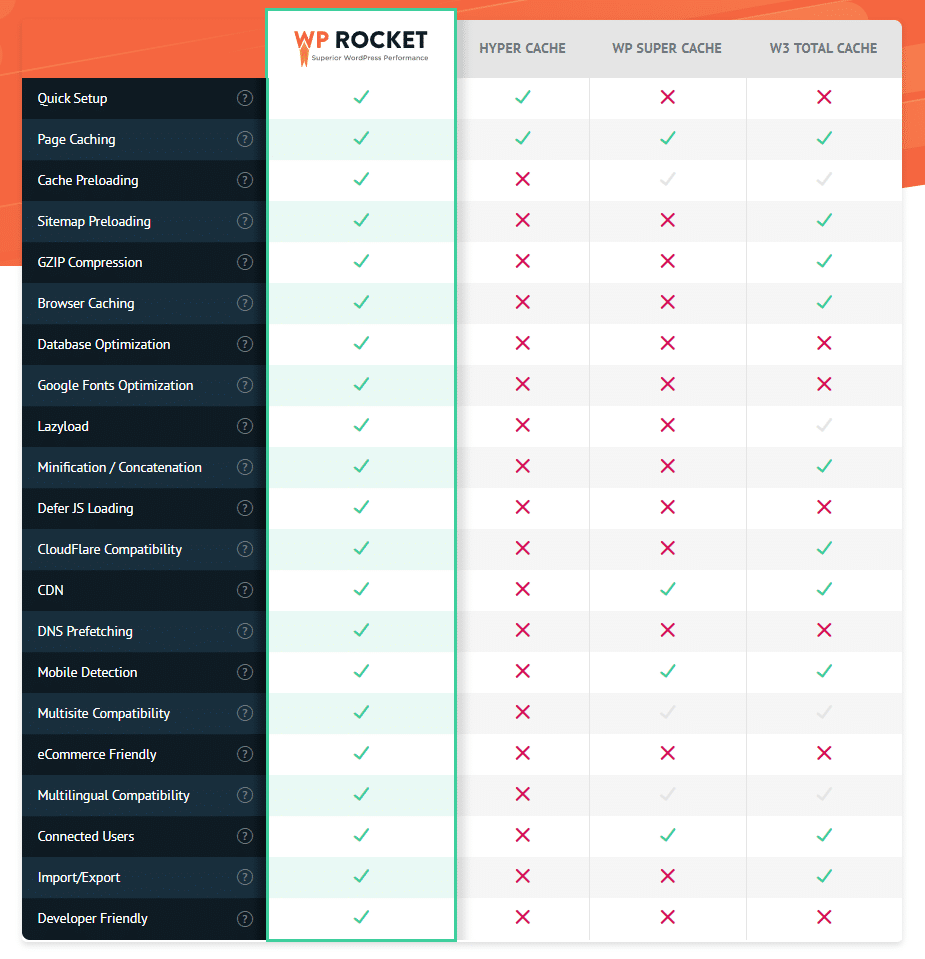
If the above image seems small to you, Click here and hit Features.
WP Rocket is branded as a cache plugin.
But, the reality is that it actually does a lot more than a cache plugin. It also performs a lot of smaller optimizations on your website.
As already mentioned, you’ll find many other similar cache plugins. The difference here is that when you choose Rocket, almost no configuration is required.
And, you’ll still get the best results. That’s why it’s ideal for beginners.
Just purchase WP Rocket and activate the plugin. As soon as you activate it, by default it will do the following:
- Activate Page caching
- Activate Browser caching
- Activate GZIP Compression
- Support for Web Fonts
- Detect your active plugins
- Detect your hosting environments
- Detect your active theme
Just by installing and activating it, you’ll see significant improvement in the loading speed. By default, it activates most essential settings required.
And of course, it does it without breaking your site.
Now, there are many other small optimizations you can perform. WP Rocket doesn’t automically activate them because of obvious reasons.
But what reasons?
Please understand that every website is different, using themes and different sets of plugins. So obviously, activating all the options is not suitable for all sites.
And activating all time options doesn’t always guarantee fast loading speed.
What’s critical is to understand what your site needs. As you activate the plugin, you will be able to control the following settings:
- Cache Preloading: This helps you build up your cache before it’s required so that the speed of your site becomes faster and more consistent.
- CSS & JS File Optimization: This combines and shrink your JS/CSS files
- Lazy Loading: This feature delays the loading of images and videos until a user scrolls down the page and actually needs to view them.
- Disable embeds/emojis to reduce external HTTP requests.
- Disable WordPress embeds.
- Defer JS loading
- Optimize Google fonts
- Optimize your database
- Integrate content delivery network (CDN)
- Control Heartbeat API’s activity
- Turn on additional add-ons
But hey!
Don’t be confused with plenty of WP Rocket settings.
I’ll explain them right in this review.
As you can see that WP Rocket comes with many different features that most cache plugins don’t come with. That means if you use other cache plugins, you would need to install at least 4-5 extra plugins to get those features.
But with WP Rocket, everything is already built-in.
Who Should Use WP Rocket?
WP Rocket is designed for anyone looking to speed up their WordPress website and improve its performance. Whether you’re a professional blogger, an online store owner, or a small business, you can benefit from using this plugin.
In short, if you are having trouble with the loading speed of your WordPress site, you should start using WP Rocket right now.
Because you know what?
It’s the best.
That’s my opinion, of course. And, I’m pretty sure it will yours as you start using. I don’t want to blame you if you have a different opinion.
But in my experience, it has truly surprised me in every possible way.
WP Rocket can literally cut your loading time by half or more.
These days when a single millisecond delay in loading time can negatively impact your site, not using a good cache plugin can quickly become a disaster.
Why?
Because loading time really matters.
The truth is, as much as 40% of website visitors will leave your site if it takes more than 3 seconds to load. And, if this is your site, it’s a disaster. Right?
A study by Akamai Technologies revealed:
- A 100-millisecond delay can hurt conversion rates by 7 percent
- A two-second delay increase bounce rates by 103 percent
- 53 percent of mobile site visitors will decide to leave a website that takes longer than three seconds to load. Quite useful data. Right?
Obviously, it indicates that your website’s performance is critical, not only for the customer’s attention but also for creating an outstanding user experience.
It naturally helps you increase the revenue.
Let me explain it more accurately.
Suppose you have a website that receives 5000 visitors per month and you are selling a product at $50. Your average conversion rate is 3%.
So your average revenue is $7500 per month.
Now if your website takes more than 3 seconds to load, you can expect at least 40% of the visitors will leave your site. That’s a huge reduction.
So clearly, you’ll receive only 3000 visitors visiting your site per month.
It translates to only $4500 per month revenue.
Result?
$3000 loss per month. Quite dangerous, right?
Here’s the solution: WP Rocket Plugin

WP Rocket plugin doesn’t only reduce the loading time of your site, but it offers an all-in-one approach to WordPress performance optimization.
And, that’s not all.
While doing that, it remains user friendly, even for absolute beginners. In short, it’s perfect for beginners as well as advanced users.
There’s a reason why thousands of people decided to shell out for this premium plugin when there are many WordPress cache plugins available free of charge.
WP Rocket Installation Process
In order to install WP Rocket, first purchase this plugin by clicking here.
As already mentioned, there are three different pricing options available. The regular price is $49 for 1 site, $99 for 3 sites, and $249 for unlimited sites.
Choose the plan that suits your requirements and make your payment. Once the necessary steps are completed, you’ll receive an email with download instructions as well as your new WP Rocket account credentials.
Head over to your new WP Rocket account. You should find your special download link there, as suggested in the image below.
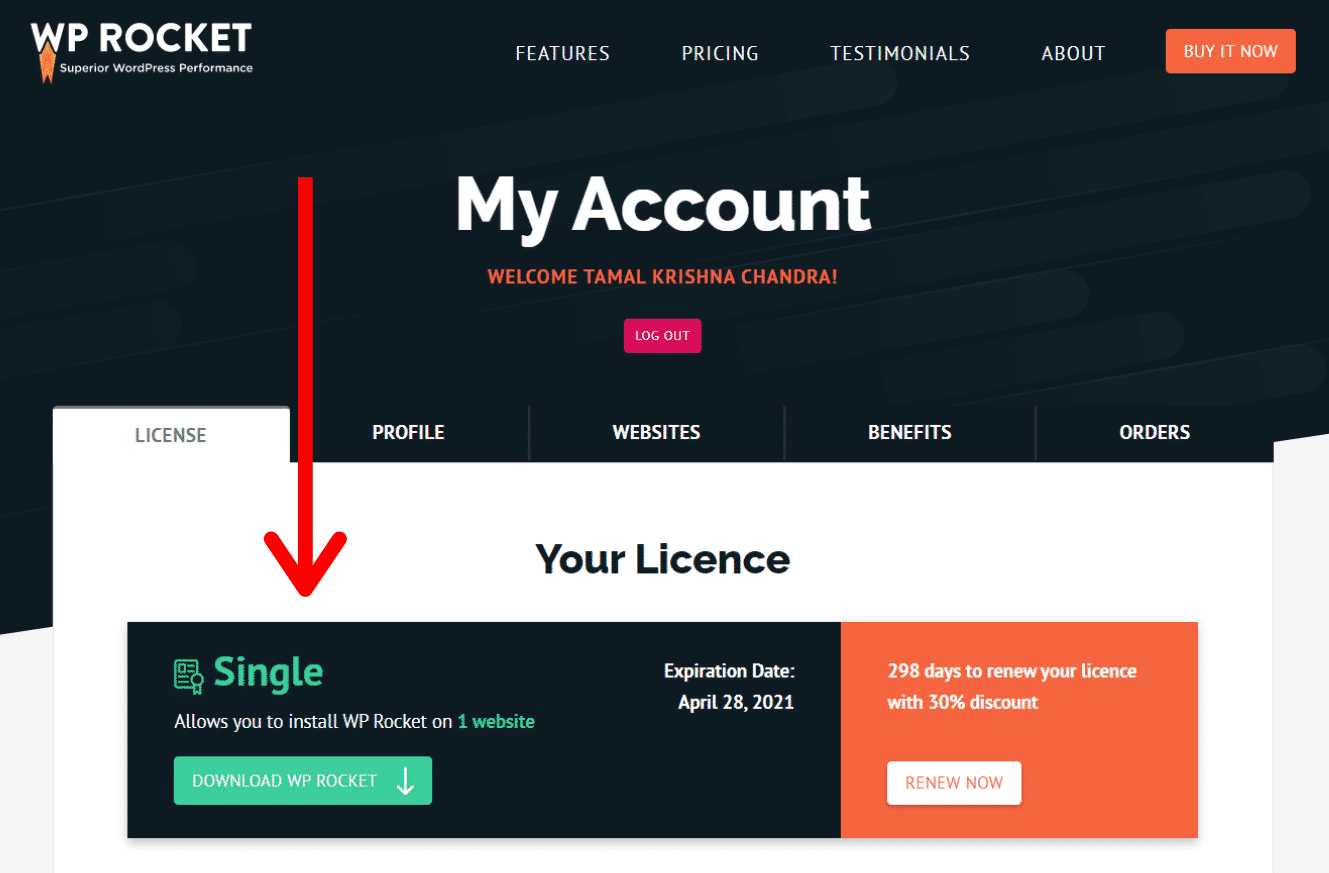
Download and save the plugin’s zip file to your computer.
Next, log into your WordPress dashboard. And click Plugins > Add New.
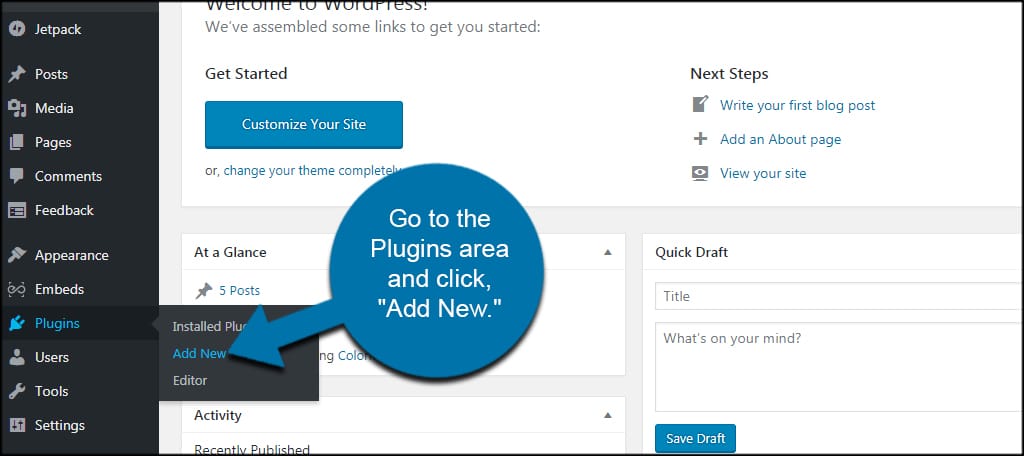
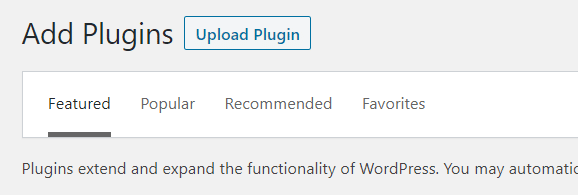
Upload the plugin’s zip file to WordPress using the Upload button on the Plugin installation page. Hit the “Activate” button when prompted.
Congratulations! You’ve now successfully installed and activated WP Rocket.
By just activating the plugin on your site, you should see an instant performance boost. To properly check the loading performance of your site, use GTmetrix.
WP Rocket User Interface
The moment you activate the plugin, it will implement the features listed above automatically. This means that as soon as the activation process is complete, your website will start loading faster. This is made clear in the interface.
As you install and activate the plugin, you should see WP Rocket option menu in the top menu bar inside WordPress. Hover on the menu bar and click Settings.
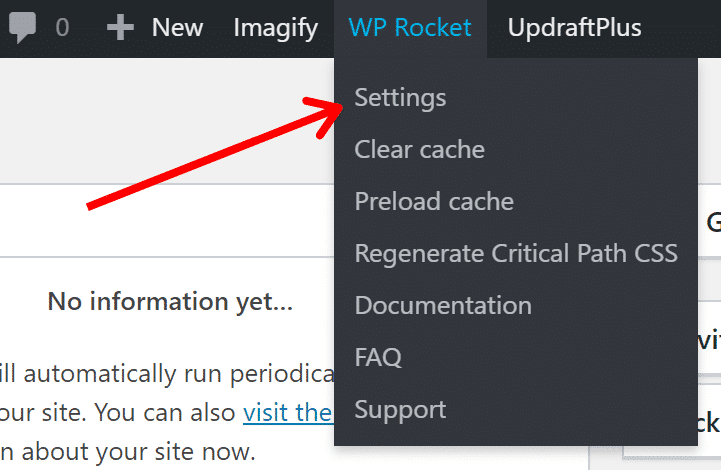
Or on the left sidebar menu, Click Settings>WP Rocket.
Now, you are on the plugin’s main dashboard, as shown in the image below.
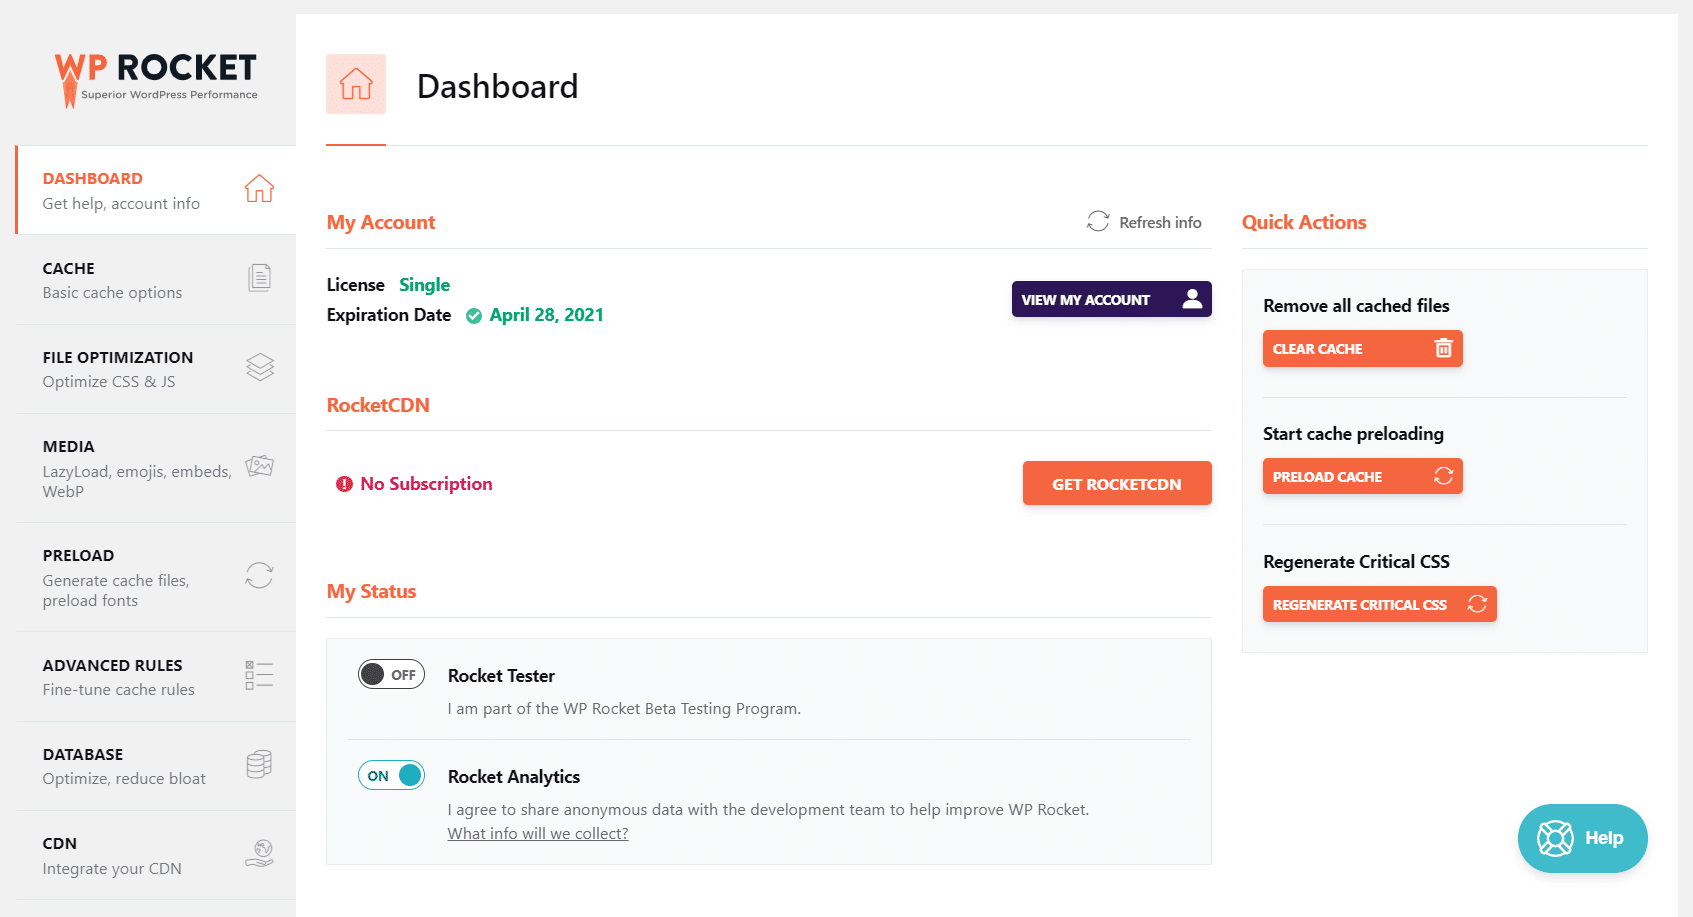
The dashboard will provide you with crucial information about your newly purchased plugin license. You also get to know how long your license stays active.
WP Rocket has its own CDN called Rocket CDN which you can opt for, right from the dashboard. By the way, I don’t recommend it. Because I know a much better CDN at a very cheaper price. The name of the CDN I use is BunnyCDN.
Why do I need CDN, you ask?
Using a CDN, you can speed up your site so much more. CDN or content delivery networks store your website’s static files (CSS, JS, images) at different geographical locations. As a result, the content can be delivered quickly when requested.
When your site loads on a browser, it loads all these static files too. So CDN delivers these files quickly resulting in faster loading speed.
Since your server is located at a specific geographical location, it’s hard to deliver content quickly if the website visitor is located by away. CDN serves the content from a server closer to the user. As a result, pages load at a faster speed.
In short, CDN helps by bringing the content closer to the website’s visitors so that they can be served quickly. When it comes to page performance, every second is important. That’s why it’s a smart choice to use a CDN.
But RocketCDN from WP Rocket costs so much more than BunnyCDN that I use. It provides the same level of quality at a much cheaper cost.
Let’s get back to the main topic.
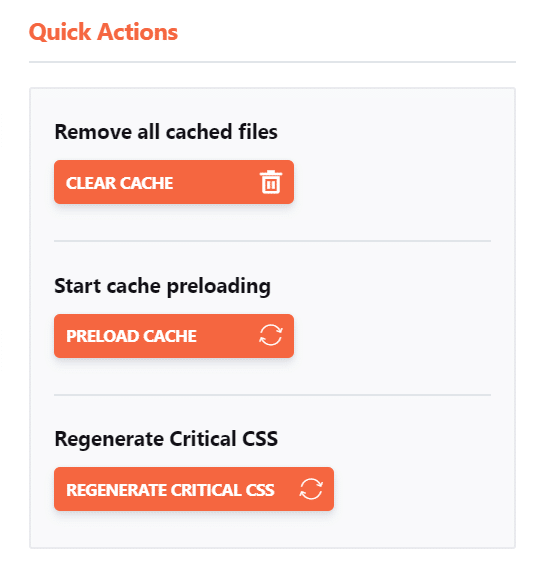
From the WP Rocket dashboard, it’s easy to find essential buttons to:
- Remove all cached files
- Start cache preloading
- Regenerate Critical CSS
You can do it from the quick actions menu on the right.
You also get a few getting started guides and the answers to the most frequently asked questions. You’ll however find the all advanced features and settings in the left sidebar perfectly organized under different categories. Quite user-friendly, right?
On the left menu, you can click “Cache” to configure it.
Let’s explore the settings one by one:
WP Rocket Cache Settings
Basic Cache is the first option you’ll be able to manage inside WP Rocket settings. From your dashboard, you can control the basic cache functions.
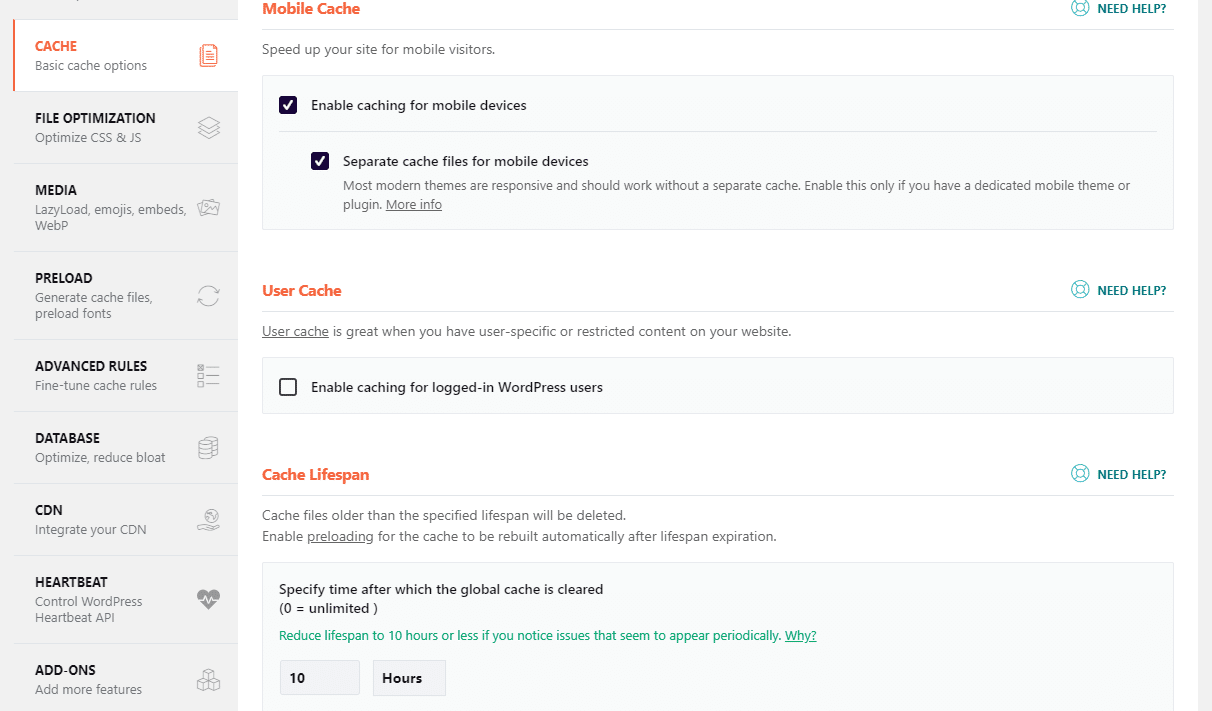
Here’s what you’ll be able to do:
- Enable mobile users from being able to see cached pages
- Enable logged-in users from being able to view cached pages
- Enable caching for HTTPS pages
- Specify time after which the global cache is cleared (default 10 hours)
As you click on “Cache”, you are on the “Cache” configuration page that will let you set up mobile cache, user cache, and cache lifespan.
Mobile Cache

First, you’ll find Enable Caching for Mobile Devices. Check this box to enable mobile caching for your website.
This option enables your mobile visitors to receive cache files, resulting in a faster loading speed for mobile users.
Nowadays, most modern WordPress themes are mobile responsive. So you don’t need separate cache files for mobile devices. But if you are using any mobile-specific theme, enable the option “Separate Cache Files for Mobile Devices“.
User Cache

User Cache is excellent when you have user-specific or restricted content on your website. Imagine that you’ve given access to a few more users who can log into your website and perform different tasks.
Usually, you want them to receive a version of your page, specific to that user, not the cached version specific to you. If you enable this option, all other users will receive their own user-specific cached version even if they are logged in.
Just leave it unchecked, if you are the only user.
Cache Lifespan
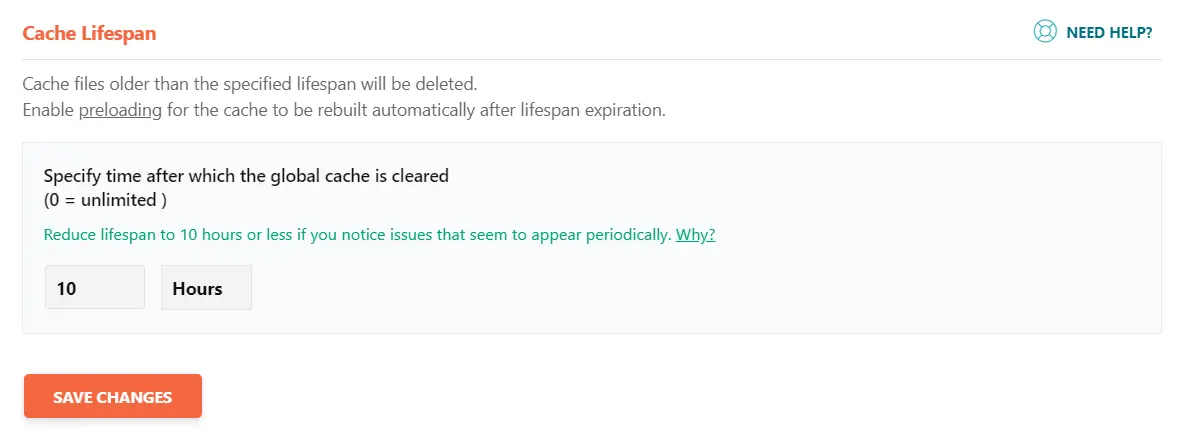
This is where you can specify the time after which you want the cache to be deleted and refreshed. A new version of the cache will be generated if Preloading is activated. (I’ll discuss later). Ask yourself the following question:
How frequently does your website get updated?
The answer will help you figure out the correct time to clear the global cache. If your site is updated more frequently use a smaller number.
Or just leave it as it is. It won’t make a difference in most cases.
WP Rocket File Optimization
On the interface, you will find the file optimization tab. From here you will be able to optimize, or more accurately minify CSS and JS files.
Minification is a simple process that is used to reduce the file size by removing unnecessary or redundant data like whitespace and comments.
And here’s the best part:
It doesn’t influence how the resource is used by the browser. So the result is same. But the file size is reduced. Pretty cool, isn’t it?
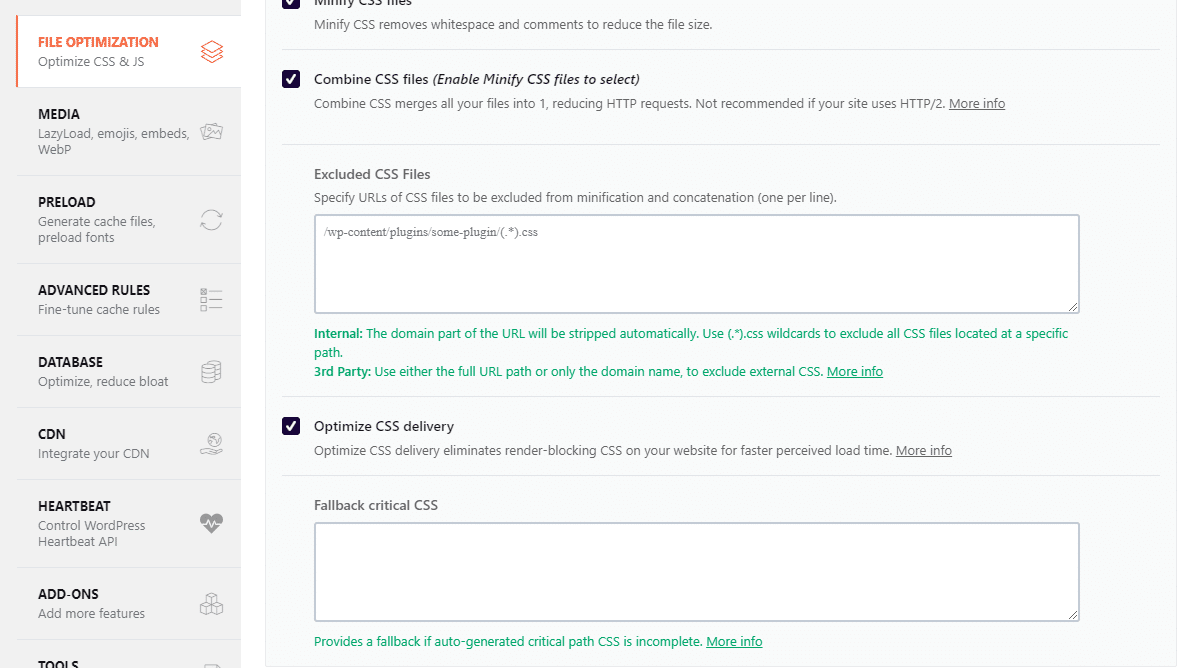
From the file optimization tab, here’s what you can do with CSS files:
- You can minify CSS files
- Combine CSS files to merge all your files into 1
- Exclude specific CSS files to be optimized if required
- Optimize CSS delivery to eliminate render-blocking CSS
- Provide a fallback if auto-generated critical path CSS is incomplete
See there’s a setting available for almost any kind of scenario.
But hey,
You’ll also be able to manage and control how your Javascript files are optimized. Let me quickly introduce you with the Javascript settings.
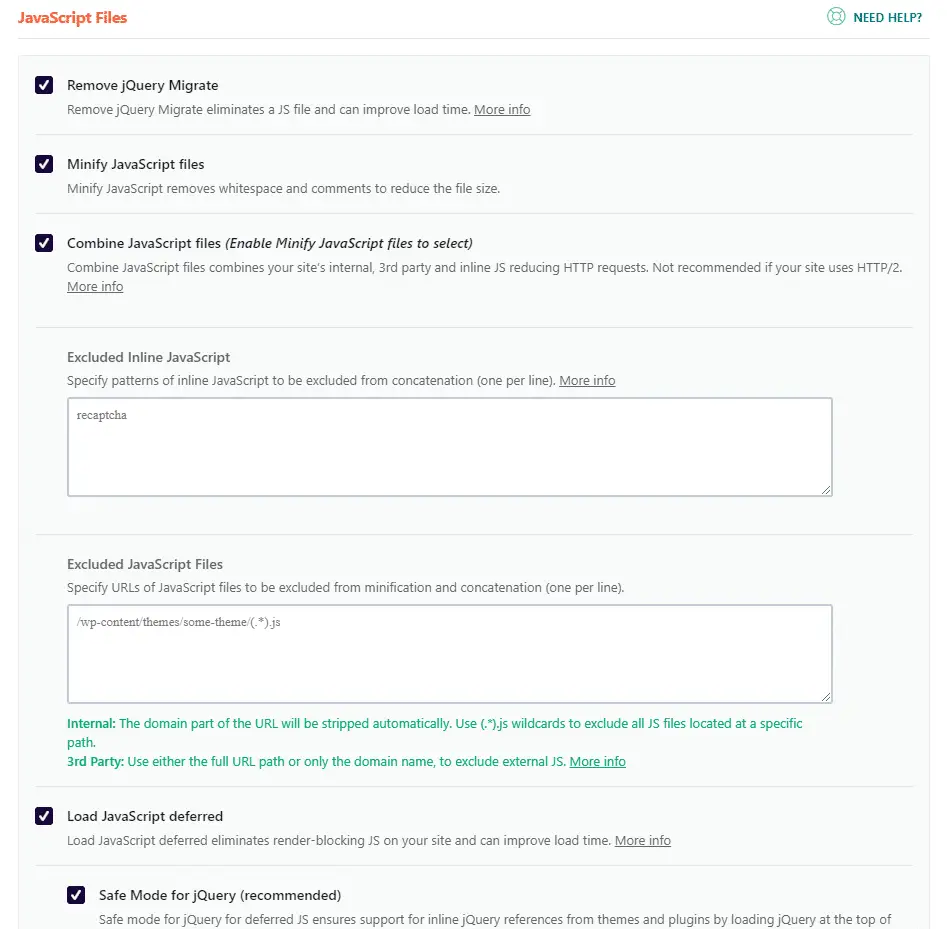
Here’s what you’ll able to do:
- Remove jQuery migrate
- Minify JavaScript files to reduce file sizes
- Combine Javascript files like site’s internal, 3rd party and inline JS
- Specify patterns of inline JavaScript to be excluded
- Specify URLs of JavaScript files to be excluded
- Load JavaScript deferred that eliminates render-blocking JS
- Enable Safe mode for jQuery for deferred JS
- Delay the loading of JavaScript files (an excellent feature of 3.7 update)
- Specify keywords to identify inline or JavaScript files to be delayed
It’s recommended to use as many of these settings as you possibly can. Some of them may however cause issues for your sites such as those for CSS or JS.
But understand this:
This is definitely not a downside of installing WP Rocket.
What makes WP Rocket stand out from other cache plugins is the clear instructions you get right in the interface, when you activate the settings.
This simply means that there is far less risk of issues.
Basically, the file optimization section will help you modify the settings related to optimizing your HTML, Google fonts, minify CSS files, and a lot more.
Let’s explore the settings and how to set it up.
First, you’ll find the basic settings.
Basic Settings

Enable both of the functions. Minify HTML minifies HTML by removing whitespace and comments to reduce the file size.
Optimizing Google Fonts will improve font performance.
It combines multiple font requests and reduces the number of HTTP results, resulting in faster loading speed.
CSS Files
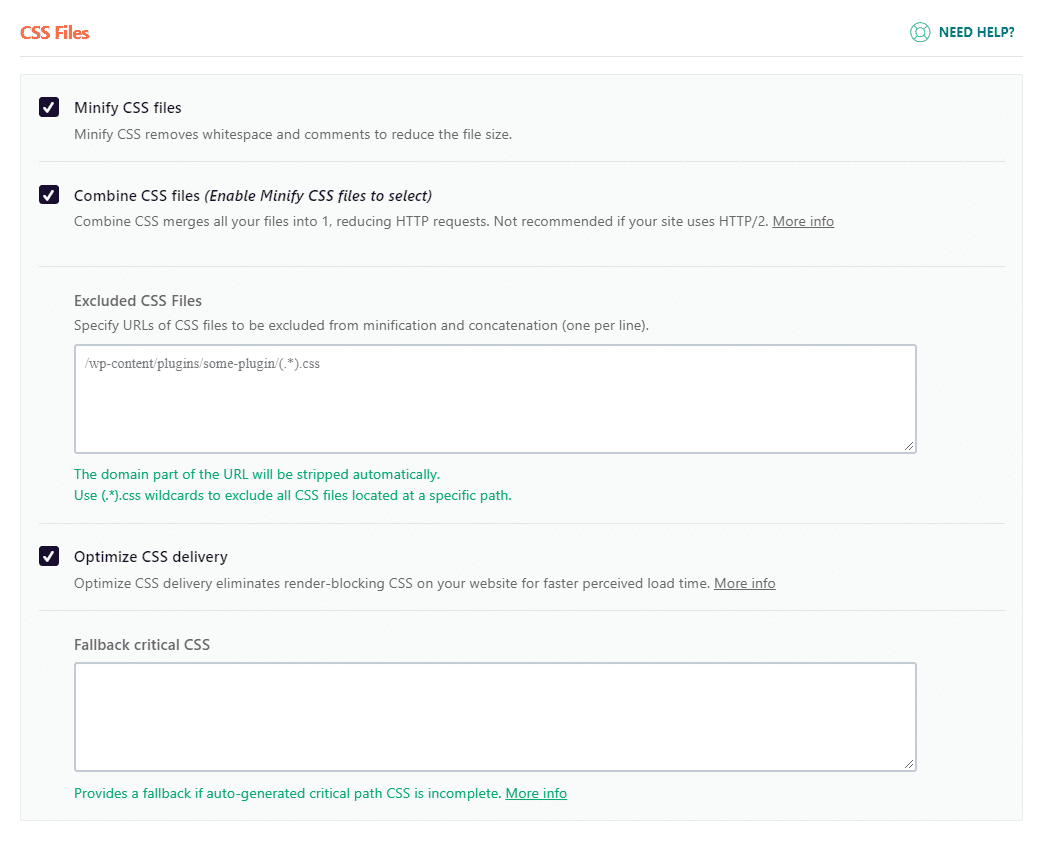
In this CSS section, you should enable all the following functions:
- Minify CSS files
- Combine CSS files
- Optimize CSS delivery
All these functions are pretty self-explanatory. Minify CSS Files will reduce the file size by removing whitespace and comments.
Once enabled, Combine CSS Files merges all files into 1 file. It reduces HTTP requests. However, this is not recommended if your site uses HTTP/2.
Please note that combining CSS files is a great way to reduce HTTP requests. But it may sometimes break your site. So if you find any errors on your website after having it activated, just deactivate it. Your site will get back to normal.
If your site design is breaking or it’s having an issue with a specific CSS file when optimized, you can exclude the file with Excluded CSS Files section.
Tick the checkbox Optimize CSS Delivery to eliminate render-blocking resources. It generates critical path CSS for your website in the background. As a result, CSS will be loaded asynchronously without render-blocking.
JavaScript Files

Remove jQuery Migrate prevents a specific jQuery migrate file from loading on your WordPress site. This is unnecessary in most cases.
jQuery File Location: wp-includes/js/jquery/jquery-migrate.min.js
This particular jQuery file is automatically loaded with every page load, even if it’s NOT required, in most cases. It only adds 1 extra HTTP request.
By enabling this option, you make sure that this file doesn’t load.
However, there are still some WordPress themes that use these old jQuery versions. To be sure it doesn’t break your site, check if you see any errors after activation.
If your theme is using this file, enabling this setting may cause issues. In most cases, modern WordPress themes don’t use this file. If your theme does, just deactivate it and your website will get back to normal.
Just as the CSS minification, Minify Javascript Files setting will minify Javascript files by removing whitespace and comments from your Javascript files.
Please understand that activating these settings may sometimes break your site. So I will suggest you enable each setting one by one and check if it’s causing issues with your site. In most cases, it won’t create problems. But if it does, just deactivate the setting. And things will get back to normal.
As the name suggests, Combine Javascript Files will combine all javascript files (internal, 3rd party, and inline JS) and reduce HTTP requests.
In the white boxes, you can specify any JS URLs that you want to be excluded.
Sometimes, a specific file only causes issues with your site. In this case, you can just exclude that particular file instead of deactivating Javascript optimization.
Enable Load Javascript Deferred to load all of your JS files and the ones minified by WP Rocket at the footer of your site.
Activating this setting may break your site if your site is using jQuery. In that case, tick the box that says Safe Mode for jQuery. It will exclude the jQuery file from being loaded at the footer. It’s safe to enable the function to stay safe, in case you have no idea if your website is using jQuery or not.
WP Rocket Media Options
WP Rocket’s Media section will help you manage and control how the media properties are used on your site.
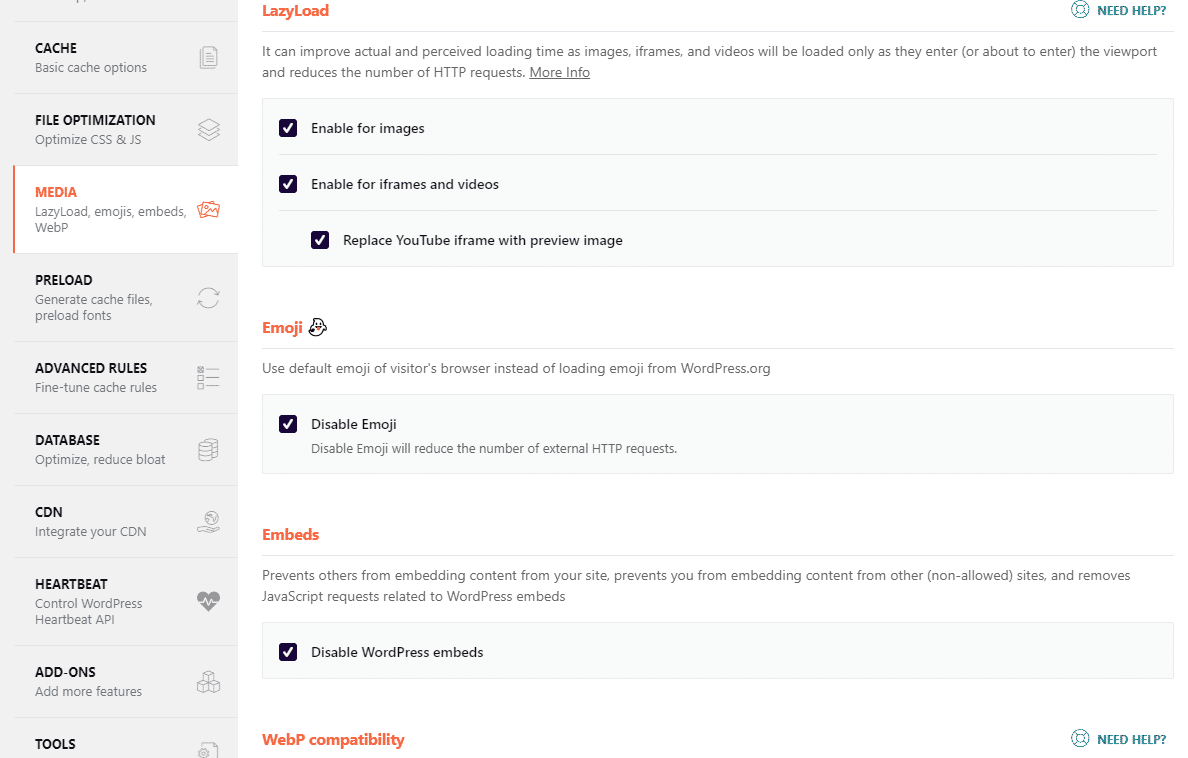
Undoubtedly, images are videos are essential for your site. It doesn’t only make it interesting to consume content on your site, it also affects conversions.
Unfortunately, images and videos usually take long time to load.
The solution?
Lazyload.
It’s a simple technique to delay the loading of images and videos until they are required by the users. That means every image under the viewable portion of the screen will not be loaded until the user scrolls down.
It immediately improves the loading speed. Pretty cool. Right?
With the help of WP Rocket, you can easily enable lazy loading for images and videos. Besides, you’ll also be able to disable emojis.
Here’s what you’ll be able to do:
- Enable LazyLoad for images
- Enable LazyLoad for videos
- Replace YouTube iframe with a preview image
- Disable emojis
- Disable WordPress embeds
- Enable Webp caching
In short, the media tab will allow you to do all sorts of things you’ll ever require to optimize your website’s media content for faster loading speed.
Let’s explore the settings one by one.
First, you’ll get the setting for LazyLoad.
LazyLoad
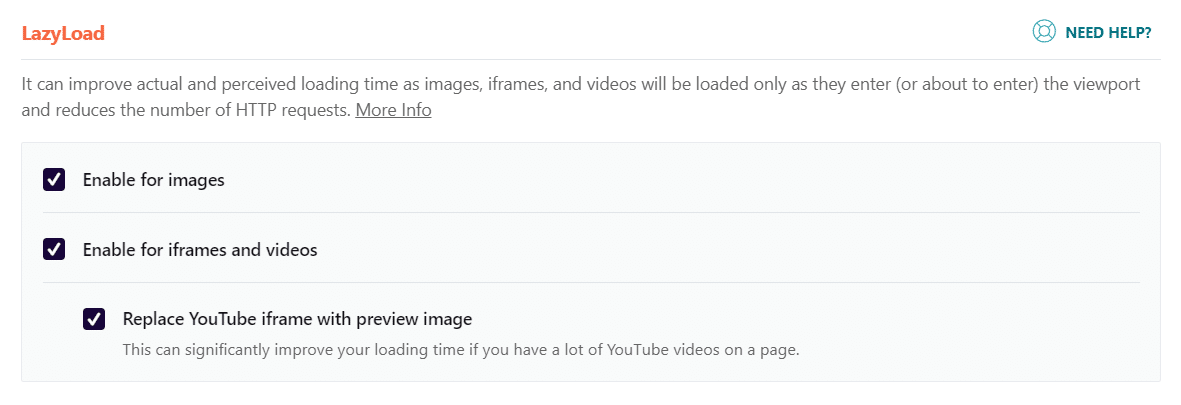
Lazy loading is an optimization technique that loads content only for the visible portion of the web page, instead of loading the entire webpage at one go.
Offscreen images are not really necessary. It’s required only when the user scrolls down the page and actually needs to see them. By enabling LazyLoad for Images, you prevent offscreen images from loading, resulting in much faster load time.
You should also Enable LazyLoad for Iframes and Videos and Replace the YouTube iframe with preview images.
If you have a lot of YouTube videos embedded on your pages, this will significantly improve the load time as your pages won’t be loading YouTube iframes anymore, but replace them with a preview image.
Emoji

You should disable emojis on your site. As a result, your site will use the default emojis of the visitors’ browser instead of pulling it from WordPress.org.
If you love emojis, that’s fine. If you are obsessed with page performance, it’s a smart choice to disable emojis on your site. Emojis require an extra script (wp-emoji Script) and CSS to be loaded which can unnecessarily slow your site.
Embeds

Disable WordPress Embeds will prevent others from embedding content from your site, prevent you from embedding content from other (non-whitelisted) sites, and remove JavaScript requests related to WordPress embeds.
Just tick the checkbox and the rest will be taken care of.
WebP Compatibility

WebP is a modern image format developed by Google.
WebP images files are smaller than other image file formats. But it still provides the same level of image quality.
This image format was developed to address the page loading issues. A webpage with lots of images often loads slowly. A small file format can help significantly.
WP Rocket doesn’t create WebP images. It doesn’t convert your existing image formats. There are many WordPress plugins that can do it. WP Rocket has its own image optimization plugin called Imagify (that I use) can convert your images.
If you use Imagify and enable it to use WebP file format, WP Rocket will automatically detect it on your site and serve WebP for your images.
WP Rocket Preload
First, I’ll start with what Preloading really is.
But before that, please understand this:
Your site only builds the cache for a page after someone has actually visited it; this is unless you have preloading activated on your site.
That simply means that after the cache lifespan expires, the first visitor won’t see the cached version as it still won’t have been built.
The solution?
Preload.
Preloading is what ensures that each and every one of your visitors will see the fast-loading cached page. It preloads the cache before someone visits the site.
In short, Preload doesn’t wait for someone to visit your site.
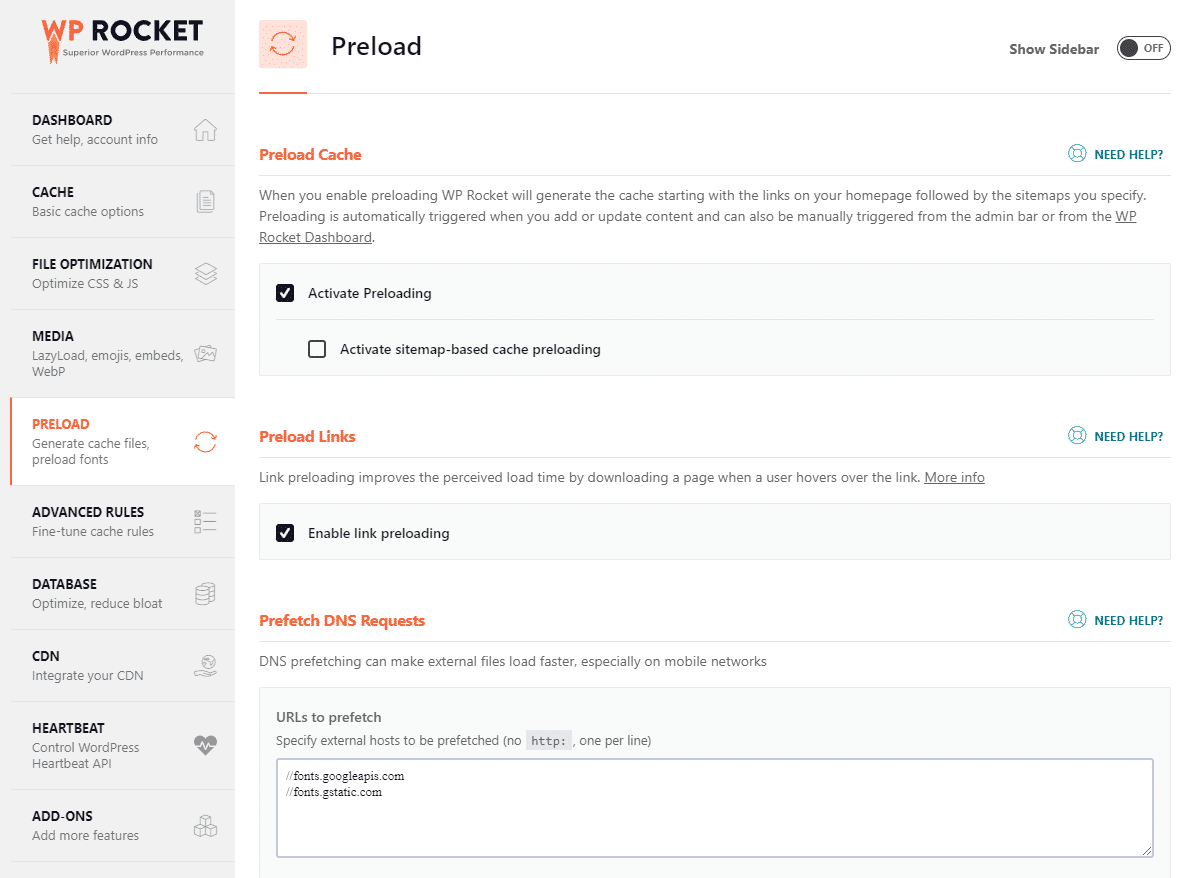
When you choose the WP Rocket cache plugin, you will have two different ways to choose from for preloading your cache. The two methods are as follows:
- Sitemap Preloading
- Preload Bot
Sitemap Preloading preloads your cache, based on all pages in your sitemap-XML file. It won’t cache newly edited posts or newly published content.
Preload bot works by automatically crawling URLs, directly after you edit or publish a post. This ensures that all new content is preloaded.
It can be resource-intensive sometimes.
If your site is on a weak server, you should use Sitemap Preloading. However, you can opt for neither, one, or indeed both of the methods.
Here’s what you’ll be able to do:
- Preload cache
- Activate sitemap-based cache preloading
- Enable link preloading when a user hovers over a link
- Prefetch DNS requests to make external files load faster
- Preload fonts used on your site. (fonts must be hosted on your domain)
Let’s explore the settings one by one.
First, you’ll find the Preload cache setting.
Preload Cache
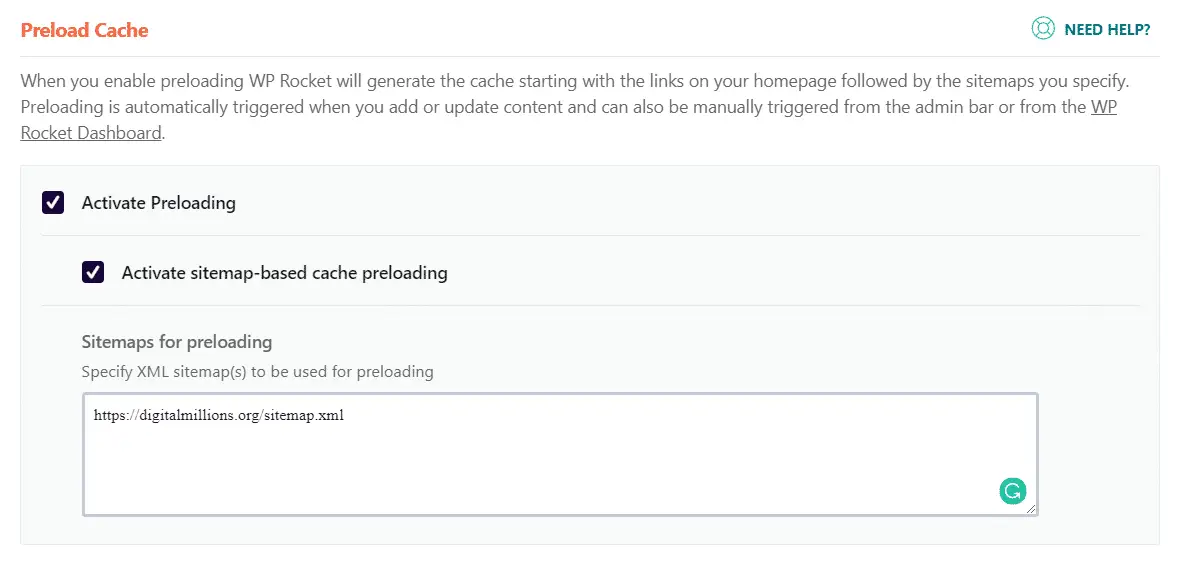
It’s highly recommended that you enable Preload Cache for your site. It generates the cache of all your pages beforehand so that when a page is requested by users, it can be served immediately from the cache.
It’s automatically triggered when you publish a new blog post, add new content, or update old content. You can manually trigger it if required.
Create an XML sitemap file by using a sitemap generator and upload it to your website’s root folder. Specify the file path in the white box. Now, WP Rocket can use this file to efficiently preload the entire cache.
Prefetch DNS Requests

If you use third party content like Google fonts or YouTube videos on your website, it’s a good idea to add the origin domains to the Prefetch DNS Requests box.
This way, the browser knows the domains may be required and performs the DNS lookups for links in the background. So when a user clicks on a link, they don’t have to wait for the DNS lookup to take place, as it already has.
This will significantly improve the user experience on your site.
Remember that you only need to DNS prefetch the external URL requests being made on your website. You can use any page load time testing website to figure out what external URLs are required for your site.
Preload Fonts
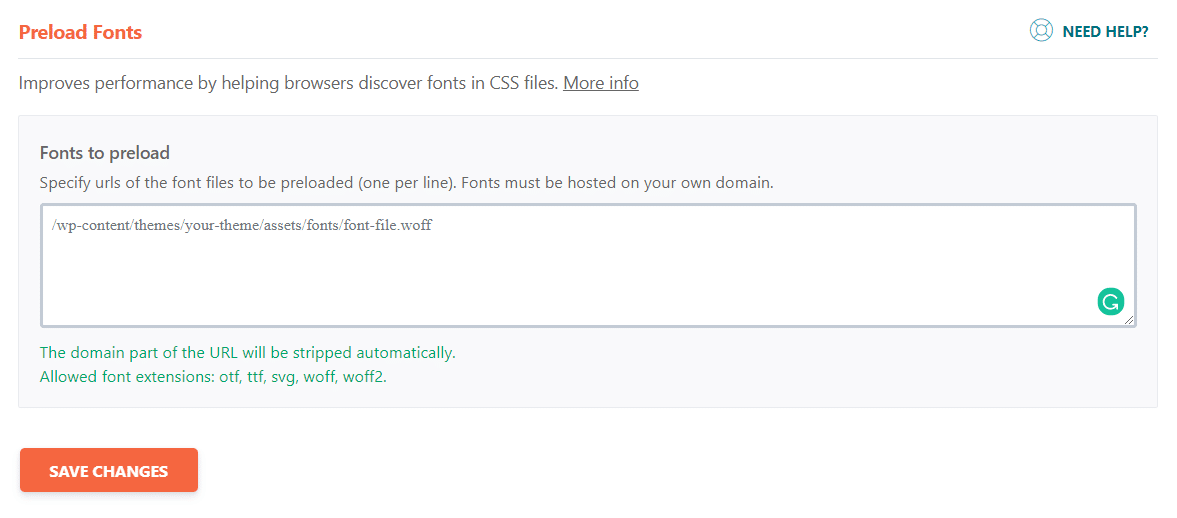
Just as Cache preloading, you can preload your fonts if the fonts are hosted on your website. It will signicantly improve the loading time of your site.
Make sure you specify the URLs of the font files to be preloaded.
WP Rocket Advanced Rules
As a beginner, this section may not be relevant to you.
However, you should take note of the Advanced Rules area. It gives you more control over the functioning of cache for specific cookies, user-agents, and URLs.
Here’s what you’ll be able to do:
- Specify URLs of pages or posts that should never be cached
- Specify certain user-agents and cookies to be excluded from caching
- Specify URLs to always be purged from the cache when updated
- Force caching for specific GET parameters
These features are more relevant for advanced users who are comfortable with investigating all the settings and features of WP Rocket.
However, you can do it too if you understand what you are doing.
This section will help you fine-tune the cache rules for your site. In most cases, you don’t need to touch the advanced rules.
If you are a beginner, you can just leave this section as it is. It won’t make any difference. This section doesn’t influence how fast or slow your site loads.
First, you’ll find Never Cache URL(s).
Never Cache URL(s).
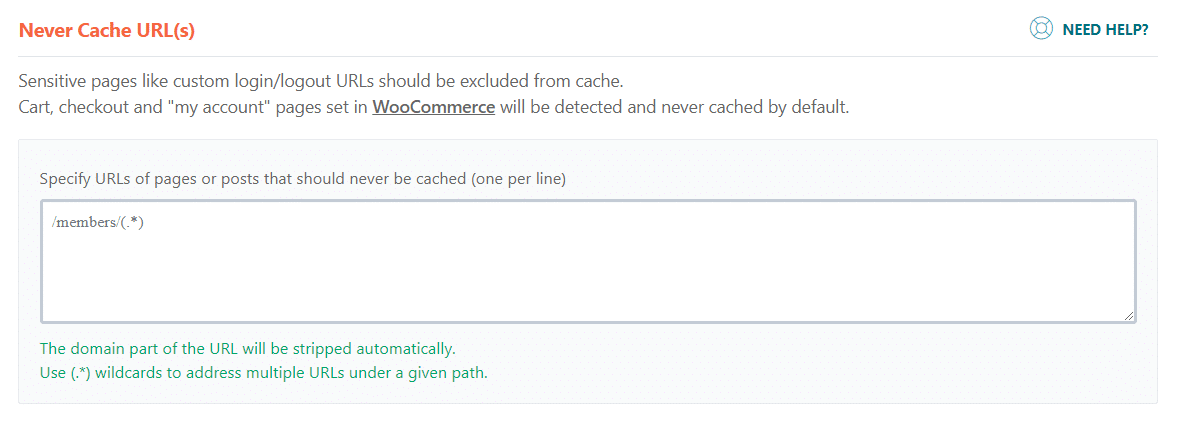
If you know there are specific pages on your site that should never be cached, specify the URLs in the appropriate box.
Pages like custom login/logout URLs, cart, check out, and account page should not be cached. Visitors should always get a fresh version of the webpage.
Make sure you specify these URLs in the white box.
In case you use the Woocommerce plugin, WP Rocket will automatically detect the required pages to be excluded from the cache.
So you don’t need to do anything.
Never Cache Cookies

As the name suggests, Never Cache Cookies enables you to specify the IDs of cookies that, when set in the visitor’s browser, should prevent a page from getting cached. Make sure you specify the IDs one per line.
Never Cache User Agent(s)

In the same way as Never Cache Cookies, you can specify user agent strings that should never see cached pages in the Never Cache User Agent(s) section.
Always Purge URL(s)
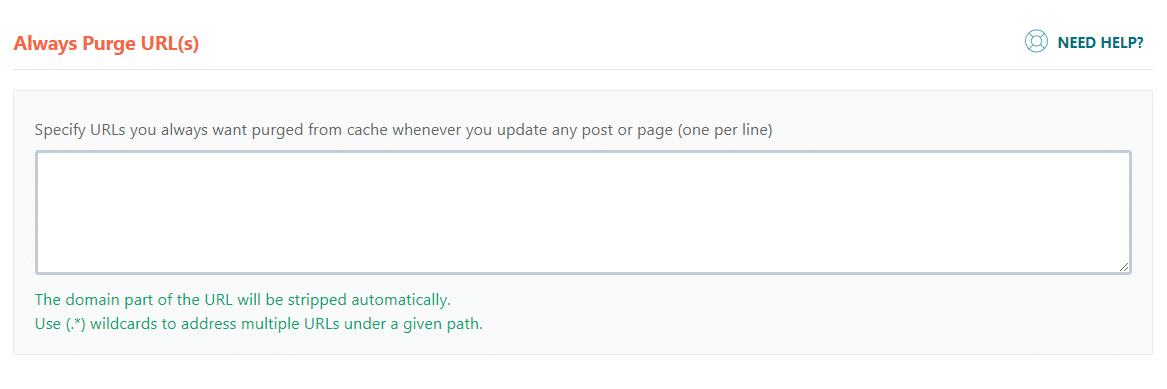
As the name suggests, here you can specify URLs you always want to be purged from the cache whenever you update any post or page.
Cache Query String(s)
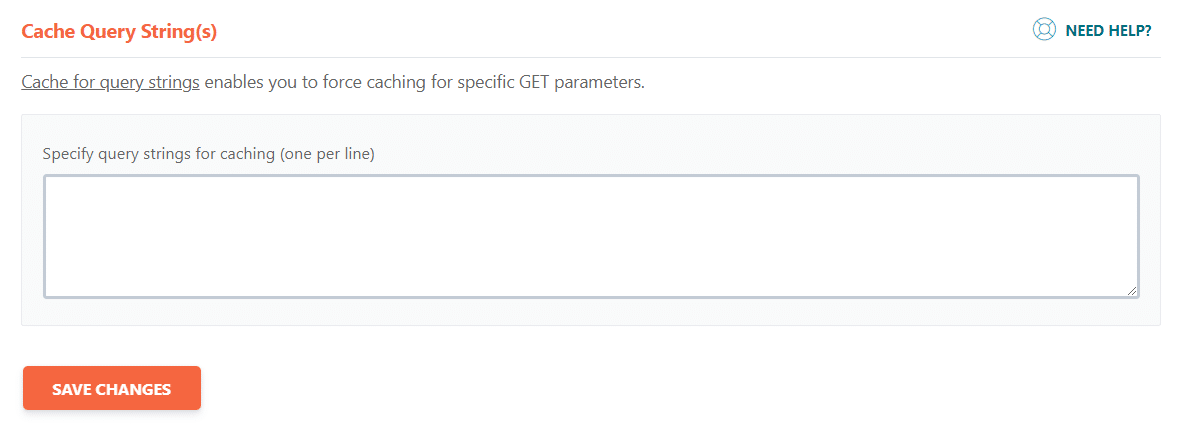
If your site has URLs with a question mark (?) followed by a parameter and a value, it’s called Query strings. By default, WP Rocket doesn’t create a cache for URLs with query strings. But if you want these pages to cached too, make sure that you specify each parameter in the text field (one per line).
WP Rocket Database Options
As your site ages, it will get clogged up. It’s a bit like us, or indeed any machine or instrument we use for extended periods of time.
The problem?
A database with lots of unwanted data will make your site load slowly.
And in terms of websites, what I’m talking about here is the junk in the form of transients, trashed comments, and revisions.
So it’s essential to clean up your database to ensure quicker access.
WP Rocket database section allows you to clean out all the junk that is unnecessarily clogging up your database with just one click.
Pretty user-friendly, right?
Here’s what you’ll be able to do using WP Rocket:
- Post revisions and drafts
- Spam and trashed comments
- Expired transients
- Reduces overhead of database tables
- Schedule automatic cleanup
This feature is something that you’ll find on many cache plugins. Database optimization is one of the most important features of these plugins.
It’s definitely worth a mention.
A huge database with lots of unnecessary data prevents the database to perform efficiently. Because it takes a long time for your server to retrieve information from your database tables. By removing unwanted data from your database, you reduce the size of your database and also improve its performance.
Let’s see what you can do in this section:
Post Cleanup
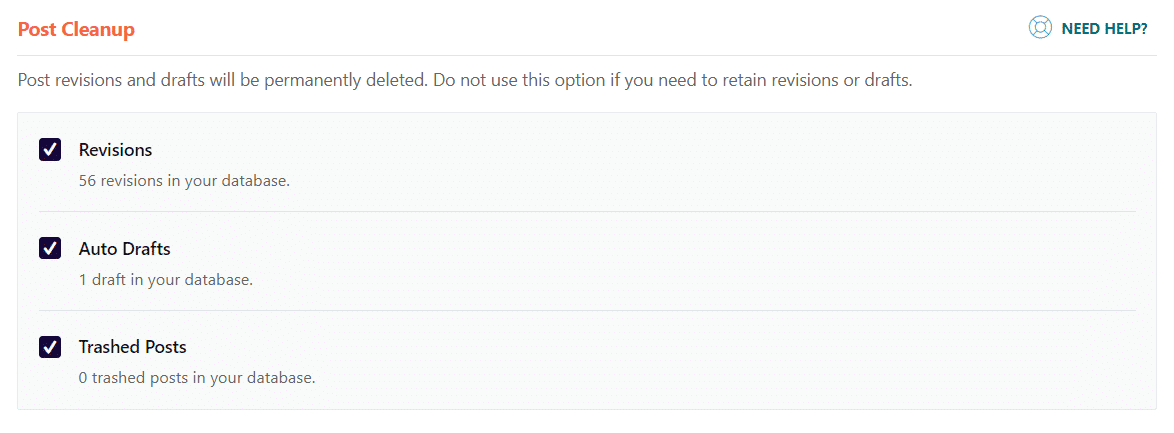
Under Post Cleanup, check all the boxes. This will remove the post revisions, auto drafts, and trashed posts from your database. You also can specify how often you want WP Rocket to perform this job under the Automatic Cleanup section.
Comments Cleanup, Transients Cleanup & Database Cleanup
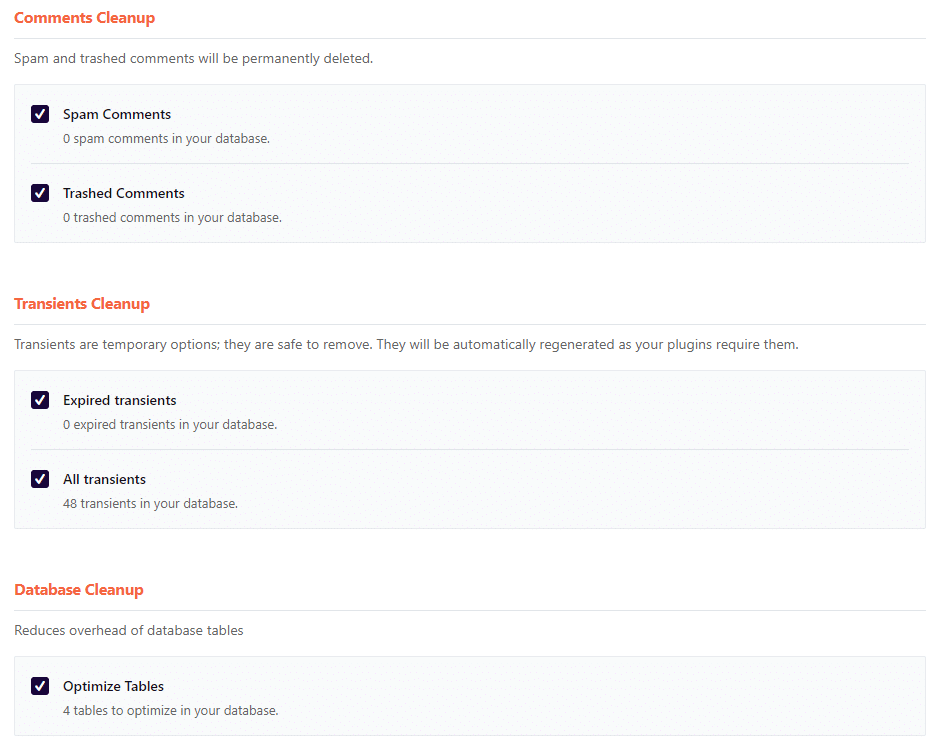
Check all the boxes under Comments Cleanup, Transients Cleanup as well as Database Cleanup. Selecting all these boxes will remove spam comments, trashed comments, and transients from your database.
By enabling Optimize Tables setting, your database will be optimized at regular intervals based on the time you select under the Automatic Cleanup section.
Automatic Cleanup
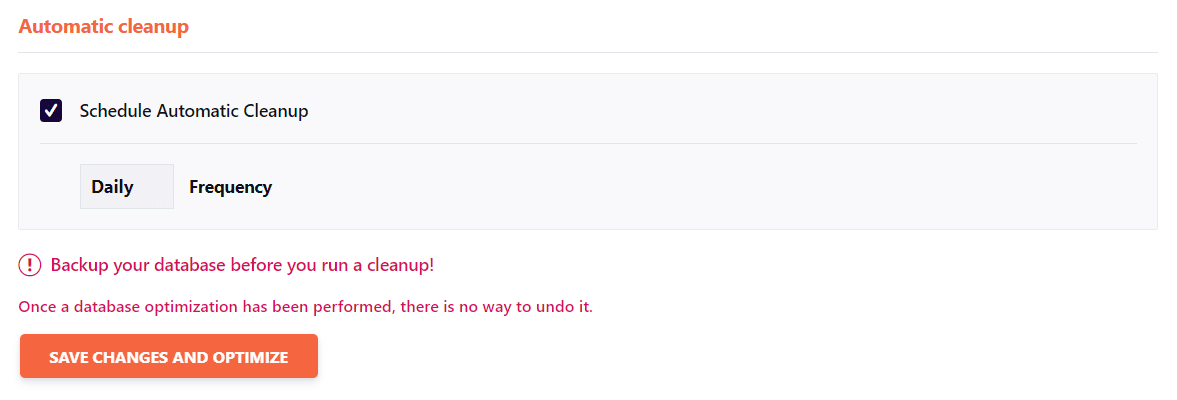
I prefer daily optimization. But if you don’t update your site frequently, there’s no need for daily optimization. You can choose daily, weekly or monthly frequency based on how often you update your website.
WP Rocket CDN
If you currently use a CDN in order to speed up global delivery of your website’s static contents, WP Rocket can help you do the following:
- Enable CDN (content delivery network) for your site
- Rewrite all of your URLS that you will use with your CDN
- Exclude specific files from your CDN
I personally like to use BunnyCDN. It’s the cheapest, yet extremely powerful CDN. You can get started with this with only $10 per year.
Yes! that’s right. It takes only $10 to get started with BunnyCDN.
You might want to check an awesome article, I’ve written to use BunnyCDN with WP Rocket here: How to Use BunnyCDN with WP Rocket (3 Easy Steps)?
But, here’s what you should know:
WP Rocket has its own high-performance Content Delivery Network (CDN) with unlimited bandwidth. It’s called RocketCDN.
Best reasons to choose RocketCDN:
- Best Automatic Configuration
- No need to struggle with complicated options
- Easy Integration with WP Rocket
- Powered by StackPath
- Unlimited bandwidth
- All CDN files automatically served over HTTPS
- SSL Traffic included
- All Global PoPs included
- Simple pricing plan – $7.99/month per domain
Now, here’s what I want you to know:
BunnyCDN, as already suggested, can do all these things at a much cheaper price. I was truly be surprised with the price when I first discovered them.
Here’s how much BunnyCDN will cost you:
- $0.01/GB – Europe & North America
- $0.03/GB – Asia & Oceania
- $0.045/GB – South America
- $0.06/GB – Africa
Clearly, you pay what you use. There is no monthly subscription fee. That means you can use it on small sites with less traffic without paying for highly expensive CDN services and still getting all the benefits CDN offers.
It can’t be better than this. And, here’s the best part:
You can try it free for 14 days.
The result?
Faster loading speed of your website’s static files like images and videos.
Truly speaking, I find WP Rocket’s RocketCDN is a little expensive for beginners. But, keep in mind, when it comes to cache plugin, WP Rocket is the best.
But that’s not all about CDN.
Specifically for Cloudflare users, you’ll also find that WP Rocket includes an add-on that is dedicated to Cloudflare users. It will allow you to get set up with and control aspects of your Cloudflare service easily from the interface.
In addition to this, you’ll be able to control the heartbeat activity of you site.
Let’s check out the settings one by one.
Under the CDN tab, you can specify the CNAME(s) of your selected CDN.
CDN
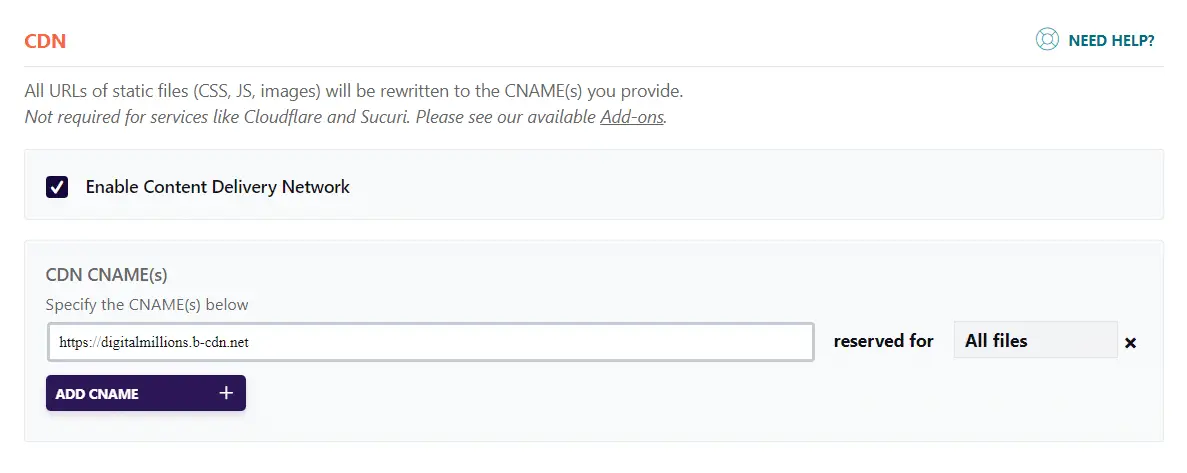
Leave it as it is if you don’t use any CDN for your website.
I personally like to use BunnyCDN. They have a free trial of 14 days. The minimum cost is only $1 per month. Yes, only $12 will set you up for a year.
Visit BunnyCDN now and sign up for a trial.
Exclude Files from CDN
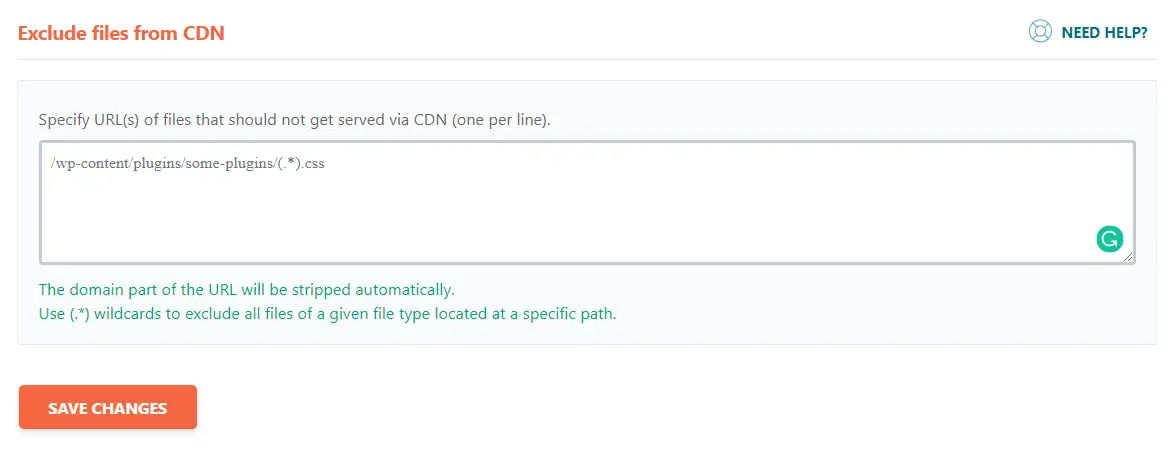
In the text field under Exclude Files from CDN, you can specify URLs of the files that should not be served via CDN.
As an example, I use the Onesignal web push notification service that doesn’t work properly if the required files are served by a CDN. For it to work efficiently, the files must be served from the primary domain.
So the files need to be excluded. I just specified the file URL to be excluded and everything is now working fine. Don’t forget to save all your changes.
WP Rocket Heartbeat Settings
Since WordPress version 3.6, WordPress introduced a new feature called Heartbeat. It provides a communication protocol between the browser and your server.
The heartbeat API helps you to sync all the data between the server and the WordPress dashboard. Without it activated, all the changes you make to your site, blog posts, or other content will be lost if you don’t save it manually.
But continuous triggers may not be required, in most cases. It is resource-intensive and can indirectly influence your website performance.
WP Rocket Heartbeat section helps you reduce this activity.
Heartbeat
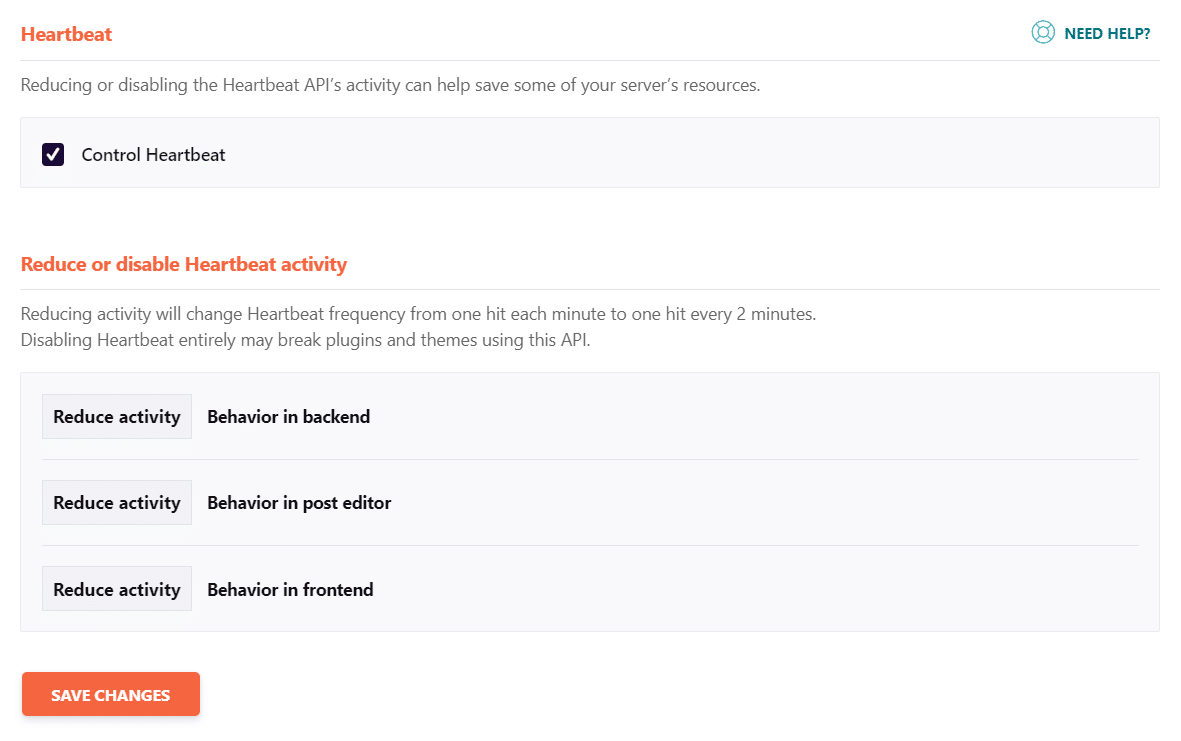
With the help of Heartbeat inside WP Rocket settings, you can easily control the frequency. It’s a smart choice to reduce the activity without completely disabling it.
There are many WordPress plugins and themes that use Heartbeat API. So deactivating it completely may cause issues on your site. Do it at your own risk.
WP Rocket Add-ons
Under the Add-ons tab, you find some extra functionalities that you can activate by just switching the option “on” to enable from this screen.
Improve browser caching for Google Analytics

Switch the option “on”.
Most sites use Google Analytics and you should too.
But the problem is Google Analytics tracking codes are hosted on Google servers. Because of their short expiration time, you’ll get browser caching warnings in many website performance testing tools.
Unfortunately, you cannot set an expiration time for files you don’t host. So there is only 1 solution. You have to host the files.
By enabling this setting, WP Rocket will host these Google scripts locally on your server. As a result, you’ll not get the warning anymore.
Improve browser caching for Facebook Pixel

Switch the option “on” only if you use Facebook pixel on your site.
Once enabled, WP Rocket will host Facebook Pixels locally on your server just as it does for Google Analytics scripts.
As a result, you won’t get browser caching-related warnings.
Varnish

Many web hosting companies (WP Engine, Flywheel, or Cloudways) use varnish cache. If you are not sure whether your web hosting uses it, just ask them.
Switch the option “on” only if you use the varnish cache.
Once activated, the varnish cache will be purged whenever WP Rocket clears its cache so that the content always stays up-to-date.
Cloudflare

Cloudflare Add-on can be activated if you want to use their free CDN service.
This is a highly popular web-infrastructure and website-security company that also provides CDN services. It’s completely free to use.
However, I don’t think their free CDN works as efficiently as other premium options. I strongly suggest you go for BunnyCDN, instead of using Cloudflare.
BunnyCDN only requires a minimum of $1 per month while Cloudflare premium plans will cost you as high as $20 per month.
Paying such a high price for CDN doesn’t make sense if you run a small site that receives only a few thousand visitors per month.
But if you still want to go with Cloudflare, follow the instructions:
At first, visit Cloudflare and sign up for a free account. Follow all the necessary steps to successfully add your website to Cloudflare.
Once Cloudflare starts working for your site, get back to your WP Rocket dashboard.
Now, switch on the Cloudflare add-on. You’ll be asked to provide the global API key and Zone ID that you can find inside your Cloudflare account.

Provide the appropriate credentials in the required field.
Under Cloudflare Settings, choose Optimal Settings. It will automatically enhance your Cloudflare configuration for speed, performance grade, and compatibility.
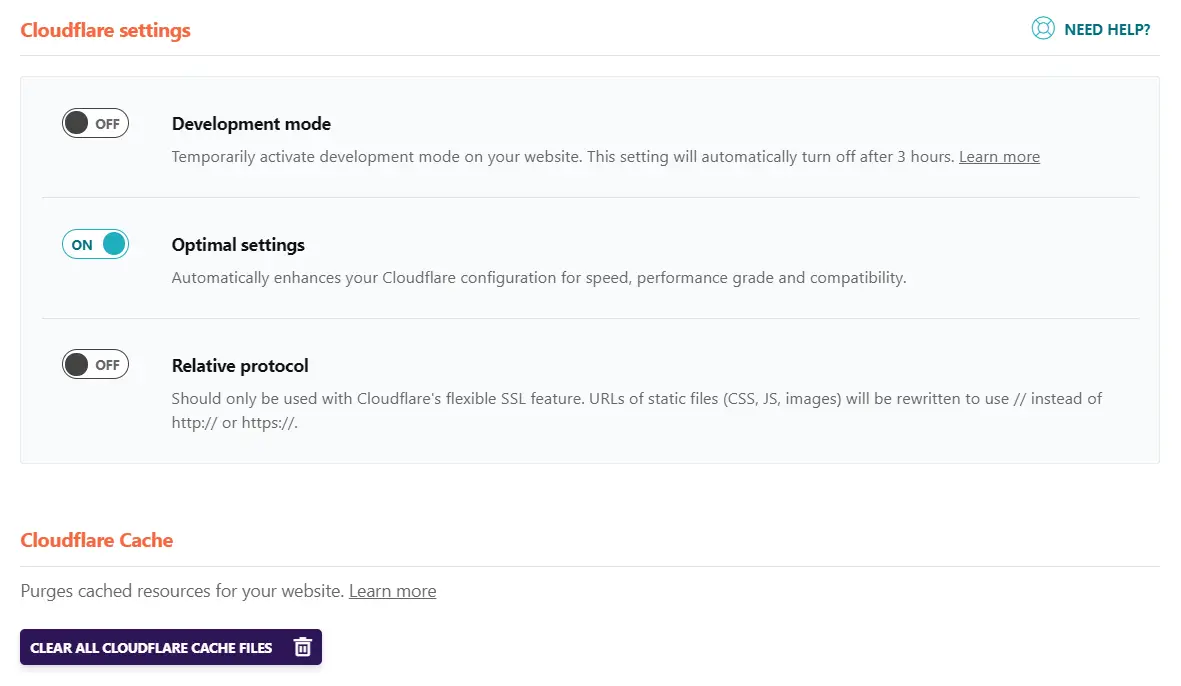
From here, you can also purge all Cloudflare cache files.
Congratulations! you’ve now successfully added Cloudflare with WP Rocket.
Sucuri

Switch the option “on” only if you use Sucuri Website Firewall with their caching enabled for your site. Turning on this add-on will enable WP Rocket to clear Sucuri cache whenever WP Rocket’s cache is deleted.
Once enabled, it will ask for your Sucuri credentials (firewall API key).
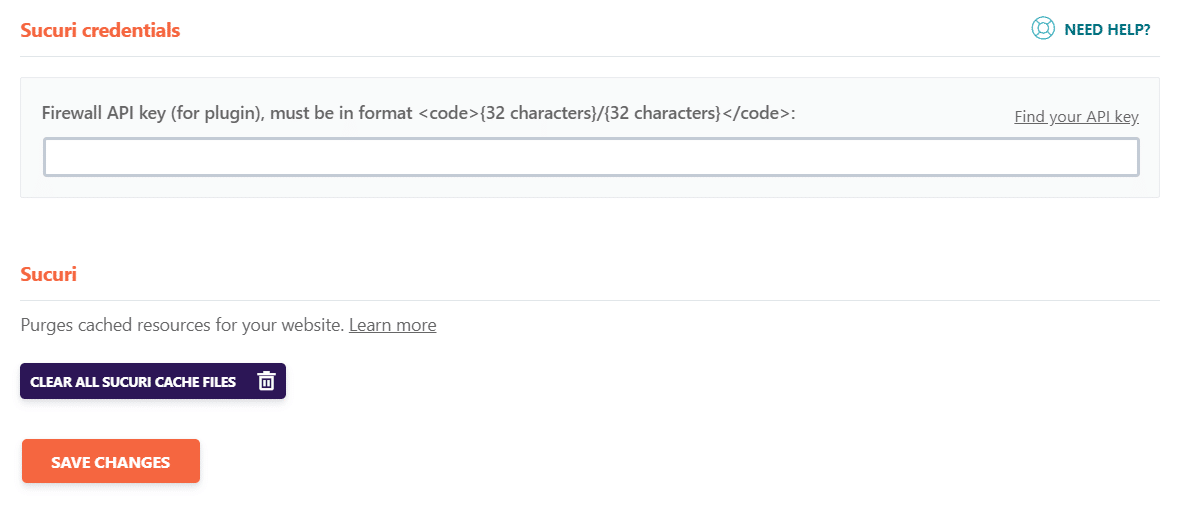
You can also manually clear all Sucuri Cache files by hitting the clear button.
Now, provide the appropriate credentials and save your changes.
WP Rocket Tools Section
The tools section will help you download a backup file for your settings, import settings from a file in your computer, and roll back to any previous version in case the present version is causing issues with your site.
For your convenience, I am sharing my WP Rocket settings file that you can download by clicking on this link.
So just visit the WP Rocket site and get an account. Download the plugin and activate it on your site. Import my WP Rocket setting file from the Tools tab.
Save your changes and enjoy improved performance on your site.
WP Rocket Pricing Review
WP Rocket currently offers three different pricing plans, depending on the number of websites you want to use the plugin on.
- Single: $49 for 1 website
- Plus: $99 for 3 websites
- Infinite: $249 for unlimited websites
This is a premium plugin.
So obviously, you’ll need to pay to experience the benefits it offers.
| $49 | 1 website | 1 year of support & updates |
| $99 | 3 websites | 1 year of support & updates |
| $249 | Unlimited sites | 1 year of support & updates |
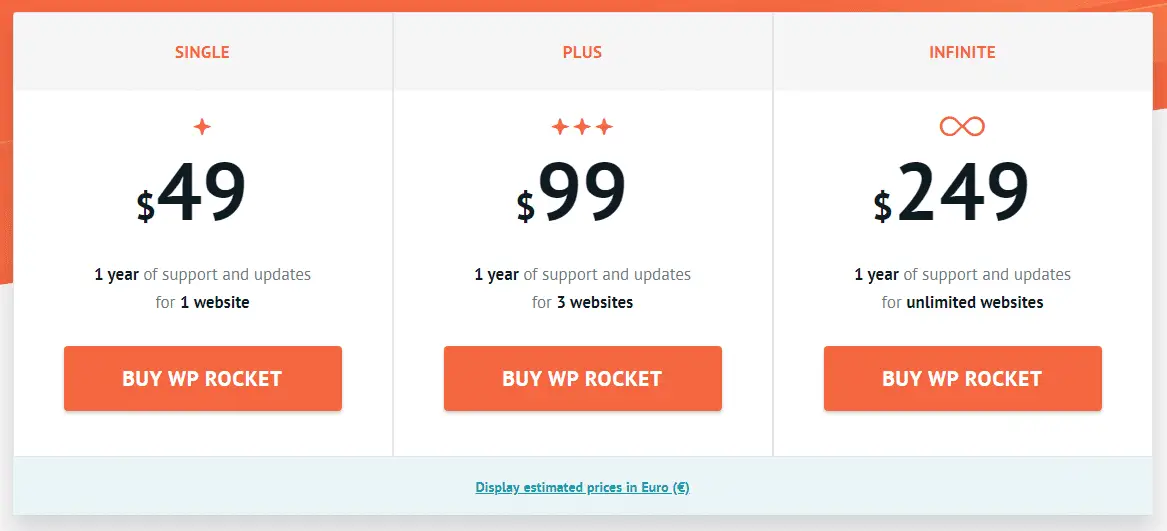
Clearly, WP Rocket doesn’t cost a whole lot of money.
In fact, it’s affordable for most people. Anyone looking for speed and performance should be able to shell out what WP Rocket is asking for.
And, here’s the best part that makes your purchase risk-free:
- You get a 14-day money-back guarantee (I don’t think it’ll be needed)
- You’ll be getting a 30% automatic discount on all your renewals
- WP Rocket always offers better discounts for existing clients
It’s the ultimate shortcut for a fast-loading website at a very affordable price. So do you want that or you want to continue struggling for loading speed?
The decision is yours.
WP Rocket Free Trial
WP Rocket doesn’t offer a free trial.
It can be disappointing for some people, I understand. But what makes WP Rocket more attractive is the 14-day money-back guarantee.
Although WP Rocket doesn’t offer a free trial, it does come with a 14-day money-back guarantee. This makes it essentially a risk-free purchase, as you can try out the plugin and get your money back if you’re not happy with it. This is a great way to try the plugin out without any commitment.
However, I personally feel you won’t need a refund. WP Rocket is a fantastic plugin and you won’t regret trying it out for your website.
WP Rocket Documentation & Support
WP Rocket has great documentation on their website to help users set up the plugin and also helpful hands-on tutorials. It also offers great customer support.
Well, most of the questions are already answered in their extensive knowledge base. You can easily find the answers you need there. Since the plugin is there for years, almost all kinds of issues are already discussed in the documentation.
But if something doesn’t make sense or goes wrong you can contact their support team. They are very helpful, and you can expect a response within 24 hours.
The team at WP Rocket is knowledgeable and friendly, so if you ever have any questions or need help, you can definitely reach out to them.
The best part is that you can even reach it if you are unable to configure the plugin and get the expected results. They’ll give you personal attention and help you out in the best possible way. By following their suggestions which are tailor-made for your website, you can speed up your website in the best possible way.
What is WP Rocket Missing?
Honestly, WP Rocket doesn’t have any major drawbacks. The plugin does a great job of caching and optimizing your website to improve its performance.
But, something I personally feel is missing, is a free version of the plugin with limited features. This would allow people to get a feel for the plugin and decide whether it’s worth investing in the premium version or not.
I understand that WP Rocket offers great features at an affordable price which is commendable but having a free version would be more accessible for people just starting out. WP Rocket team could have a free version with limited features so that people can try it out before investing in the premium version.
That’s the only con I could think of!
WP Rocket Renewal Discount
WP Rocket offers a 30% discount on renewals for all its customers. This means that if you’re already using WP Rocket and want to renew your subscription, you can get a 30% discount on the renewal fee.
This is great news for all those who are already using the plugin, as they can get a great deal and save more money on their next subscription.
WP Rocket vs Free Cache plugins
WP Rocket is a great plugin and it beats many of the free cache plugins when it comes to features. It offers more features, better performance, and great support.
Free cache plugins are great, but they don’t offer the same features as WP Rocket. You will need to install multiple plugins to get similar results, which will increase the risk of security issues and bloat your site with unnecessary data.
If you need an easy way to manage your website’s caching and optimization, WP Rocket is the way to go. It offers great features at an affordable price and comes with a money-back guarantee, so you have nothing to lose. This makes WP Rocket a great option for any website. So go ahead and give it a try!
Is WP Rocket Worth Paying for?
Yes, WP Rocket is worth paying for. It offers excellent features, reliable performance, and a 14-day money-back guarantee. The team also provides excellent customer support which means you can always count on them for help.
The plugin is very easy to use and comes at an affordable price, so anyone can get the best out of their website without breaking the bank.
All in all, WP Rocket is a great plugin and it makes optimizing your site easier. I cannot recommend it enough, so go ahead and give it a try!
You won’t be disappointed with this plugin.
But right now, I’m probably not the right person to answer this question (But you are). Because you know what? I’ve already answered it many times.
Having said this, if you buy WP Rocket, you wouldn’t need heaps of experience to really benefit from it. Its basic features are all activated by default.
Just use it and experience it yourself.
And, you know what? It’s enough to make you jump out of your chair just by looking at the improvement in your loading speed. 🙂
No really, that’s what I mean.
But at the same time, here’s something you should be aware of:
You could indeed combine a few different free cache plugins such as Autoptimize and Cache Enabler and get similar results, free of charge.
Here are some 2 more free plugins worth your consideration:
- W3 Total Cache
- WP Super Cache
But here’s the problem?
Lots of plugins used for the same purpose usually create problems. It’s usually an invitation to various problems. They only clog up your database and hurt your site more than helping you, in most of the cases.
And do you know what’s more frightening?
You have nobody of ask for help if you mess up with something.
So, it really all depends on if you have the money to spend, and if you have the time to manually configure and combine all the different plugins properly.
WP Rocket certainly does have some great features and offers high-quality technical support that you wouldn’t find with free plugins.
And, it starts at only $49 for 1 site.
So I really think that it is well worth the money spent. It simplifies your life, and it will certainly reduce the loading time of your website’s page.
I guess that’s what you want, right?
Frequently Asked Questions
Does WP Rocket offer a lifetime license?
No, WP Rocket does not offer a lifetime license. However, they do offer an annual subscription with a 30% discount on renewals.
Does WP Rocket work with all WordPress themes?
Yes, WP Rocket is compatible with all WordPress themes. It should not usually create any issues. However, if you’re having any issues related to compatibility, you can always reach out to their support team for help.
Does WP Rocket offer a free trial?
No, WP Rocket does not offer a free trial.
However, they do have a 14-day money-back guarantee policy so you can try it out and get your money back if you’re not satisfied.
Does WP Rocket increase page speed?
Yes, WP Rocket helps to improve your website’s page load speed. It does this by caching your pages, minifying and optimizing files, deferring JavaScript, and more. So if you want to improve your website’s speed, WP Rocket is a great option.
Is WP Rocket better than free cache plugins?
Yes, WP Rocket is much better than free cache plugins.
Free plugins don’t offer the same features as WP Rocket and you’ll need to install multiple plugins to get similar results. Also, there is a risk of security issues and bloating your site with unnecessary data. So if you’re looking for an easy way to manage caching and speed optimization, WP Rocket is the way to go.
How WP Rocket Breaks Site?
In rare situations, WP Rocket can interfere with a WordPress website, breaking its layout or making some of its functions unusable. This could happen if the plugin is incorrectly set up or if there are issues with the other WordPress plugins or themes.
Plus, some users have experienced problems with the plugin’s concatenation and minification functions causing problems with specific scripts or styles.
Most of such issues can easily be avoided by following the instructions given by developer, verifying the plugin’s settings before applying them to a live website, and troubleshooting any issues that may arise. It’s also recommended to clear the cache after making any changes to the site and to maintain the WordPress version and plugins up to date.
It’s also recommended to get in touch with the WP Rocket support staff if you’re having issues with the plugin and are unable to resolve them.
Is WP Rocket easy to set up?
Yes, WP Rocket is very easy to set up. It has a straightforward user interface and all the settings are clearly labeled. Plus, their support team is always ready to help if you have any questions or issues. So go ahead and give it a try!
Is WP Rocket worth the price?
Yes, WP Rocket is definitely worth the price.
It offers great features that improve your website’s performance, and it has a money-back guarantee so you can try it out risk-free. Plus, they offer a 30% discount on renewals so you can save even more money. So if you’re looking for an easy way to manage caching and optimization, WP Rocket is definitely worth the price.
Final Words and Thoughts
This premium plugin is branded as a WordPress caching plugin. But truly speaking it does so much more than what most cache plugins do.
It performs many different small optimizations to speed up your site as much as possible. Why not? That’s the purpose of this plugin.
Please note that there are free plugins available to get the desired results. But none of them come close to what WP Rocket can do for your site. And, you’ll need to download more than one plugin while WP Rocket performs all the optimizations on its own. You can get up and running within just a few minutes.
What do I mean by all these? It’s a good decision to go for it.
Let’s check out what people are saying about this plugin on TrustPilot. It has received a whopping 4.9 rating based on 800+ reviews, as I’m writing this.

As you can see in the screenshot above, it has got excellent 4.9 rating.
The purpose of writing this article is to help you take advantage of this excellent plugin. I can see the benefit myself. It’s your time.
While cache plugins do a great job to improve page loading time, a great CDN can additionally boost the loading speed by over 50%.
CDN or a content delivery network stores the static files of your blog (or website), like images, CSS, Javascript in multiple geographical locations. It helps to minimize the distance between the visitors and your website’s server. As a result, it takes less time to deliver your site content when requested by a user.
By storing your image files, CSS, or other static files in a CDN, you can deliver these files to your visitors quicker. I use BunnyCDN. It’s super cheap when compared to most other CDN providers, starting at only $0.010/GB.
You also get a 14-days free trial. No credit card is required.
Get Free 14-Days Trial at BunnyCDN →
With the help of WP Rocket and BunnyCDN, I’ve been able to achieve excellent page loading performance on this site.
That’s why I strongly recommend you take advantage of both of these tools. And, I promise you’ll never face loading issues again.
So here’s my last question:
Did you like the information I shared on this page?
If yes, please share this article to help me spread the word? By doing this, you don’t only help people who may need this information, but also give meaning to the endless hours I spend to create these useful articles for you.
After all, that’s how we grow, by helping each other, right?


