BunnyCDN is one of the fastest CDN services that come at a very cheap price. It’s a Gift from the Gods for anyone who wants to use CDN but doesn’t have a high budget to spend on CDN services.
I have been using BunnyCDN for years. I believe it’s the best choice for anyone who wants to start a blog (or website) on a budget and needs a quality CDN.
I use BunnyCDN with WP Rocket to optimize the page loading speed.
In this article, you’ll learn how to properly set up BunnyCDN with WP Rocket plugin with these easy-to-follow step-by-step instructions.
Did you notice how fast, this site is loading?
With the help of WP Rocket and BunnyCDN, I’ve been able to achieve a loading time of as low as 1.2 seconds for one of my most image-heavy pages.
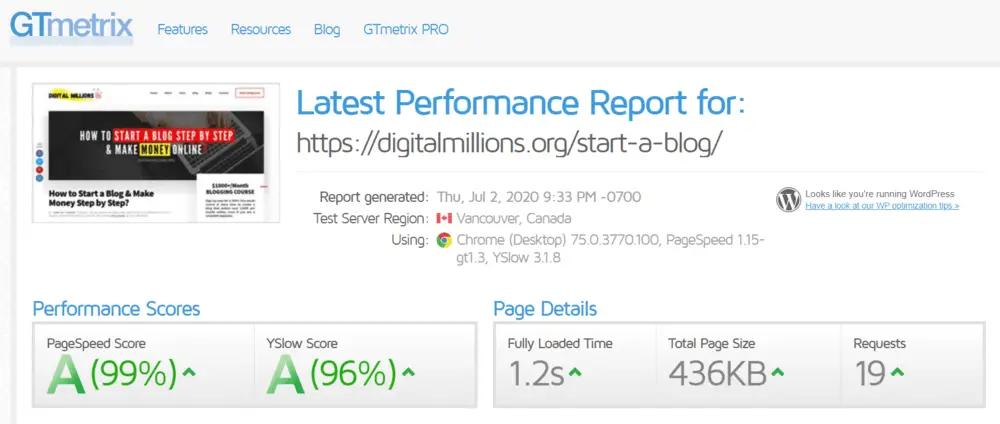
In fact, most of my pages load within 1.5 seconds.
I’m obsessed with page loading performance for my site and both of these tools together have helped me exceptional results.
Yes, that’s what WP Rocket and BunnyCDN can do for you too. In this article, you will learn how to set up BunnyCDN along with WP Rocket.
Setting up BunnyCDN services with WP Rocket is super easy. It will just take a few minutes of your time and you are good to go.
This is going to be a simple 5-step process.
Let’s get started:
WP Rocket is not a free plugin that you can download from inside WordPress. This is a premium plugin. So obviously, you’ll need to buy it before you can use it.
So if you haven’t already purchased it, do it first.
The regular cost of WP Rocket is $49.
Step 1: Buy WP Rocket
First, visit WP Rocket official website.
Visit the WP Rocket pricing page.
The cheapest plan will cost you $49 for a single site.
The costs are as follows:
| $49 | 1 website | 1 year of support and updates |
| $99 | 3 websites | 1 year of support and updates |
| $249 | Unlimited sites | 1 year of support and updates |
Select the plan that’s suitable for you. Click the buy button and make the required payment to successfully place your order.
Once your payment is completed, you’ll receive a confirmation email with your download link and your new WP Rocket account information.
Log into your WP Rocket account.
And, Hit the download button to save the plugin’s zip file to your computer.
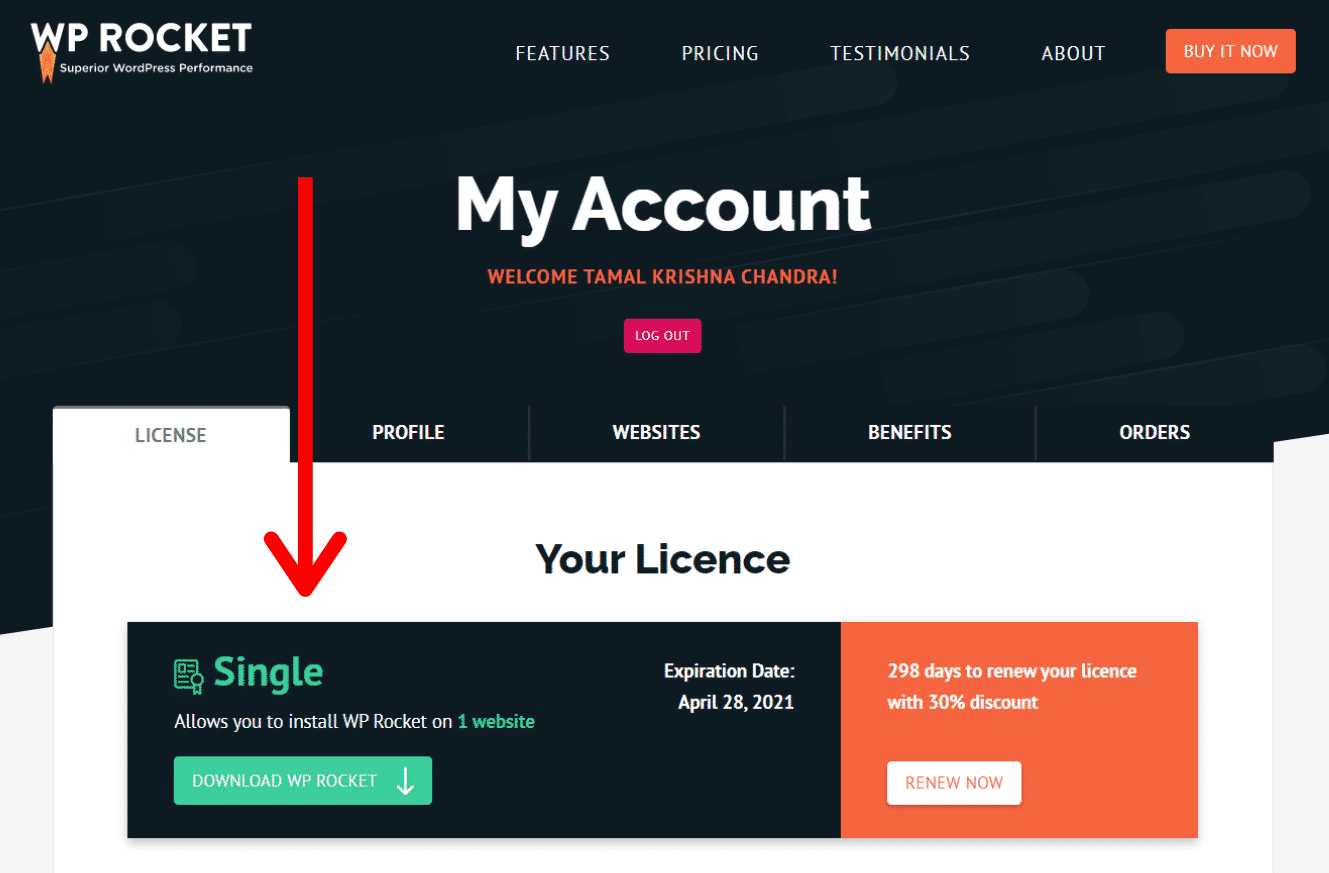
Congratulations! You’ve now successfully purchased the WP Rocket plugin. In the next section, you’ll learn how to install and activate the plugin inside WordPress.
Step 2: Install and Activate WP Rocket
Now, log into your WordPress dashboard. And click Plugin>Add New.
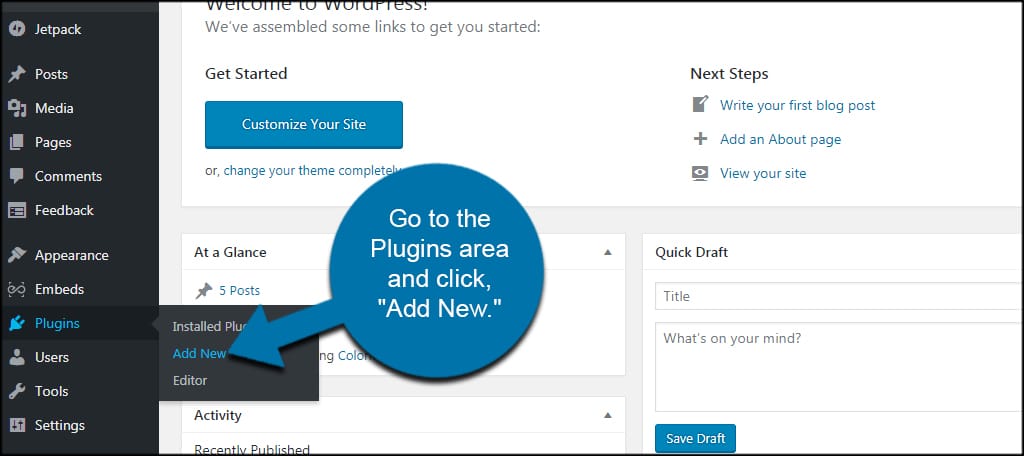
Once clicked, you’ll be taken to the plugin uploading page. Hit the Upload Plugin button to choose the plugin’s zip file from your computer.
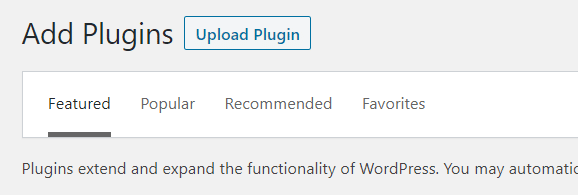
Click Install Now to install the plugin and hit Activate to get the plugin activated on your WordPress site. Awesome! you’ve just activated WP Rocket.
As soon as you activate the plugin, you should see an immediate performance boost on your site. By default, the plugin activates cache, GZIP, and many other options to enhance the page performance as much as possible.
Next, you’ll learn how to create a pull zone inside BunnyCDN.
Step 3. Create a Pull Zone Inside BunnyCDN
At first, you’ll need a BunnyCDN account.
So if you have not already secured an account for yourself, visit BunnyCDN and sign up now. It’s free to start. You get a 14-days free trial.
You don’t need any credit card to sign up and use the service for your first 14 days.
In order to use BunnyCDN within WP Rocket, you’ll need to create a pull zone. By signing up with BunnyCDN, you get a free 14-days trial and also 1000 GB data to be used using their CDN service. That should be enough to test it.
So, go ahead and sign up for 14-days trial. I promise it will be worth it.
Once you are signed up, log into your dashboard.
On your account overview page, you’ll get the basic information about your BunnyCDN account. On the left sidebar, click Pull Zones>Add Pull Zone.
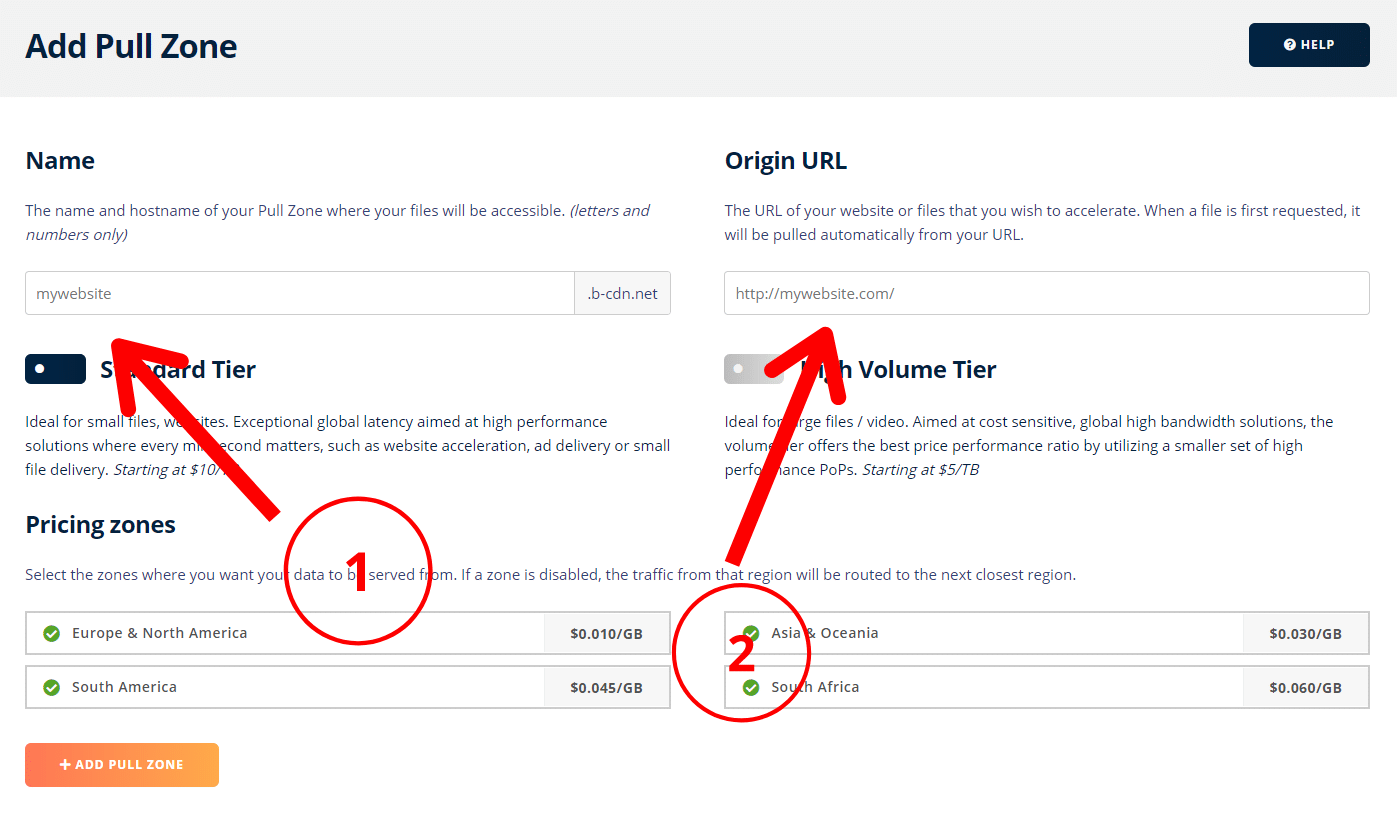
Now, you’ll be on the page as shown in the above image.
There will be two different fields:
- Name
- Origin URL
Name
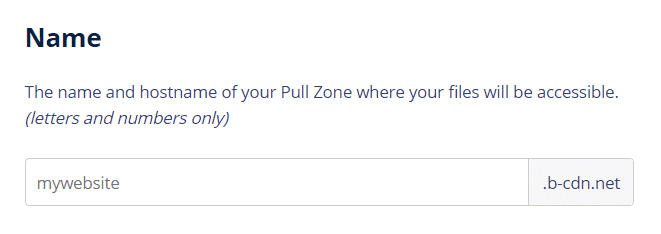
Choose a unique name for your website here. This is going to be a globally unique name within the BunnyCDN network.
For example, your website is MyLittleSite.com
You can choose the name as mylittlesite, mylittlewebsite and so on. Any name that you can use to uniquely distinguish your site.
If the name is not unique in the BunnyCDN network or someone else is already using the name, it will ask you to change it.
Based on the name you’ve chosen, BunnyCDN will create a new hostname address. The hostname will be created by adding “.b-cdn.net” to your selected name.
For example, if you chosen name is “mylittlesite“.
Then your BunnyCDN hostname will be “mylittlesite.b-cdn.net“.
| Chosen Name | BunnyCDN Hostname |
| mylittlesite | mylittlesite.b-cdn.net |
| mylittlewebsite | mylittlewebsite.b-cdn.net |
This new hostname will be used to deliver your files.
As an example, suppose you have a file at the following location:
https://mylittlesite.com/image.jpg
The new CDN destination of this file will be:
https://mylittlesite.b-cdn.net/image.jpg
Your files will still exist on your server. But since you’ll be using CDN, the new file destination will be used to serve files after successful configuration.
BunnyCDN will periodically pull the content from your server and host them on the new destination depending on the newly generated hostname.
Origin URL
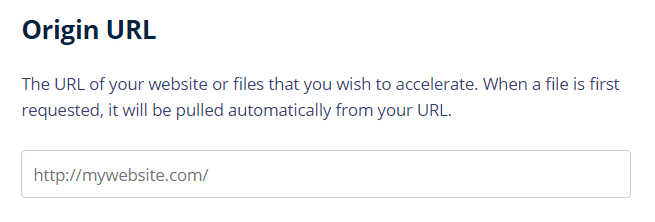
This is where you will enter the primary URL of your website. This is the domain that is used to access your website’s homepage.
This is the main configuration of setting up your Pull zone. By specifying the origin URL, you tell BunnyCDN servers where to pull the content from.
If your site is using HTTPS protocol, don’t forget to add HTTPS here to make sure the connection is encrypted throughout the network.
Once you have successfully entered The Name and the Origin URL, you can click on the button that says Add Pull Zone.
Congratulations! you’ve just created a Pull zone for your website.
BunnyCDN will now be able to pull content from your site. This is the time to configure WP Rocket to work with the CDN.
Step 4. Set Up WP Rocket CDN
Log into your WordPress dashboard.
Access your WP Rocket Settings by clicking WP Rocket>Settings.
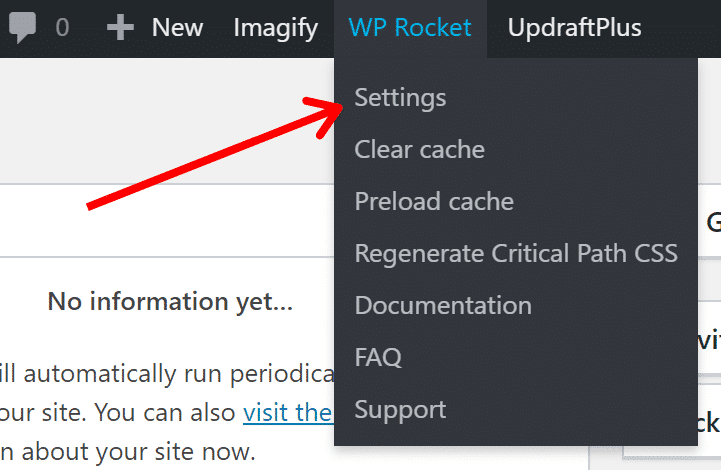
Click the CDN tab from the WP Rocket menu.
Tick the checkbox that says Enable Content Delivery Network.
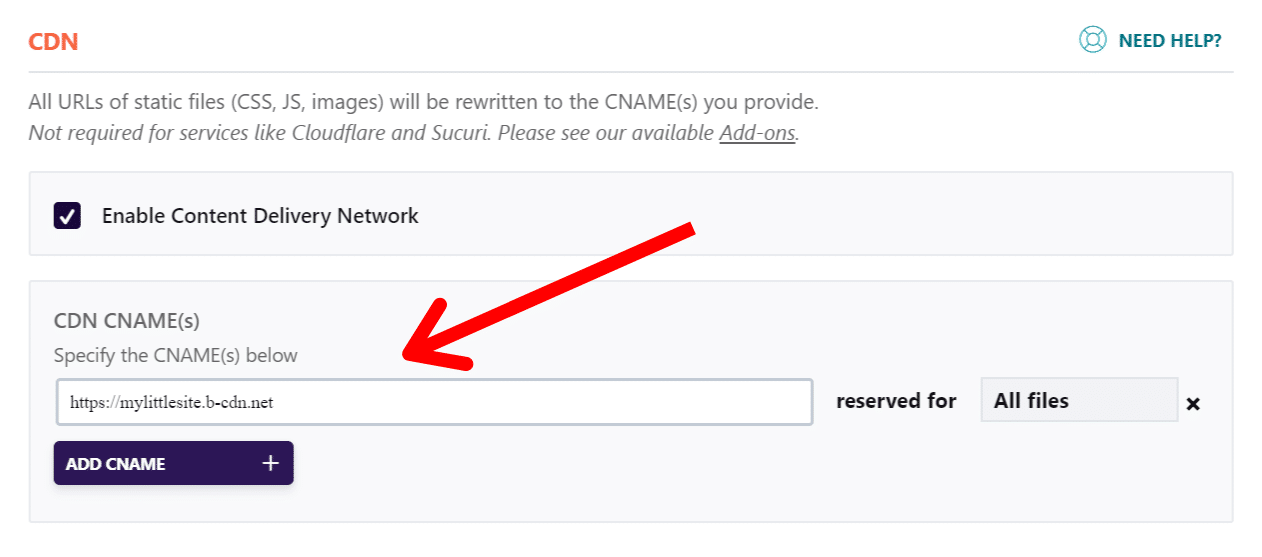
Enter the full hostname you have just created inside BunnyCDN.
And finally, save your changes. So that’s how you can successfully set up BunnyCDN to work with WP Rocket, one of the best WordPress cache plugins available.
Step 5. Final Test
Congratulations! You’ve now successfully configured WP Rocket with BunnyCDN. But still, one question may bother you: Did you set it up correctly?
It’s super easy to check if everything is properly set up or not.
To check, open your website in an Incognito/Private Browsing window from your Chrome browser. Click More Tools>Developer Tools.
Click on the Sources tab to open it. Here you can check that website is now serving content using the CDN. Look at the image below:
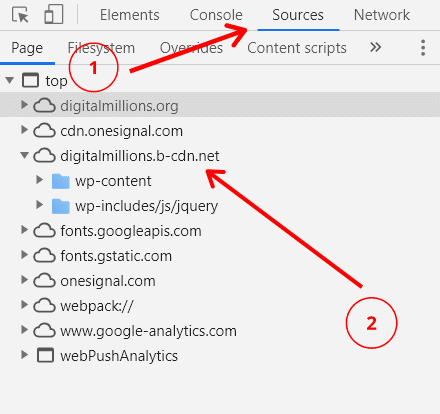
You can also right-click on one of your website’s images and open it in a new tab. Look at the image URL in the browser’s address bar.
Here, you should see your BunnyCDN hostname instead of your domain URL.
Please understand that when you are logged into your site, your site doesn’t serve content via CDN. So make sure you check it in a private browsing window or when you are not logged in.
If you see the BunnyCDN hostname in the image URL, that means your site is now serving content via CDN. And you’ll also see that your site is loading a lot quicker. It also saves lots of bandwidth on your origin server.
Did you see how easy it is to set up BunnyCDN to work with WP Rocket?
Was it helpful?
Please share this article to help others who may need this information and it also motivates me to create more amazing tutorials like this.
You May Also Like…
- WP Rocket Plugin Reviewed: Turbocharge Your Site’s Speed!
- Supercharge Your Loading Speed with Imagify + WP Rocket
- 13 Speedy Cache Plugins: Boosting Your Website’s Performance
- A Step-by-Step Guide to Lightning-Fast WordPress Speed
- Blogging Bliss: 19 Must-Have Tools to Supercharge Your Journey
- Dominate the Digital Landscape: Top 18 SEO Tools Revealed


